Azure SQL Database is intelligent, fully managed relational cloud database service that provides the broadest SQL Server engine compatibility. Using SQL database in Azure you will get the advantage of built-in intelligence that learns app patterns and adapts to maximize performance, reliability, and data protection. Microsoft performs all the patching and updating of the code base and manages the underlying infrastructure for you, so you can save time and resources. With high SQL Server compatibility, you can also migrate your databases to SQL Database Managed Instance without changing your apps.
In this post, I will share the steps to create an SQL database on Microsoft Azure and test the connectivity.
Create an Azure database and server.
- Login to the Azure portal with your registered Azure Microsoft account.
- Click on SQL Database Symbol > Click on + Add button for creating a new database
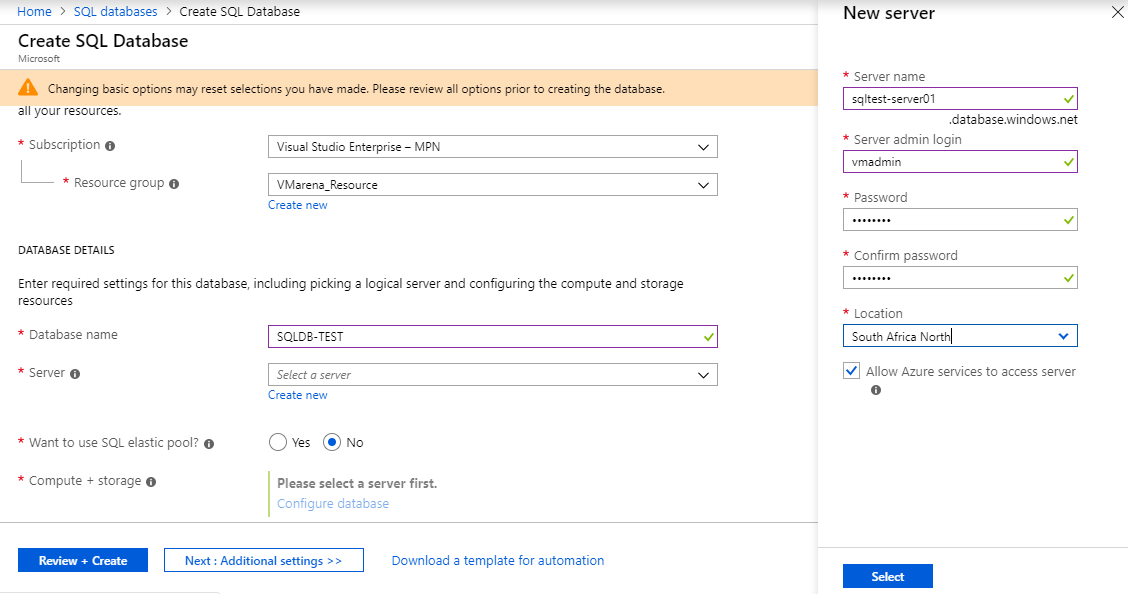
- Select the Subscription, Resource Group, Database name
- To Create a Server Click on Create New and Provide Server name, Set a Server Admin login, and Location
Note:- You need a resource group for creating SQL server. If you don’t have one you can create Resource Group from there by Selecting Create new option. Also if you don’t have a Server, you can choose to create a new form the same window, here we create the server for SQL DB.
If you need a SQL Elastic Pool, Select Yes from Want to use SQL elastic Pool else select No
Elastic Pool
SQL Database Elastic Pool is a shared resource model that enables higher resource utilization efficiency, with all the databases within an elastic pool sharing predefined resources within the same pool. The workload pattern is well defined and is highly cost-effective in multitenant scenarios. An elastic pool is best for new SaaS apps, or for modernizing existing apps to SaaS.
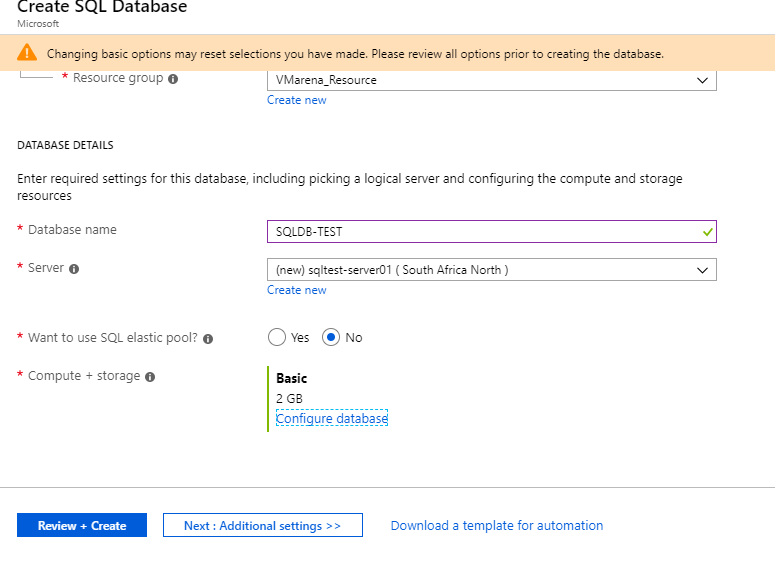
- Click on COnfigure Database from Compute a+ storage to select the appropriate resource for your requirement.
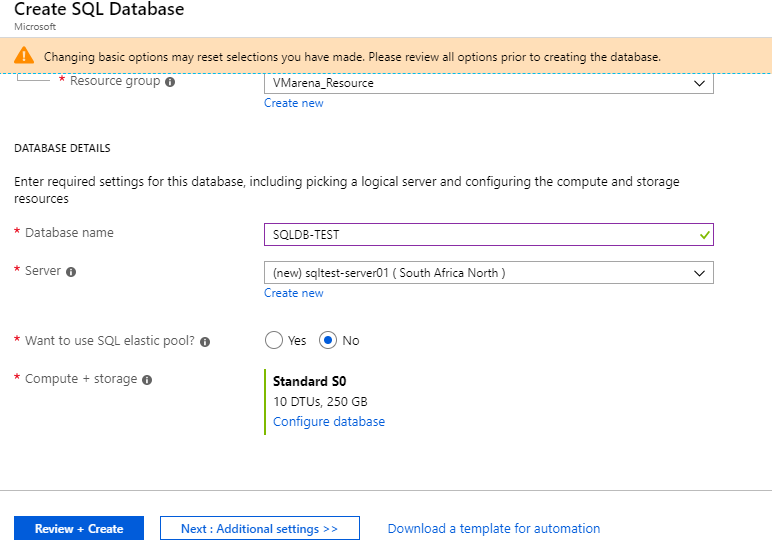
- You can choose the resource DTU based or Core based, each Pool having a different configuration, you can choose based on requirement.
- Click on Apply

- Click on Next: Additional Settings
- You can choose the required option for creating DB and Collation and Click on Next: Tags
- Here we choose None for a blank DB and Collation default

- You can add Tag for DB and server from here, which is helpful for categorizing and consolidated billing.
- Click on Next: Review and Create

- Review the details and click on Create
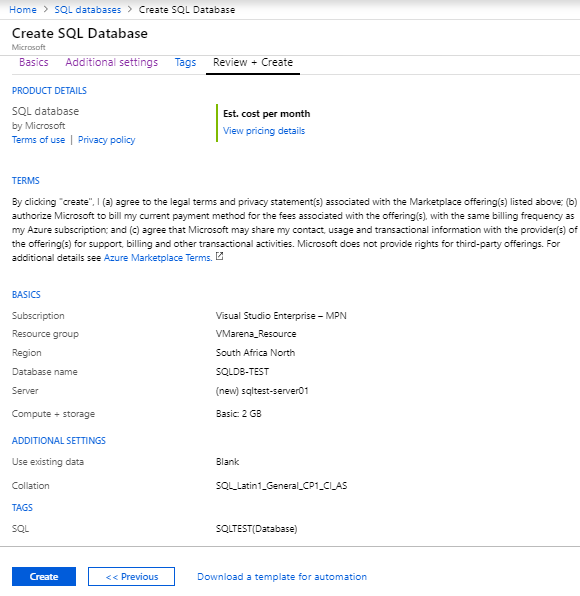
- In a few minutes, you can see DB and Server is created form Overview

- Next, You can configure the Access for DB in Firewall.
- Nagivateto the Server Created and Select Firewalls and Virtual Networks and From Add the Client IP form
Note:- Your Logged IP will showing there, you if you just click on Add Client IP it will be your IP. If other IPs are required you have to add there with Rule Name start IP and End IP. Azure SQL Database uses firewall rules to allow connections to your servers and databases if you want to use Azure database into the local machine.

Test the Connectivity fo Azure SQL DB from Local Machine
- To connect to the Azure SQL DB you need the connection String and Server Login details
- Click SQL Database > Select Database name > Search or Select Overview > Click on Connection String>Copy Server and database details
- You should have Server name and Credentials you have provided while creating sever
Note:- You can connect the DB using ADO.NET, JDBC, ODBC, PHP

- Open SQL Server Management Studio from the machine
- Provide server details and login details Server name collected from the previous step, Login of the server you created
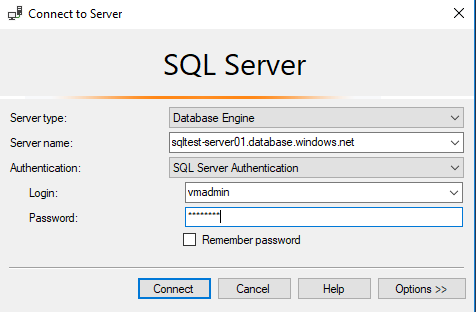
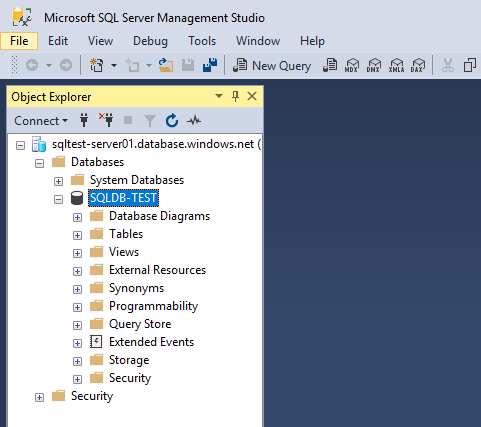
- After successful login to SSMS, all the databases are loaded into the IDE like below
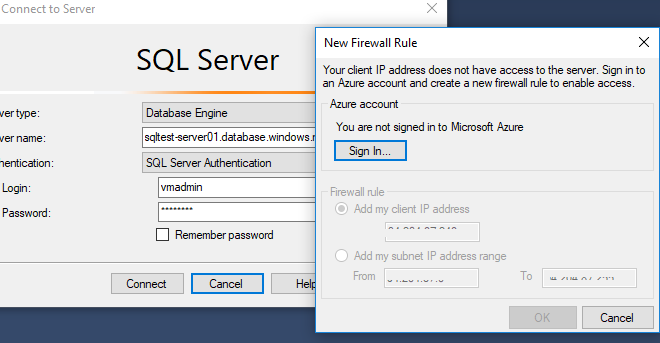
If you enabled firewall configuration and trying form another IP which is not in the firewall allowed list, you may get a window like below to add the accessing IP to the firewall rule. This will come only in case such case where your server name and credentials are matching and you can CLick on Sign In option from there and allow the current IP if it is required.
Note:- Refer Microsoft Website for More detailed information on Pricing and Resource Allocation
Conclusion
In this article, we have shared some the steps of creating an SQL DB on Microsoft Azure and how to connect using SQL Management Studio. There other options to connect the DB on Azure from the client machine, especially ODBC is commonly used for the connection, we will share you another post hot to create an ODBC connection to Microsoft Azure SQL DB.