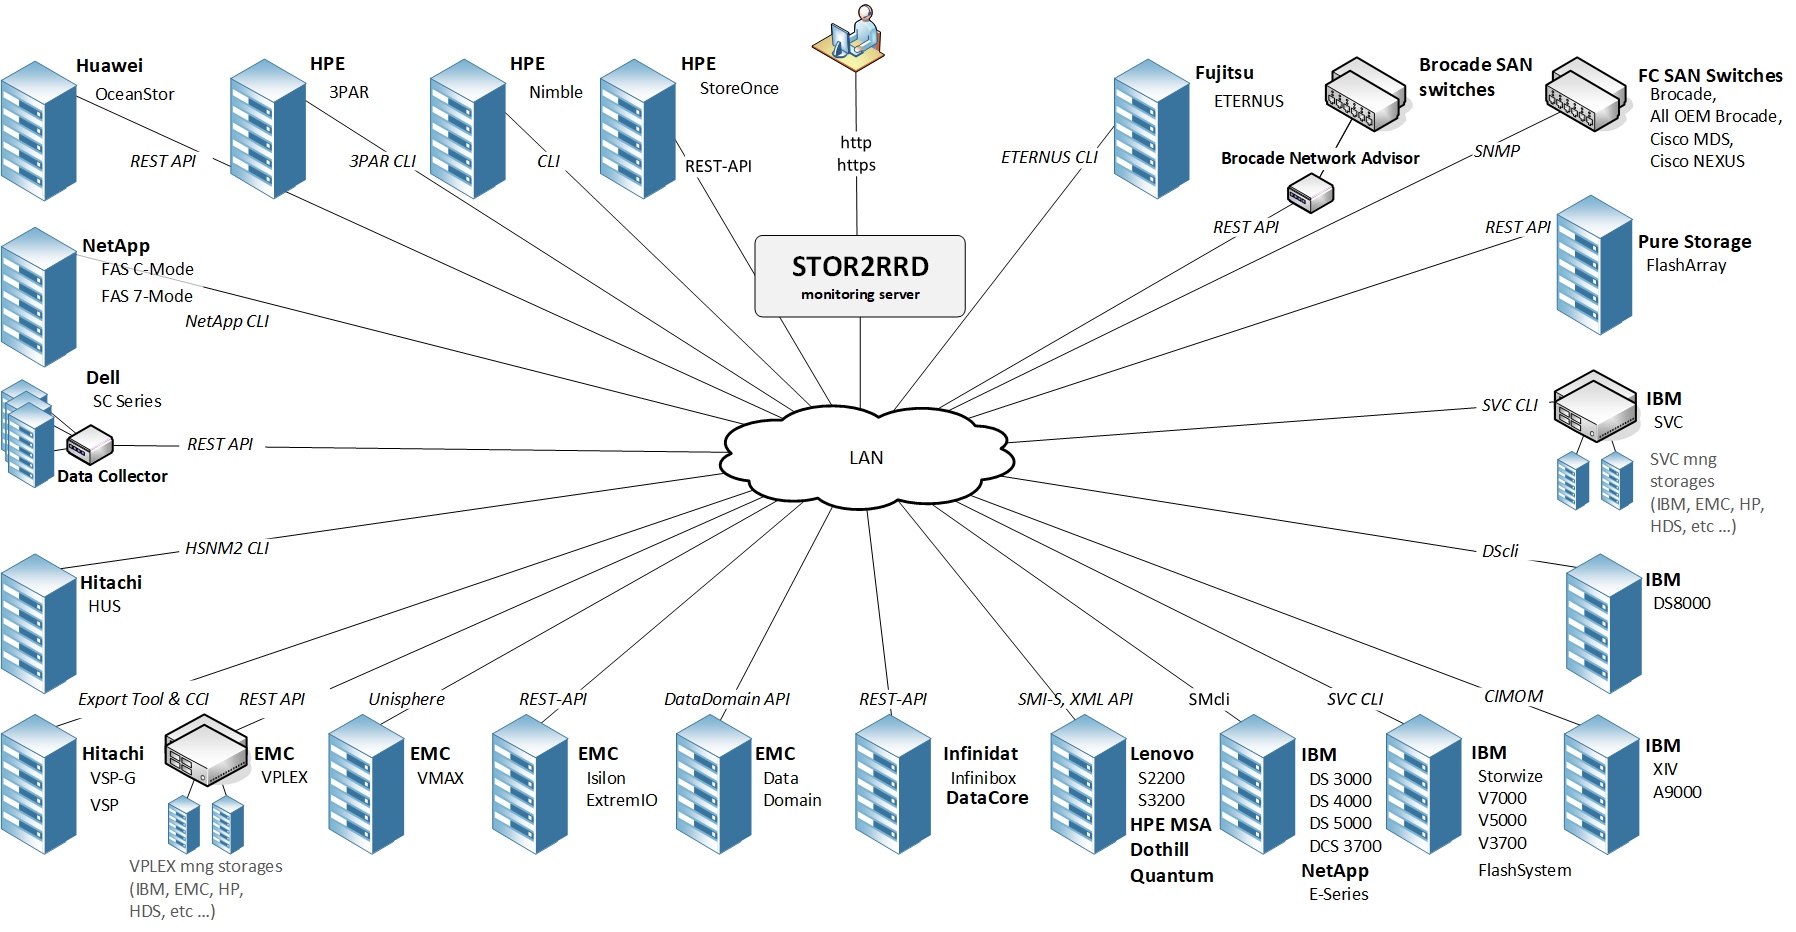
Every Infratire has backend as a different storage system and key challenges we face, especially in larger environments is managing systems from multiple vendors. Every organization has the same situation, and monitoring all of the different systems and keeping track of their performance and health are challenging because every vendor has its own set of tools.
Now we have a solution to this challenge, Xorux has a single product, STOR2RRD will provide you a single web-based interface where you can view the performance of all your different systems. STOR2RRD is one of the best tools offers you end-to-end views of your storage environment including LAN and SAN. It can save you significant money in operation monitoring and by predicting utilization bottlenecks in your virtualized environment. In this post, we will share the procedure to install and configure STOR2RRD Virtual Appliance with 3PAR storage for real-time performance monitoring.
Also, you can generate policy-based alerts, view the overall health status of your systems, provide capacity reports and forecasting data.
- Real-time storage, SAN and LAN performance visibility in multi-vendor environment
- Historical reporting (graph, CSV, PDF, XLS)
- Alerting based on performance thresholds
- Event monitoring
The full list of supported systems is significant and includes both storage systems and switches which you can find here – supported systems
STOR2RRD is free software which you can redistribute it and/or modify it under the terms of the GNU General Public License.
For customers, under support, there is distributed the enterprise edition with additional benefits.
Download STOR2RRD Appliance
You can use VMware or Microsoft Hyper-V image for fast start or for product evaluation purposes.It contains installed and configured LPAR2RRD and STOR2RRD products with all their prerequisites.It is distributed in OVF or Hyper-V format easily importable in your infrastructure
Virtual Appliance can be installed on below options
- As a virtual machine in your vCenter or ESXi
- On VMware player. A free non-commercial version.
- As a virtual machine in your Microsoft Hyper-V server
The acquired IP address will be visible on the console after the appliance starts up. Navigate to the web browser to the address shown on the welcoming screen. http://<appliance IP>/
Product webs are accessible with these credentials:
| WEB user | admin (user “monitor” was used on Virtual Appliances v1.x) |
| Password | <password can be found in the pdf document distributed together with the image> |
| Sites: | http://<appliance IP>/stor2rrd |
System Defaults
| Operating System | CentOS 7, 64bit |
| root | <password can be found in the pdf document distributed together with the image> |
| lpar2rrd | <password can be found in the pdf document distributed together with the image> |
| IP address | DHCP |
Virtual Machine settings
| Processors | 2 |
| Memory | 6GB |
| Hard-drive | 100GB (thin provisioned) |
| Network | Bridged (using DHCP) |
| VMware Tools installed (VMware image only) | |
The VMware image should work on recent VMware products as well on other virtualization software that support OVF (Open Virtualization Format). The image has been successfully installed on at least:
- VMware player 6
- VMware ESX 4.1 or Higher
Recommended HW sizing:
- Evaluation purposes:
- 6GB RAM
- 2 CPU
- 100GB disk space (thin provisioning)
- Production with 1000 VMs and 10 storages
- 12GB RAM
- 4 CPUs
- 100GB disk space (thin provisioning)
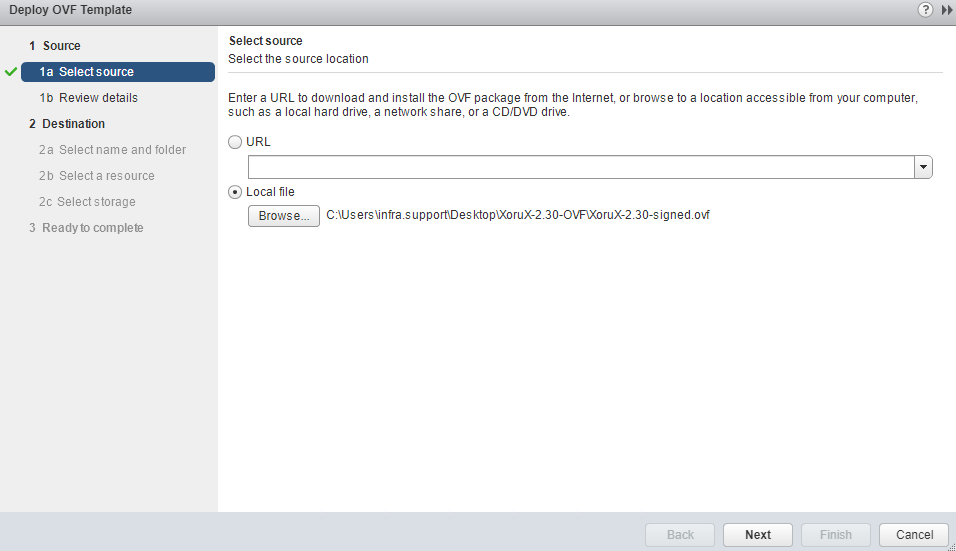
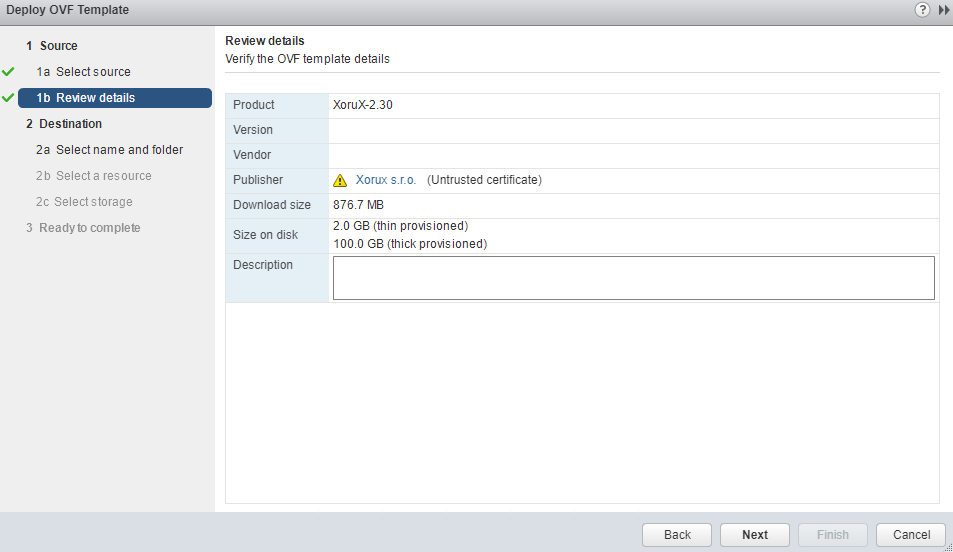
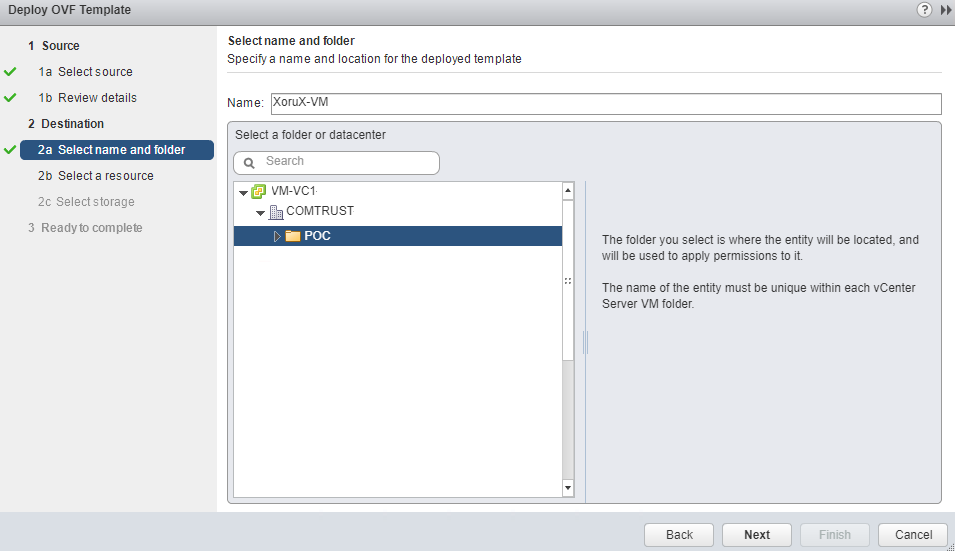
STOR2RRD OVF Deployment
Right-click the data center and select Deploy OVF Template.
Browse the file and Click Next
Review the details and Click Next
Provide a name for VM and Select the Folder and Click Next
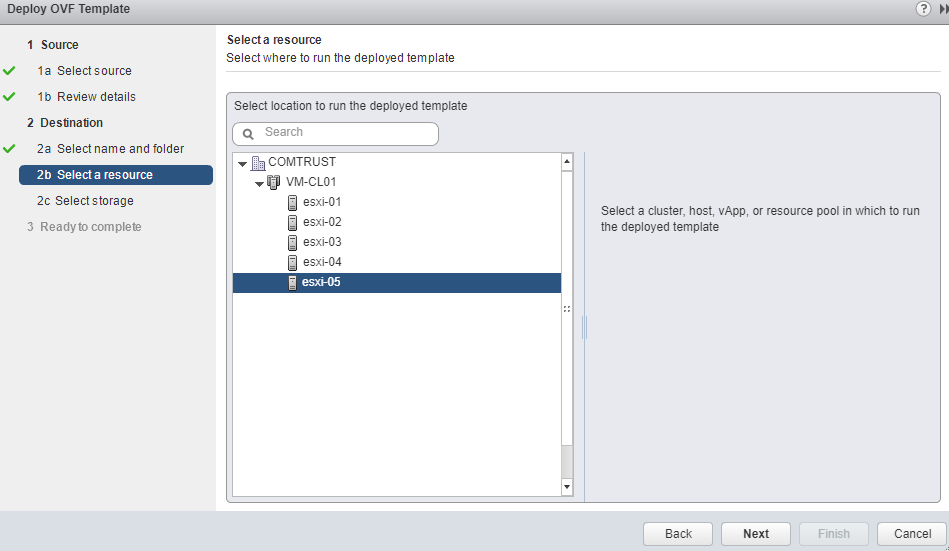
Select the Esxi Host and Click Next
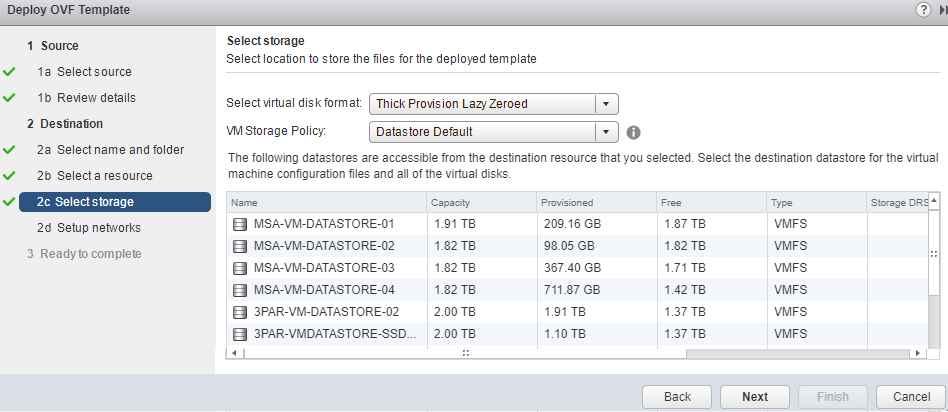
Select the Datastore and Click Next
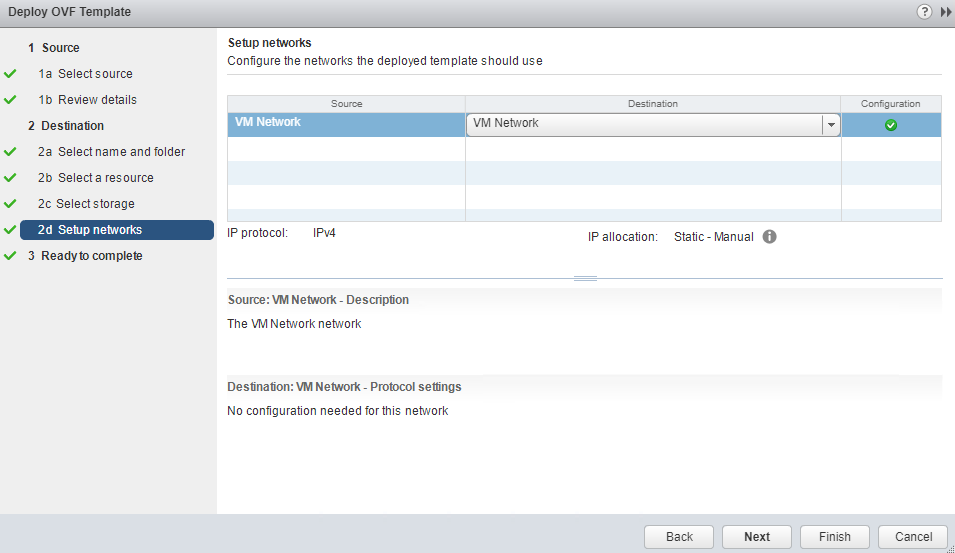
Select the Network and Clik Next
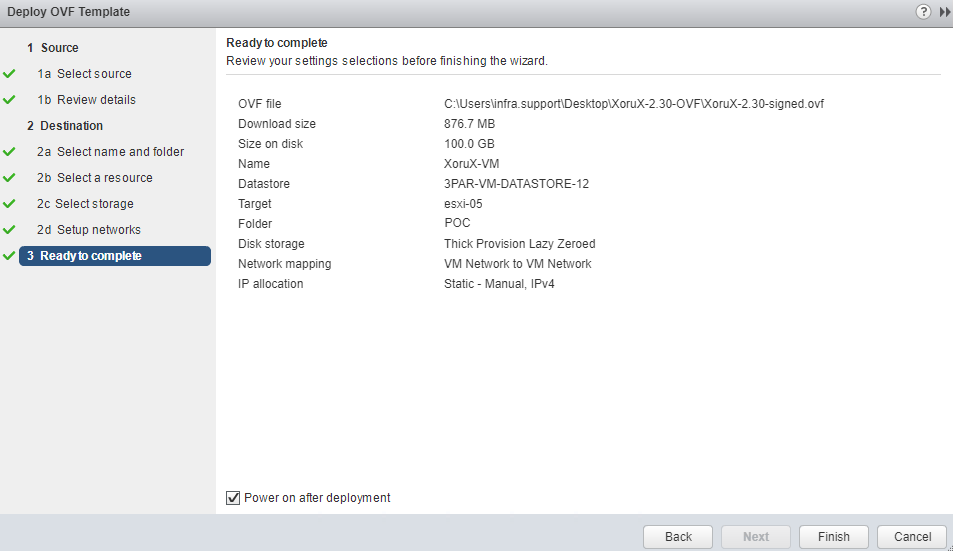
Review the Details and Finish, select the power on after deployment option
Once VM is powered on you can view the IP of the machine in the console.
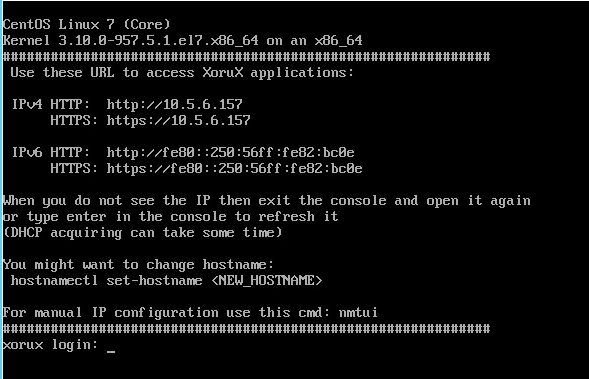
Verify that Application is working by Open: https://<appliance IP>/ from browser
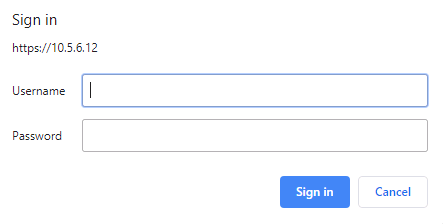
Login to the STOR2RRD console using url ” https://ip_or_fdqn/stor2rrd/ ” and you have to enter the username and password (admin/admin)
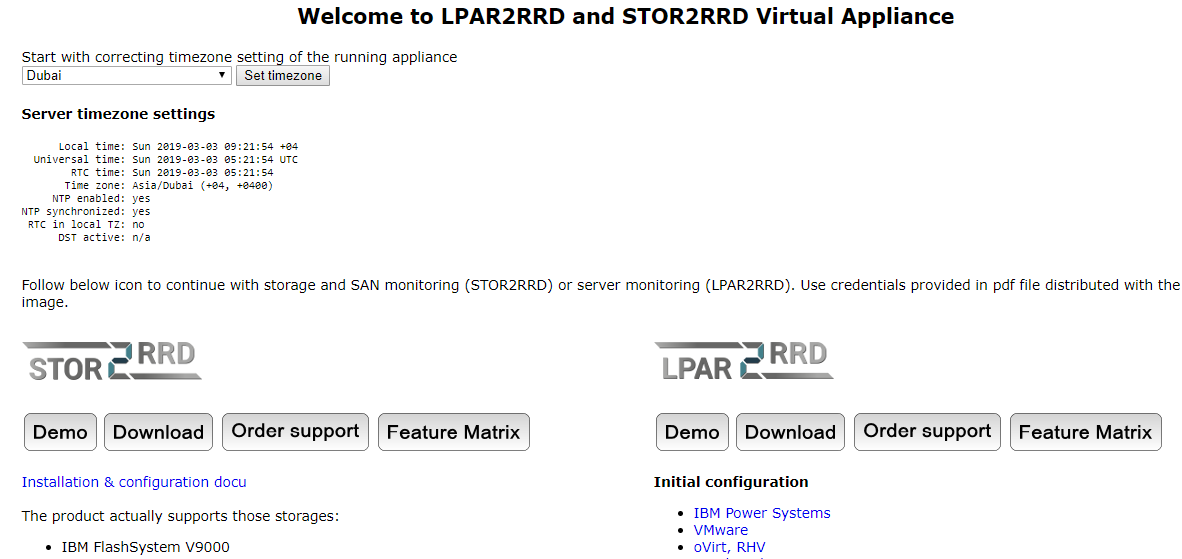
NOw you are logged to the first-time console look like below
Virtual Appliance contains all required software except 3rd party storage APIs which cannot be freely distributed, they must be installed manually, refer to your storage installation.
Note: STOR2RRD is installed under user lpar2rrd in Virtual Appliance.
Configure the Storage
Now we have set passwordless ssh access to storage from our STOR2RRD appliance
- Do all actions below under stor2rrd account (lpar2rrd on the Virtual Appliance) unless is explicitly specified root in the procedure, here use lpar2rrd since we use the virtual appliance
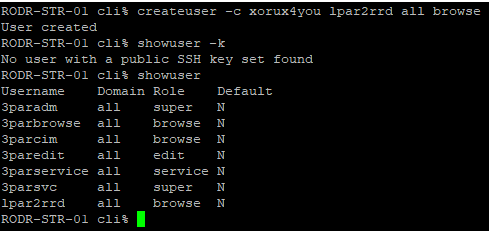
- Create user stor2rrd on the storage with browse role and allow it for all domains.
Login to 3PAR Storage using putty and create using below command
# createuser -c "password" "username" all browse
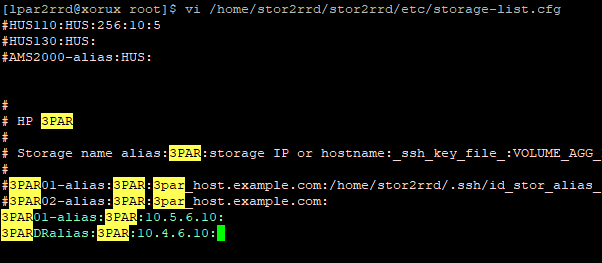
Under lpar2rrd account create config entry
# su - lpar2rrd (user stor2rrd if it is not an Appliance)
#vi /home/stor2rrd/stor2rrd/etc/storage-list.cfg
Open port 22 to the storage and test its working or not
$ perl /home/stor2rrd/stor2rrd/bin/conntest.pl "3PARIP" 22
  Connection to "3PARIP" on port "22" is ok
![]()
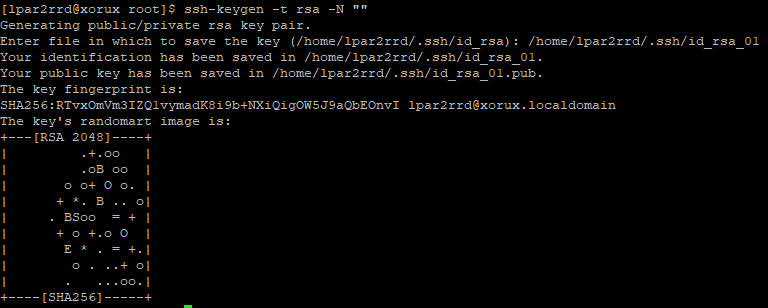
Create a key pair using the ssh-keygen utility in case you do not have a one in /home/stor2rrd/.ssh
Type enter instead of a passphrase, if you have more than one storage provide another file name
$ ssh-keygen -t rsa -N ""
  Generating public/private rsa key pair.
  Enter file in which to save the key (/home/stor2rrd/.ssh/id_rsa):
$ cat ~/.ssh/id_rsa.pub

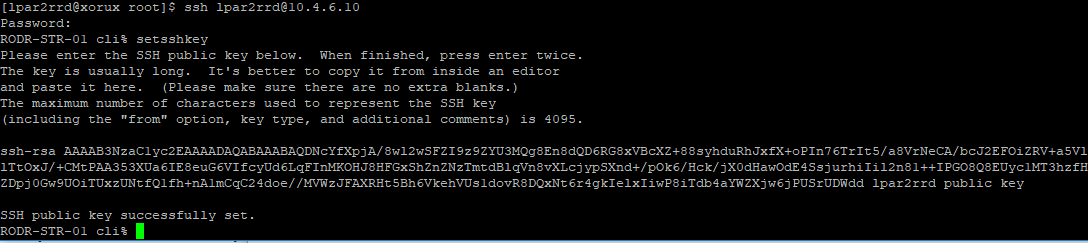
Exchange the ssh public key (import it on the storage under stor2rrd /lpar2rrd account)
# ssh lapr2rrd@3par_storage stor2rrd@3par_storage password: "password"
#setsshkey
Enter the SSH public key below. When finished, press enter twice. The key is usually long.
It’s better to copy it from inside an editor and paste it here. (make sure there is no extra blanks)
 sshrsa AF5afPdciUTJ0PYzB6msRxFrCuDSqDwPshqWS5tGCFSoSZdE= stor2rrd pubic key
 SSH public key successfully set!
Check the storage connection, you should log in without password prompt
$ ssh stor2rrd@3par_storage
Check storage connectivity
$ cd /home/stor2rrd/stor2rrd
$ ./bin/config_check.sh
  =====================
  STORAGE: 3par01: 3PAR
  =====================
  ssh -o ConnectTimeout=15 -i /home/stor2rrd/.ssh/id_rsa  lpar2rrd@3PARIP  "showuser"
  connection ok
Schedule to run storage agent from stor2rrd crontab (lpar2rrd on Virtual Appliance, it might already exist there)
$ crontab -l | grep load_3parperf.sh
$
Add if it does not exist as above
$ crontab -e

# HPE 3PAR storage agent
0,5,10,15,20,25,30,35,40,45,50,55 * * * * /home/stor2rrd/stor2rrd/load_3parperf.sh > /home/stor2rrd/stor2rrd/load_3parperf.out 2>&1
Assure there is already an entry with the UI creation running once an hour in crontab
$ crontab -e

# STOR2RRD UI (just ONE entry of load.sh must be there)
5 * * * * /home/stor2rrd/stor2rrd/load.sh > /home/stor2rrd/stor2rrd/load.out 2>&1
Let run the storage agent for 15 – 20 minutes to get data, then:
$ cd /home/stor2rrd/stor2rrd
$ ./load.sh
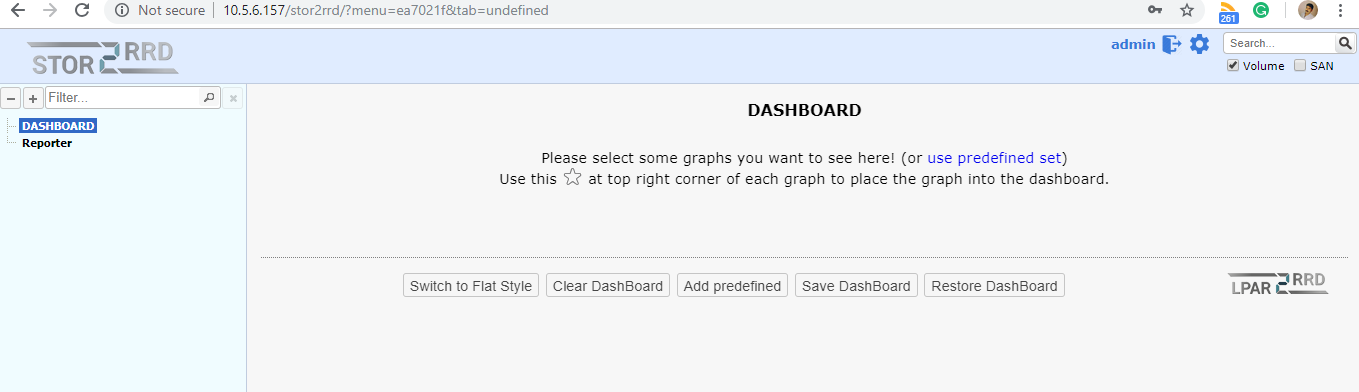
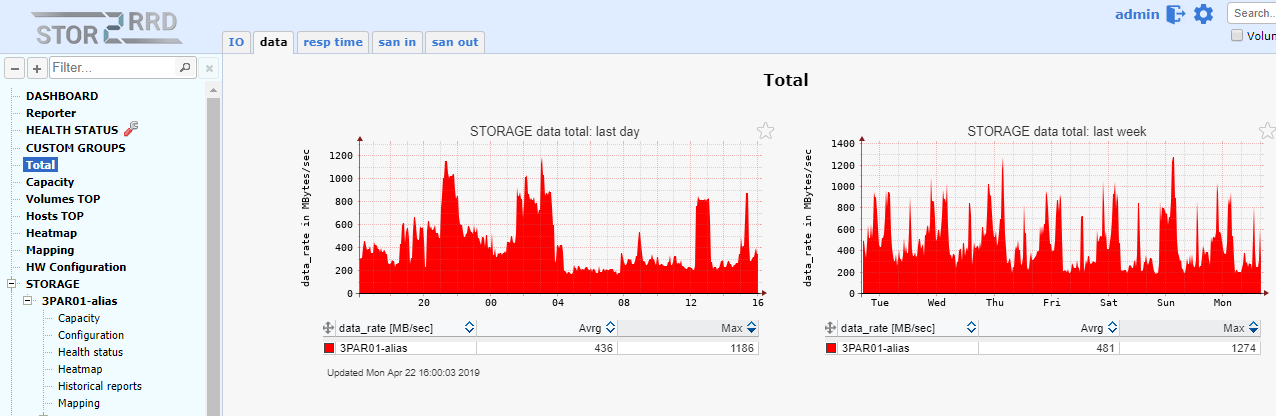
Wait for few minutes and refresh the web console and you can start the performance monitoring

Conclusion
We have successfully deployed STOR2RRD appliance in our environment to monitor the 3PAR storage system, it really awesome product it was the solution to our monitoring challenge, every time any issue comes we have to open a case with HPE for performance report and fight with application team to make them understand storage is working fine. After deploying STOR2RRD it really provides a capacity overview, utilization of CPG, IO utilization, etc and it really helps us to resolve many issues.