Nutanix Community Edition is the free version of Nutanix OS where you can perform a test drive the main features of Nutanix. Nutanix Community Edition can be deployed top of existing hardware or as a virtual machine in a nested virtualization platform.
In this post, I will be sharing the detail of how you can install VMware Tools on this Nutanix CE. This is only for testing purpose and VMware recommends to install open VM tools on the Linux machines since I am testing this going with VMware Tools.
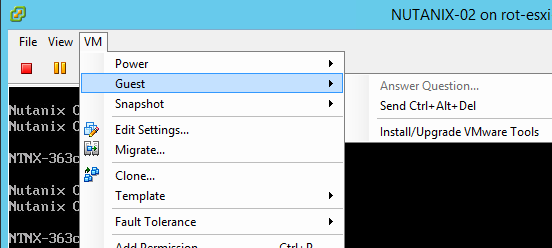
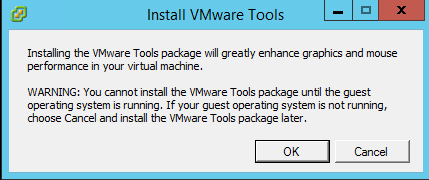
- Mount the VMware tools to the Nutanix Virtual Machine
- mount the CDROM to the tmp folder
#mount /dev/cdrom /tmp
Verify that the CDROM mounted and VMware tool files are listing
#cd /tmp
#ls
Create a folder to copy the VMware tool files
#mkdir /tools
Copy the VMware tool files to the folder
#cp *.* /tools
change the permission of the folder
#chmod 755 /tools
Go to the directory where VMware Tools files available
#cd /tools

Extract the tar.gz file
#tar vxzf VMwareTools-version.tar.gz
![]()
verify the contents
#ls
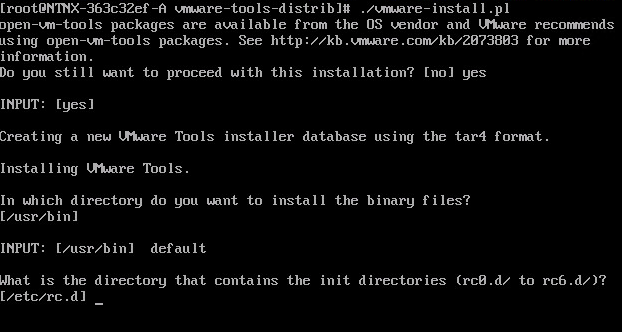
Go to the vmware-tools-distrib directory
#cd vmware-tools-distrib

Install the VMware Tools
#./vmware-install.pl

Type yes and follw the default values
Note:- As per VMware recommendation open vm tools should be installed on Linux and to proceed with Vmware tools you have to enter yes instead of default answer no
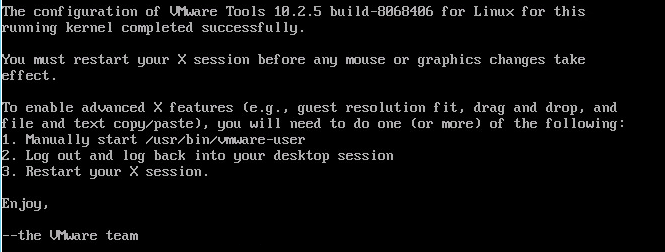
Once installation completed you have to do a reboot of the Machine
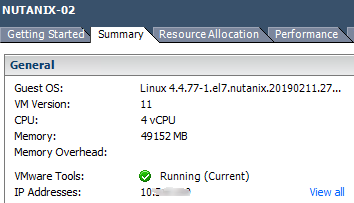
Verify from the Virtual machine
Additional Information
If you get any error, follow the below steps and start the installation again.
unmount the CDROM and Verify its unmounted
#umout /dev/crom

#ls
Navigate to the folder where VMtools extracted and start the installation
 .
.