Amazon Web services provide many services to their customers and on the great service is for to perform back up of your data to Amazon S3 and archive in Amazon Glacier using your existing tape-based processes. In my previous post, we shared how to deploy and configure File gateway, here we are going discuss on AWS Storage Tape Gateway and how to configure that.
Backup is one the important part in as long as customers business critical applications are there.Customers need to backups of their key application data to save their business and available for their users. AWS Storage Gateway offers a seamless way to transfer backup jobs from tape or Virtual Tape Library systems to the cloud – while keeping trusted backup tools and processes in place. This service really helpful for customers to keep their data to the cloud by avoiding the difficulty to use the physical Tape hardware and cost for hardware.
Why use AWS Storage Gateway as a VTL for cloud backup
Thousands of customers have faced the tape backup challenges described above and considered what they want as they move to a cloud backup approach. Here are common reasons they choose to use the AWS Storage Gateway as their bridge from existing tape backups to cloud backup.
Benefits
• Avoid the pain of physical tape hardware
• No More manual tape management processes
• Data durability & validity concerns
• No more Costly CapEx hardware refreshes
• Low-value service contracts
• Slow tape retrieval
• Inability to access offline data
• Non-disruptive, low-effort migration to cloud backup; Keep trusted backup software in place
• OpEx purchasing model to eliminate cost spikes; Low-cost archives long-term retention
• Reduced datacenter infrastructure footprint and archiving services contracts
• Streamlined backup processes, reduced manual effort, and gained predictable retrieval times
• Data durability: Amazon S3 and Amazon Glacier cloud storage are designed for 99.999999999% of durability
Working of AWS Storage Tape Gateway
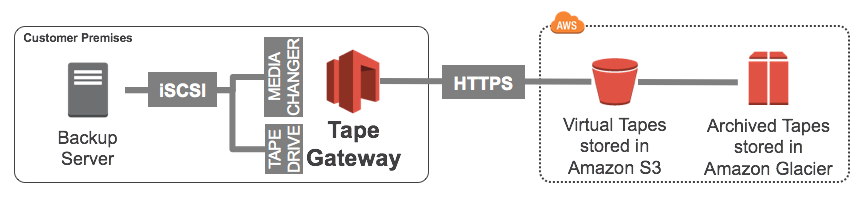
There are three types of Storage Gateway available in that one service is Tape Gateway. AWS Storage Gateway can be configured to act as a Virtual Tape Library (VTL) which extends from on-premises environment to the AWS cloud’s storage services Amazon S3 and Amazon Glacier.
The tape gateway presents the Storage Gateway to your existing backup application as an industry-standard iSCSI-based VTL, consisting of a virtual media changer and virtual tape drives. You can continue to use your existing backup applications and workflows while writing to a collection of virtual tapes stored on massively scalable Amazon S3. When you no longer require immediate or frequent access to data contained on a virtual tape, you can have your backup application archive it from the virtual tape library into Amazon Glacier, further reducing storage costs.
Storage Gateway is compatible with many common backup applications. The VTL interface eliminates large upfront tape automation capital expenses, multi-year maintenance contract commitments and ongoing media costs. You pay only for the amount of data you write to tape, and scale as your needs grow. The need to transport storage media to offsite facilities and handle tape media manually goes away, and your archives benefit from the design and durability of the AWS cloud platform.
AWS Storage Gateway Configuration
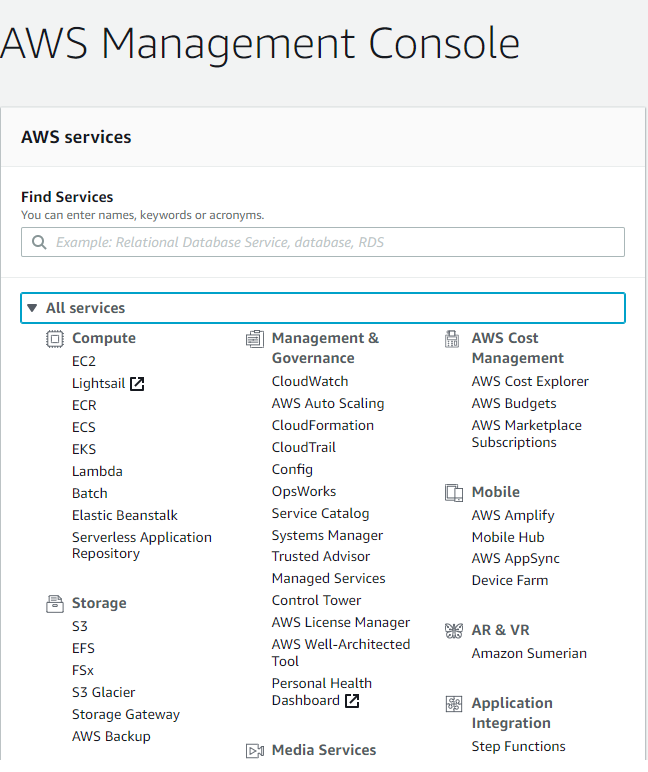
Login to AWS Management Console using your account credentials
From AWS services section select Storage Gateway option under Storage area
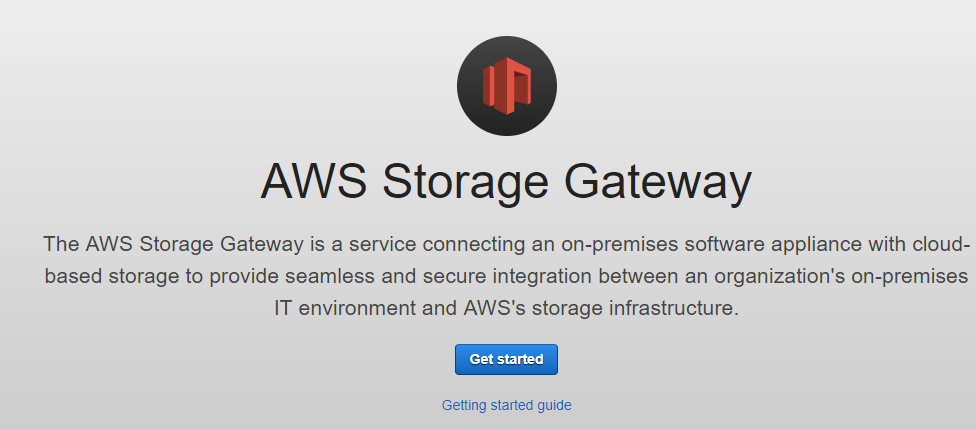
Click Get started
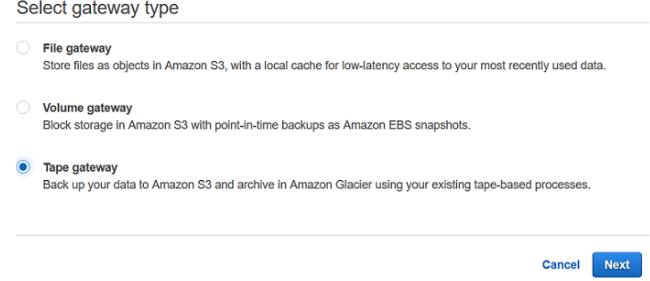
Select Tape gateway from available gateway types and click Next.
Select VMware ESXi to click next to configure the appliance, since we won’t have appliance in our environment we will download the image and Deploy in your virtual environment.
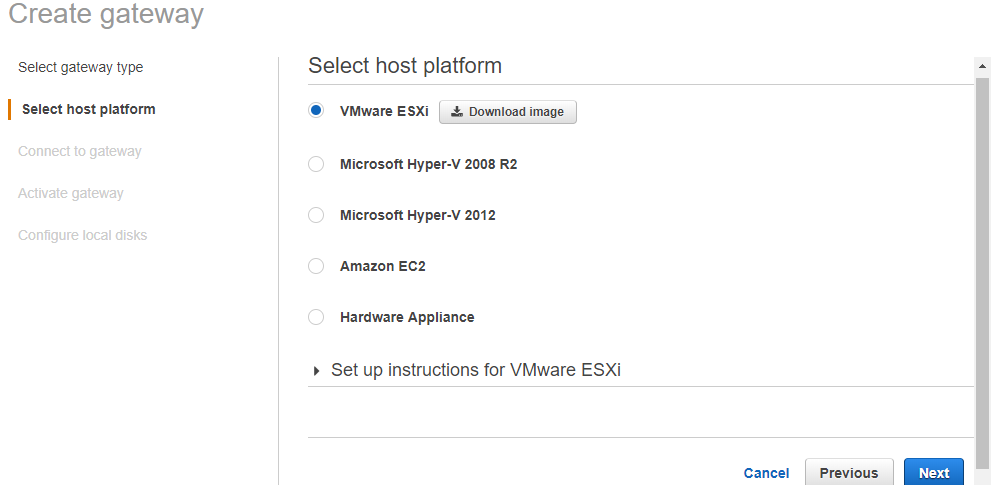
Note:- If you create your gateway on-premises, you deploy the Hardware Appliance; or download and deploy a gateway VM, and then activate the gateway. If you create your gateway on an Amazon EC2 instance, you launch an Amazon Machine Image (AMI) that contains the gateway VM image and then activate the gateway
Let’s stop here and deploy the Appliance then we will continue
Deploy the AWS Storage Tape Gateway
Open the vSphere Web Client, right-click the cluster/host and select Deploy OVF Template option

Browse and select the .OVA file and click Next.

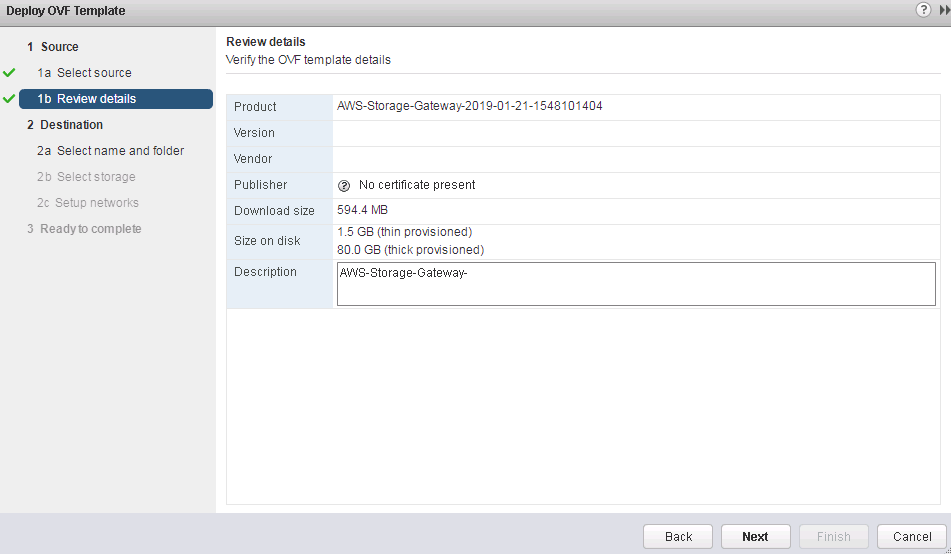
Review the OVA details and click next
Enter a Name for the Appliance , Select the folder where to be placed the VM and Click Next

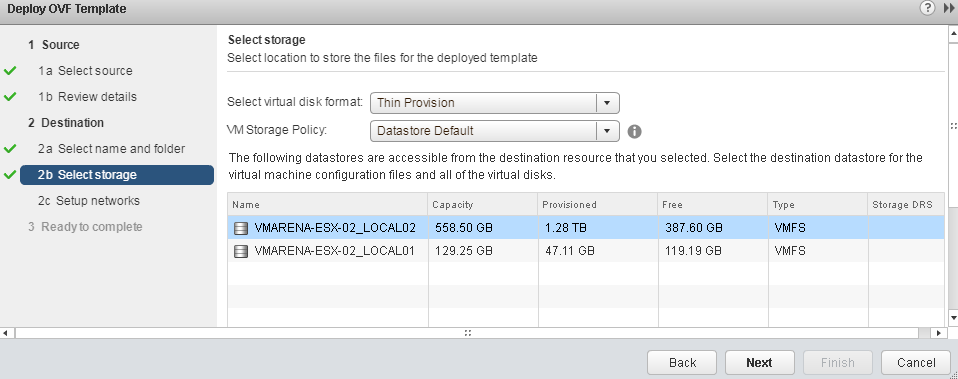
Select the Storage where to store the VM, disk format and click Next
Select the Network and Click Next

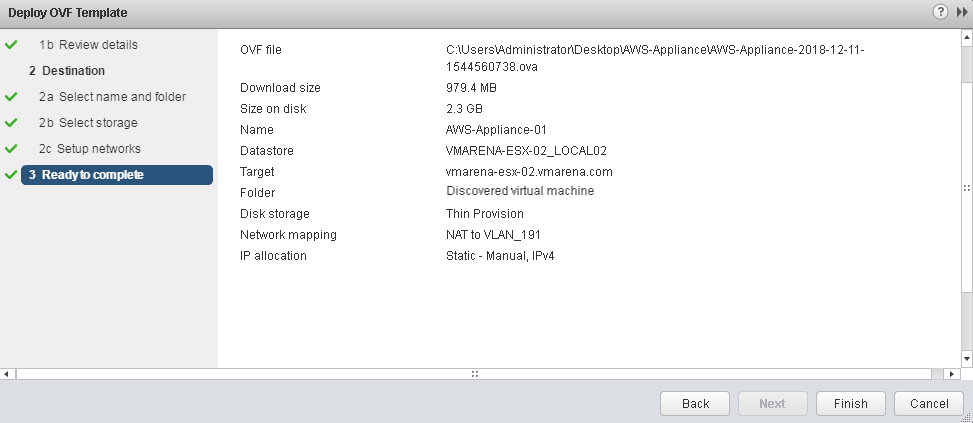
Review the details and Click on Finish
Configure the AWS Gateway Appliance
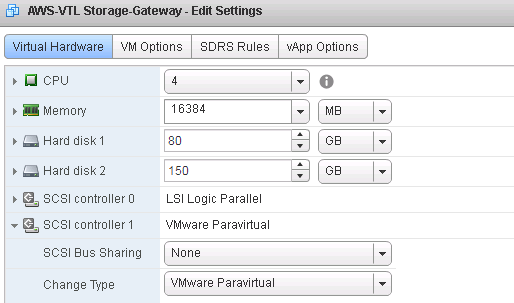
Before start the configuration of IP address you need to Configure the NTP sync and Add an additional drive for Cache with 150 GB
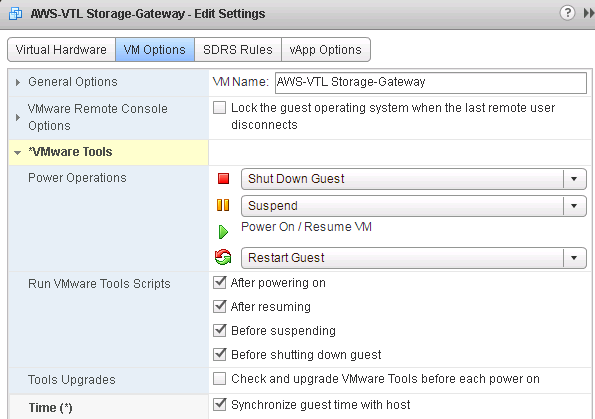
Right-click the VM and select Edit Settings -> VM Options ->Time and Select Synchronize guest time with host
Add a new Hard drive of 150 GB from Virtual Hardware with a new SCSI controller with type of VMware Paravirtual.
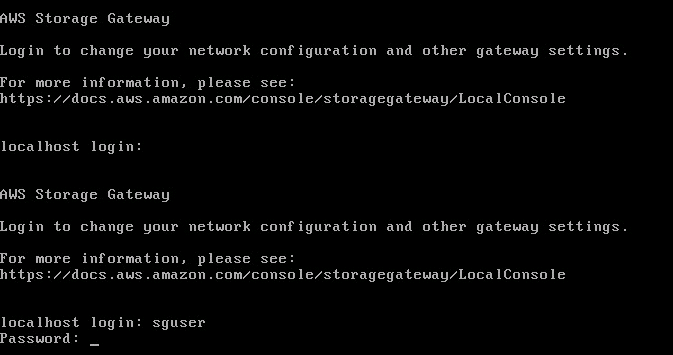
Now power on the AWS appliance Virtual Machine and Login to console using the default username and password ( sguser /sgpassword)
Configure the Network by selecting Option 2
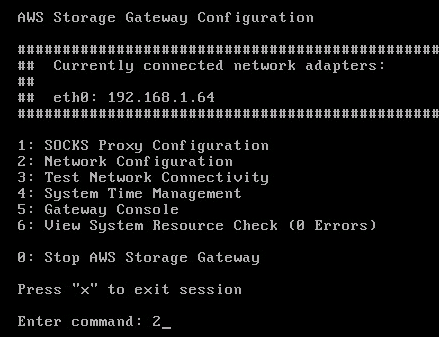
Select the Configure Static IP option using 3 and add the details and enter “Y” to save the configuration
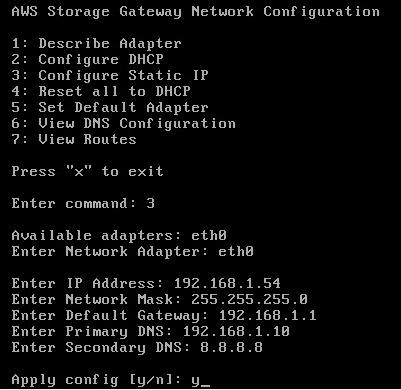
Press Return to continue.

it will restart the networking and you can see configuration has been updated .
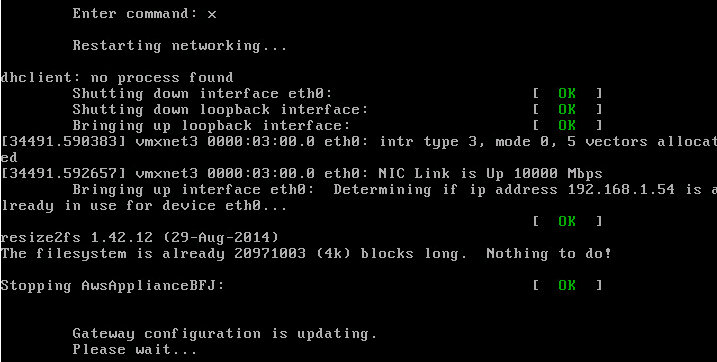
Enter x to complete the configuration.
Configuration has updated in the system. Press Return to continue.
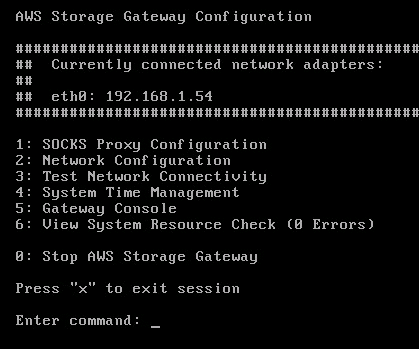
Now we can continue to configure the ASW Gateway from Amazon Service Console
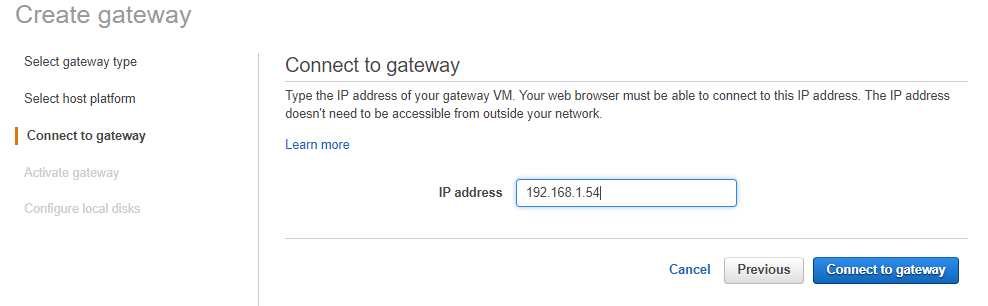
Enter the gateway IP ( Appliance IP) and Click on Connect to gateway option
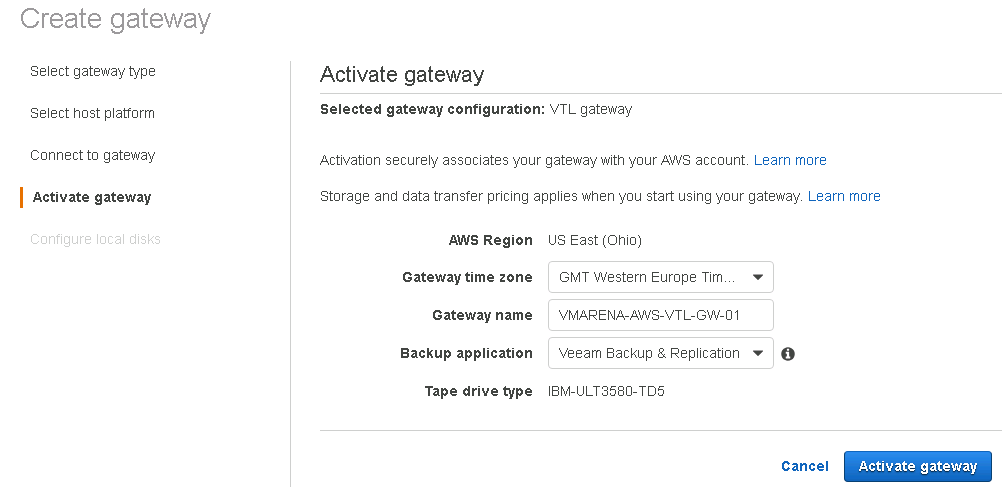
Next we have to activate the gateway , Provide a Gateway name and backup application and click on Activate gateway .
You have many option to choose Backup Application from Drop down menu
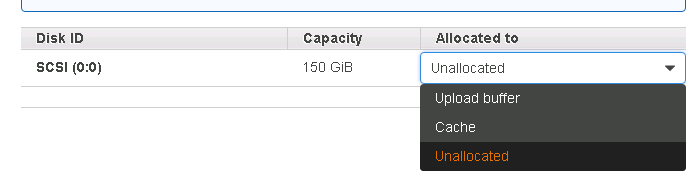
You can view message ” Gateway is now active ” and it will look for the disk available on the Gateway to configure , choose the disk required for the cache and Upload buffer then click Save and Continue.
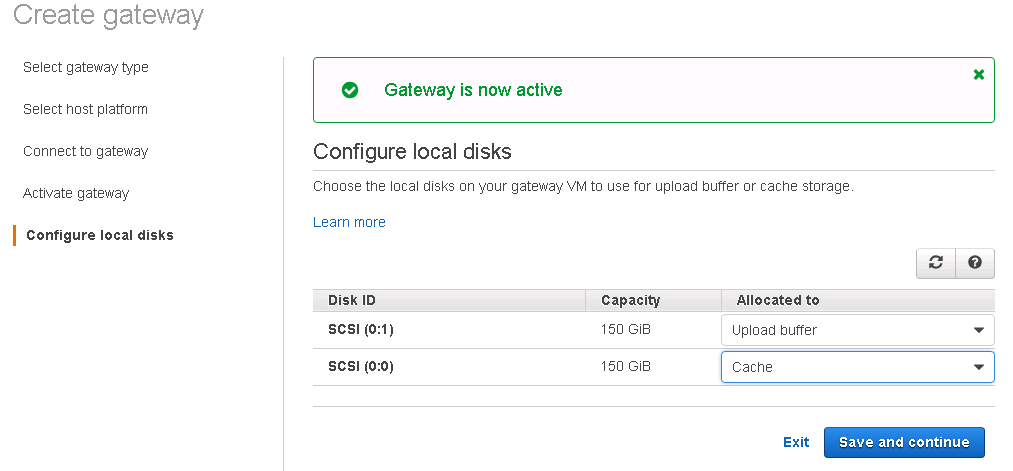
Click on Save and continue to save your configuration settings.
Created Gateway will be available on the console and you can view the details there.

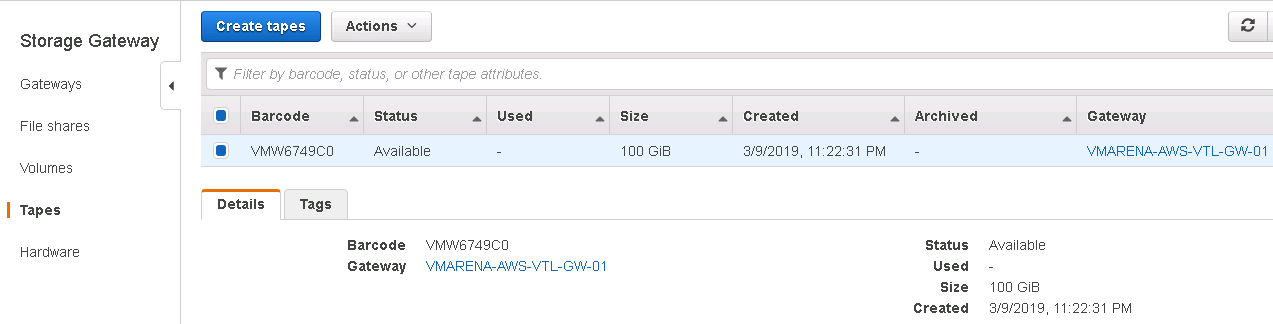
Next is Creating Virtual Tapes
Note that you will be charged only for the amount of data you write to the tape, not the tape capacity.
- From the navigation pane, click on the Gateways tab and Select Create tapes

- Choose a gateway , Number of tapes ,Capacity and Barcode prefix , click on Create tapes
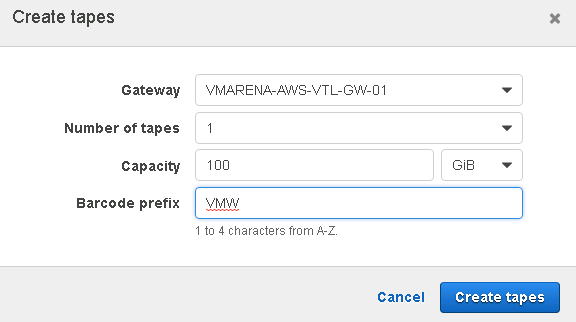
Note:- Tapes must be larger than 100 GiB.
- You can see successful message once tape created

- Navigate to the Tapes option and you can view the newly created tape with same size and barcode started with your prefix
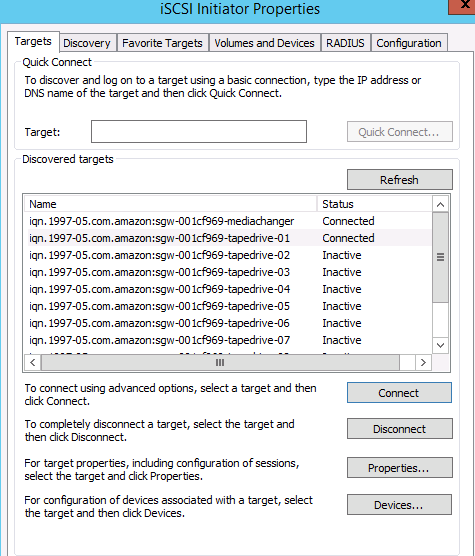
Next Connecting VTL to Your Server
You can connect your virtual tape library (VTL) devices to your Microsoft Windows or Red Hat Enterprise Linux (RHEL) client., here we use windows 2012 Server .
- Open Microsoft iSCSI initiator
- In the iSCSI Initiator Properties -> Discovery tab click the Discover Portal button.
- Provide the IP address of your tape gateway for IP address or DNS name.

- Navigate to Targets tab and click on Refresh and all tape drives and the medium changer will be visible on the discovered targets box. By default the the status for the targets is Inactive.
- Choose the first device and connect it and you can Connect all of the targets one by one .
Next Verify and update the driver and provider
From Computer management -> Device Manager – > Tape Drives
Right click on the Tape Device and from Driver Tab verify that drive provider is Microsoft
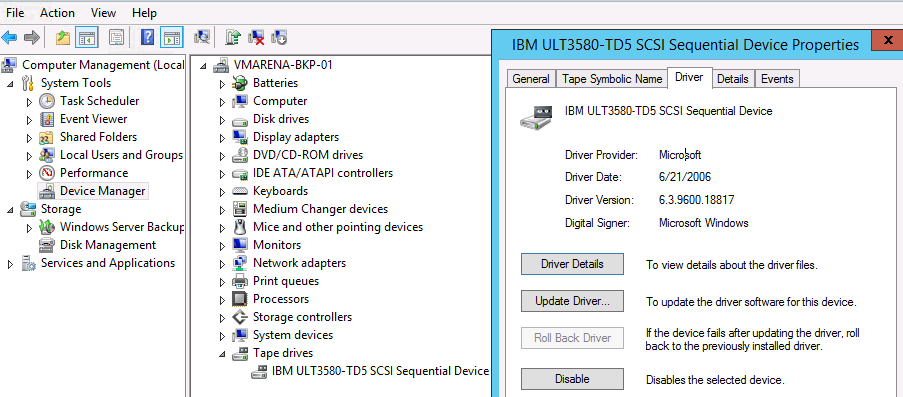
If driver mismatches from Update Driver Software , perform update to make sure its provided by Microsoft
Conclusion
Previous post was about file gateway and here we shared details about tape gateway , benefits of using it in AWS etc . Also we have successfully created Storage Tape Gateway in AWS environment and configured with Veeam Backup Server and its available there . You can follow the procedure configure same in your environment