
Veeam has recently released an update Veeam Backup & Replication 9.5 Update 4a with enhancements and support for vSphere 6.7 Update2. and we have published a blog post on the availability, features, and installation of the version. Veeam announced the support of vSphere 6.7 update2 before pre-release, this was based on the testing performed with VMware support, and they continued their comprehensive testing of the GA build compatibility.
Veeam Backup & Replication produces image-level backups of VMs. It treats VMs as objects, not as a set of files. When you back up VMs, Veeam Backup & Replication copies a VM image as a whole, at a block level. Image-level backups can be used for different types of restore, including Instant VM Recovery, entire VM restore, VM file recovery, file-level recovery and so on.
In this article, I will share the backup and restore test and results of the virtual machines hosted on the vSphere 6.7 update 2.
About Environment
vSphere 6.7 U2 GA
Veeam Backup & replication Update 4a
Windows 7 Virtual Machine for Backup Test
Add the vSphere 6.7
Add vSphere 6.7 U2 Host to Veeam Backup & Replication Server
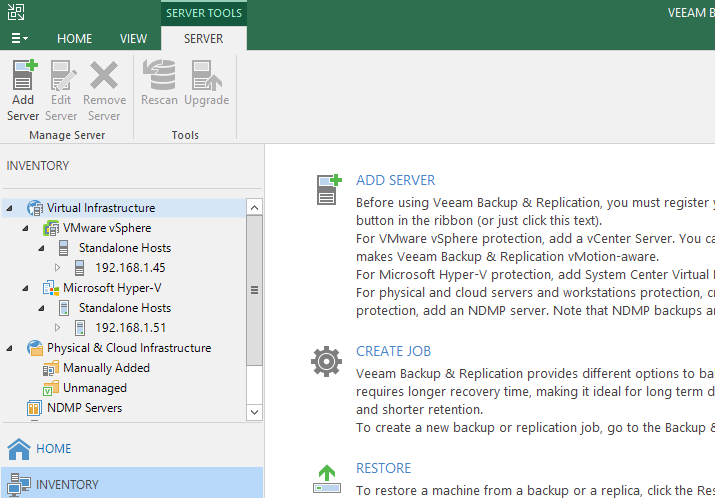
Login to Veeam Console and navigate to Virtual Infrastructure and Select Add Server Option
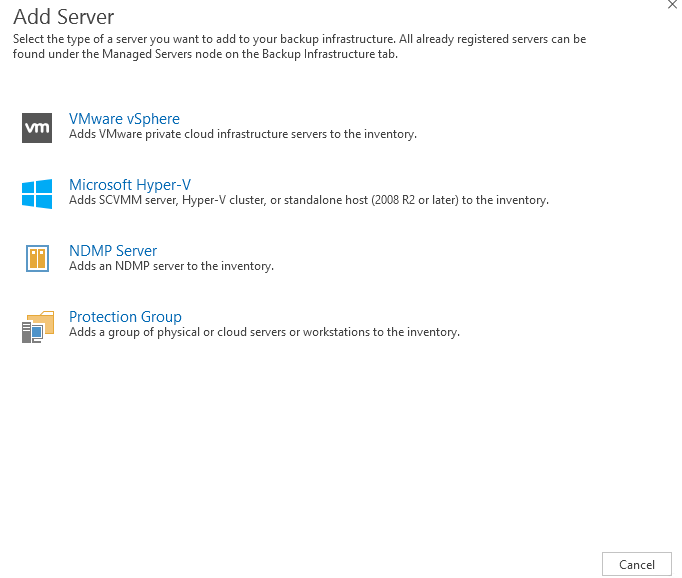
Select VMware vSphere and Continue
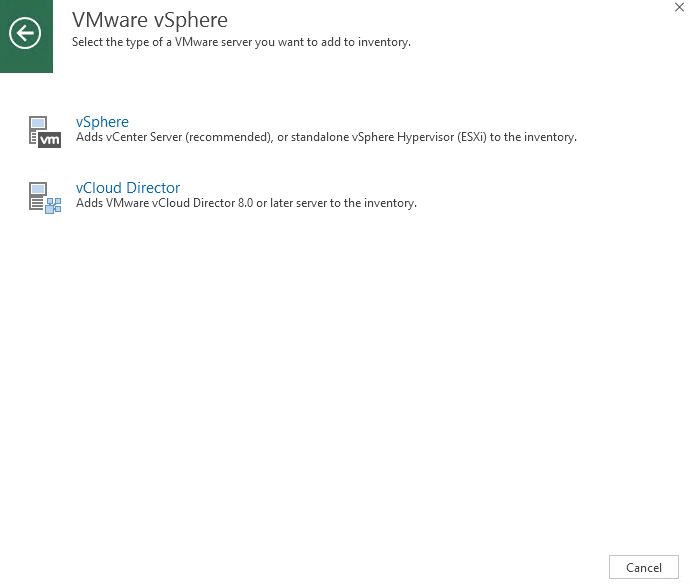
Select the vSphere and Continue
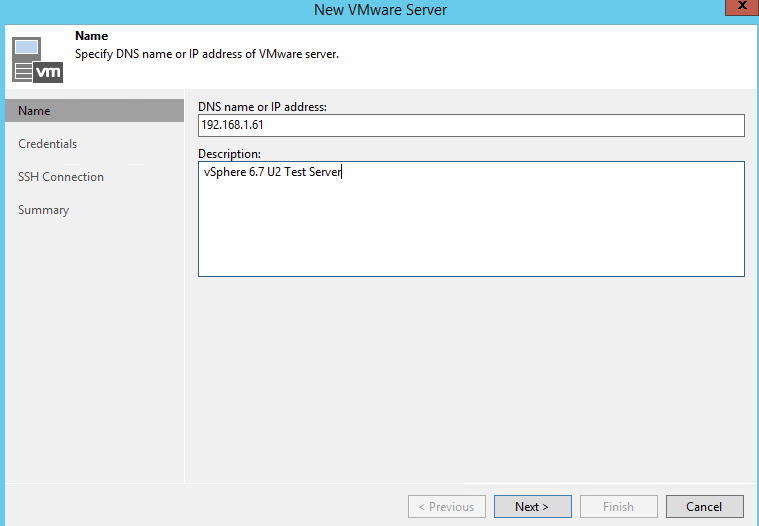
Add the vSPhere 6.7 U2 host DNS name or IP and Click Next
Select the credentials to access the server or you can create a new one from here, Click Next
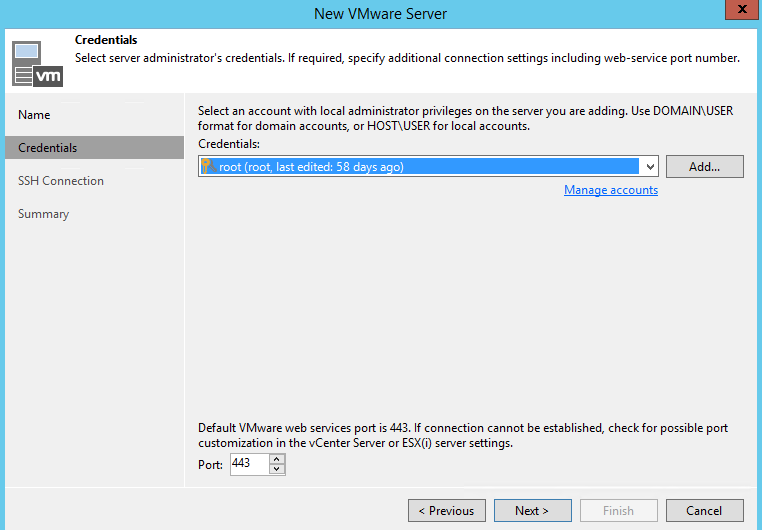
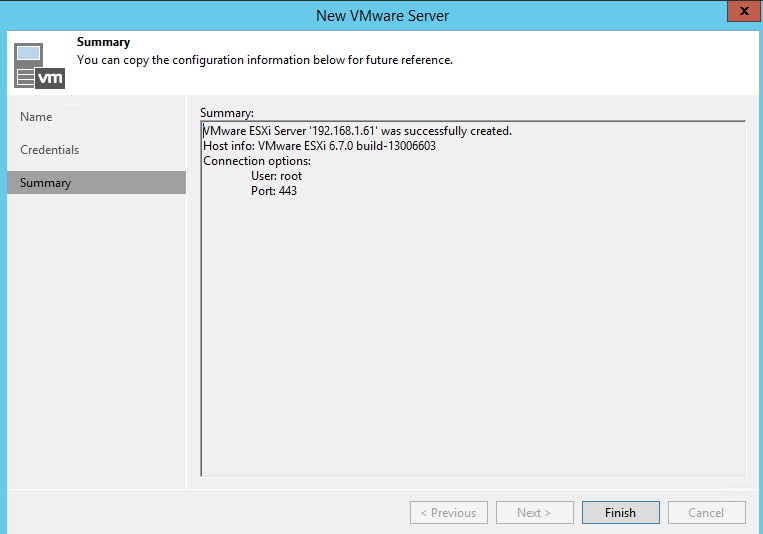
VMware vSphere 6.7 U2 host has been added to Veeam backup & recovery 9.5 update4a server.
Click Finish
Configure the Backup Job
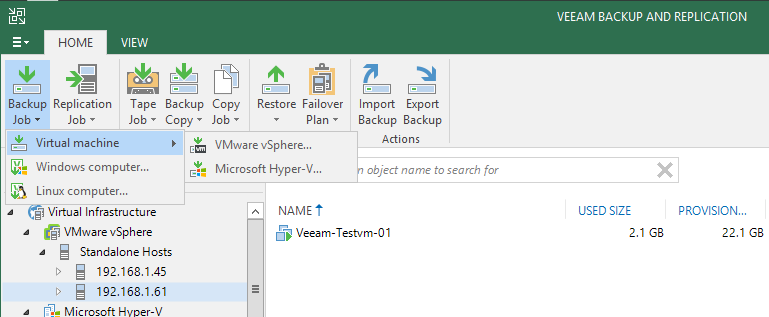
Open the Veeam Backup & Replication Console and navigate to Backup Job > Virtual machine > VMware vSphere.
or Right Click on the Virtual MAchine and Select add to the backup job, Here we choose this option
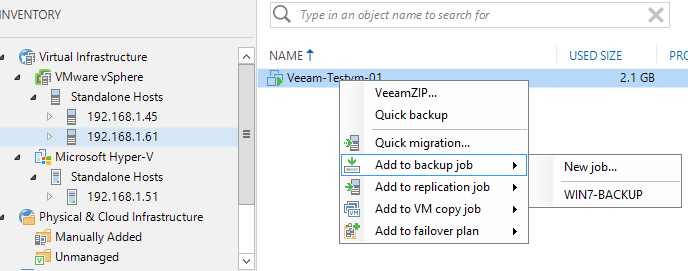
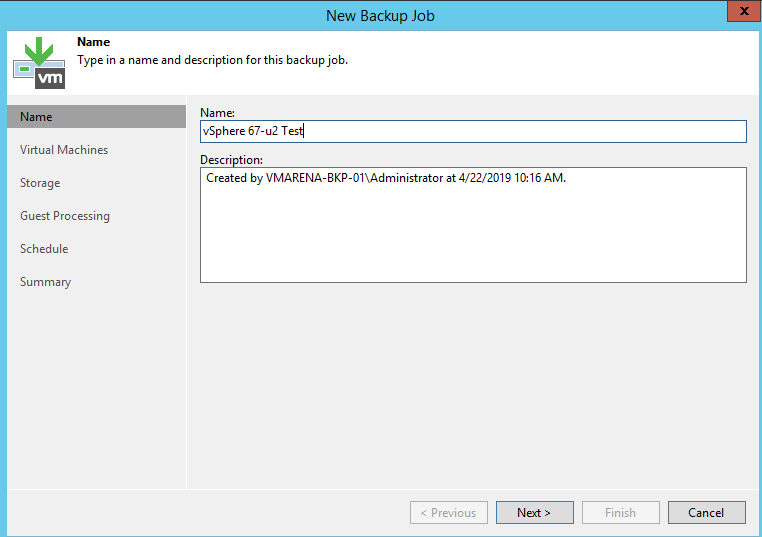
New Backup Job wizard will appear and provide a name the backup job and click Next
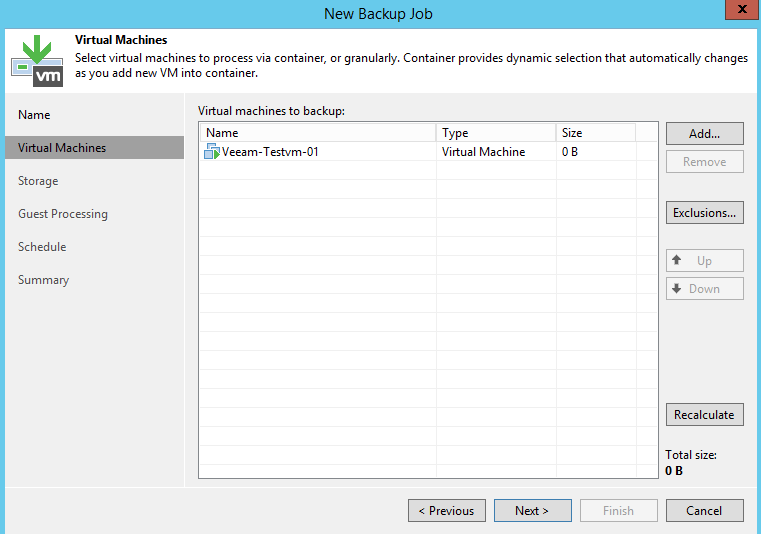
Since we selected the VM create job from there VM will be listing there, else you can add the VMs using Add option
Click Next
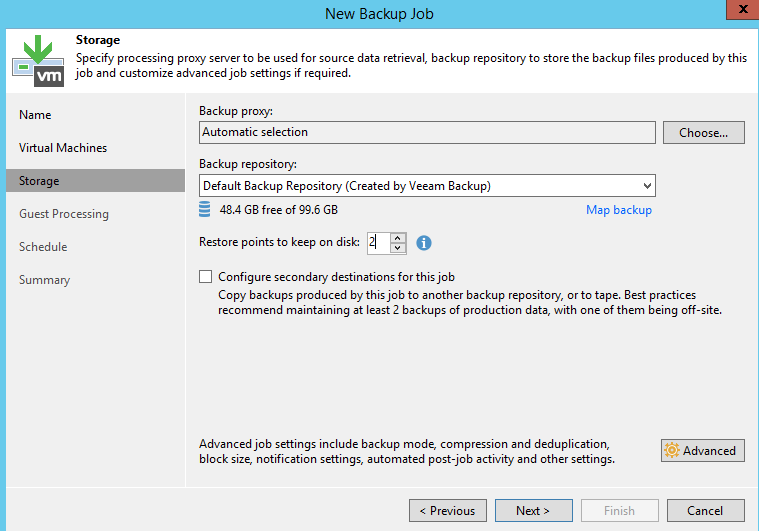
Select the Backup Repository and restore points you have to keep , Click Next
Note:- You can choose the secondary destination if you want also backup proxy is another machine you can select that too
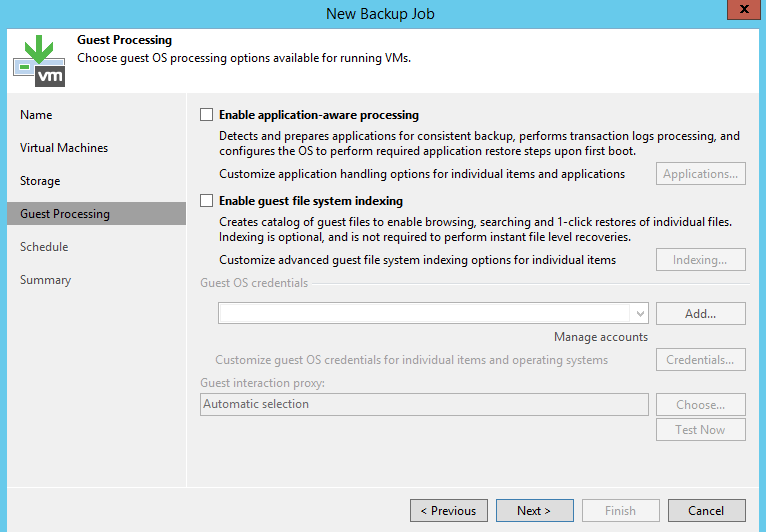
If you need Application-aware or guest file system indexing to enable , provide credentials or leave default and click next
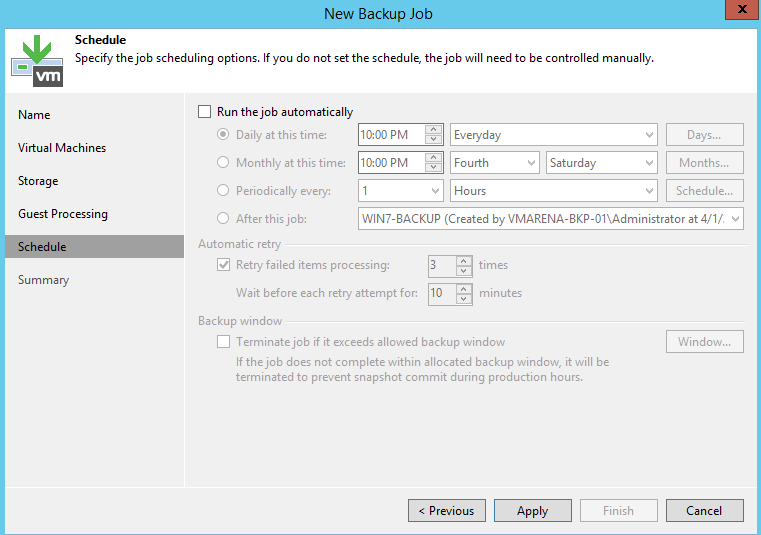
Configure the schedule if required by selecting Run the job automatically else leave the default and Click on Apply for Manua backup purpose
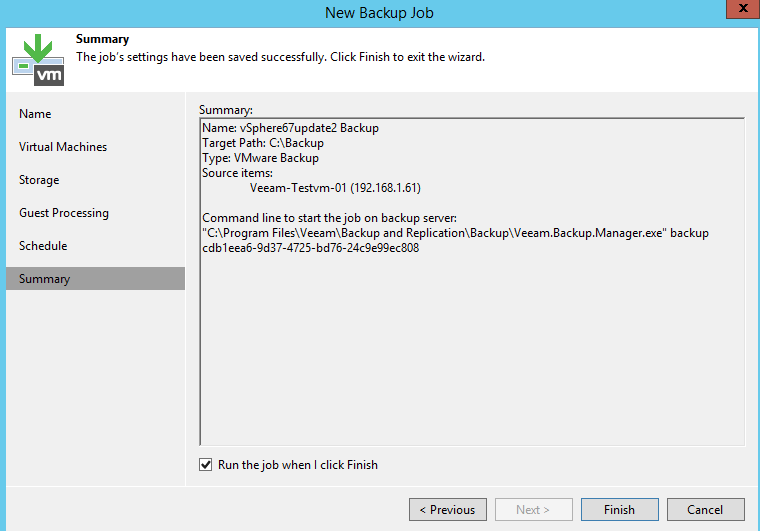
Select the Run the Job when Click Finish and CLick on FInish
Navigate to Jobs and Select the Job which we created and you can monitor the progress of the backup
Here our backup test is completed by taking the backup of Windows 7 VM on the vSphere 6.7 U2 host .

Perform Restore Virtual Machine to vSPhere 6.7 U2
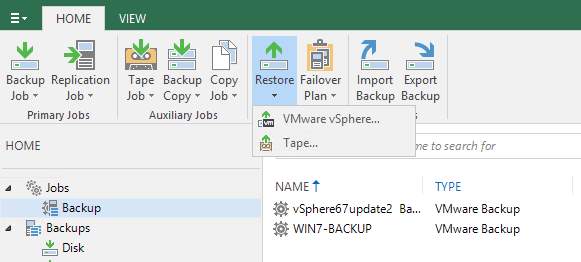
Login to Veeam Backup and Replication Console and navigate to Home – > Restore -> VMware vSphere
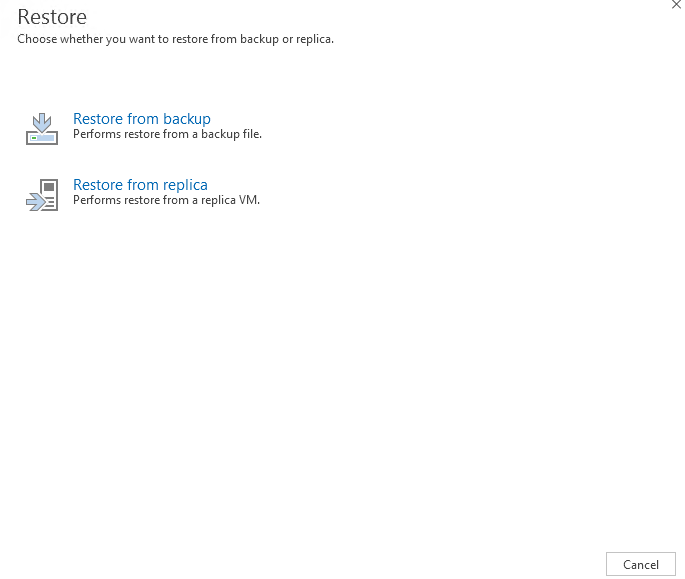
Select Restore from backup and continue
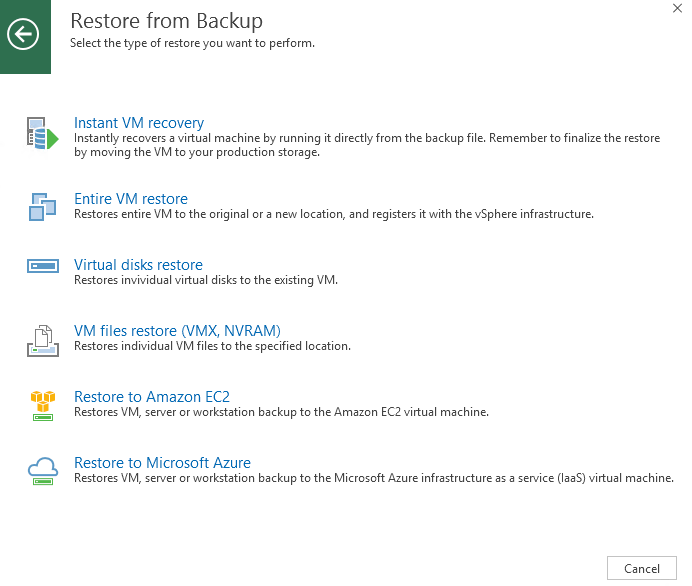
Select the option you need, we choose Entire VM restore as part of testing

You have many options to perform a restoration of the VM, We select the Entire VM Restore
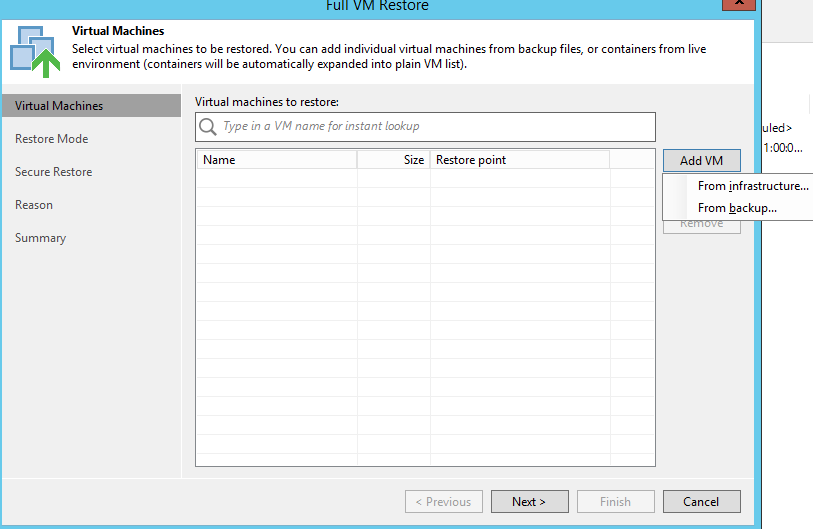
New Window will appear, click on Add VM option to choose the VM to be restored from backup/infrastructure
We go withFromBackup option
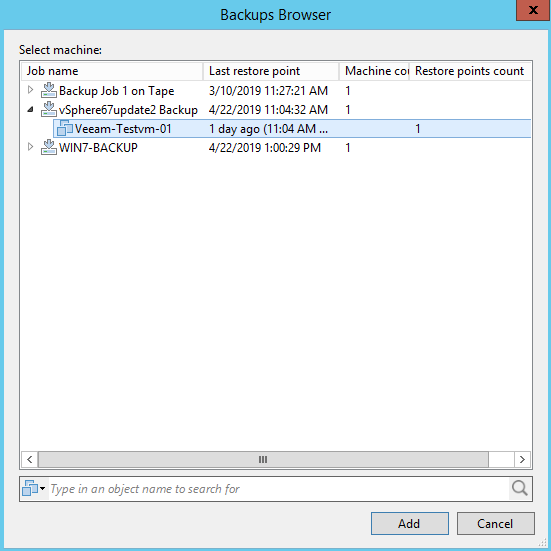
Select the VM from the backup Job and Click Add
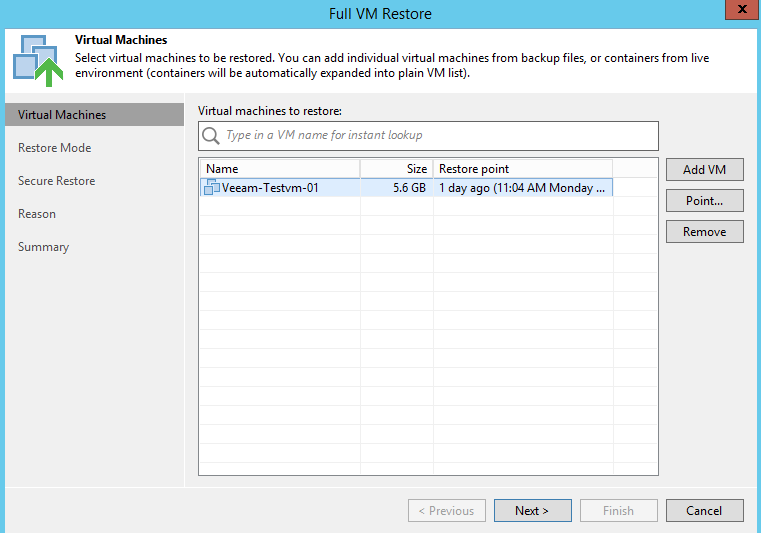
Once added the VM for restoration, it will hows the size of the VM and Restore point info , Click Next
Restoration can be done 3 modes since our VM is running in Live, we go with Restore to New Location option to avoid the conflict, Click Next
This option will allow you to specify the target details to restore VM
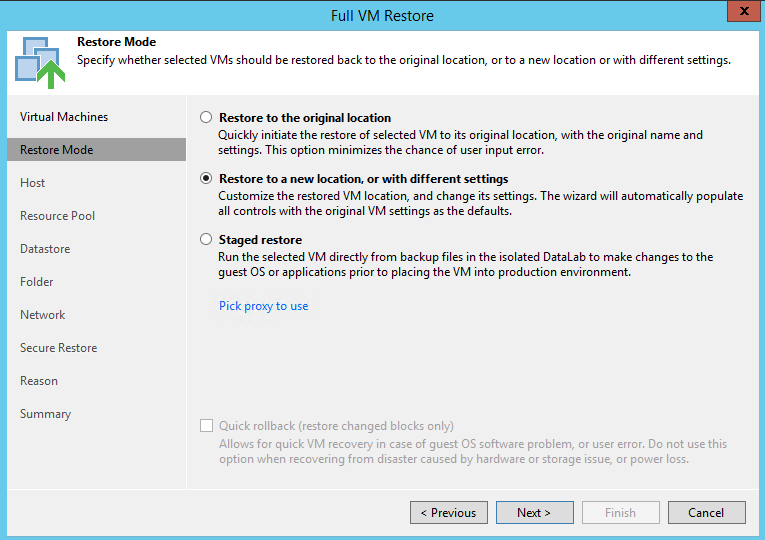
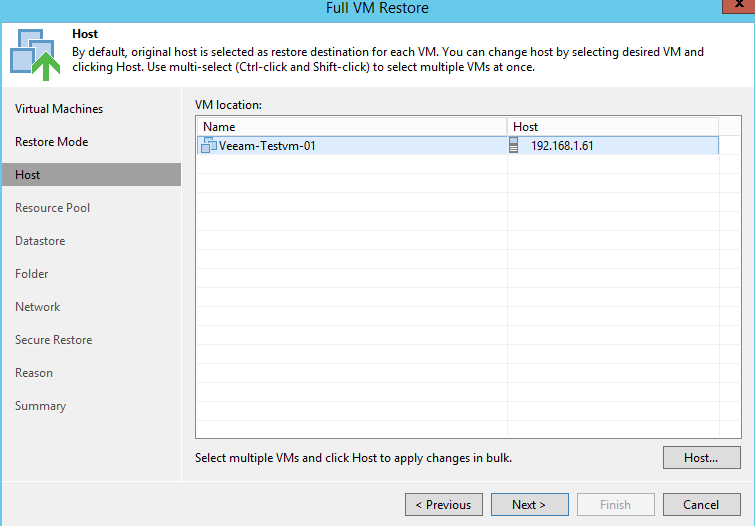
Select the host to restore the VM and Click Next
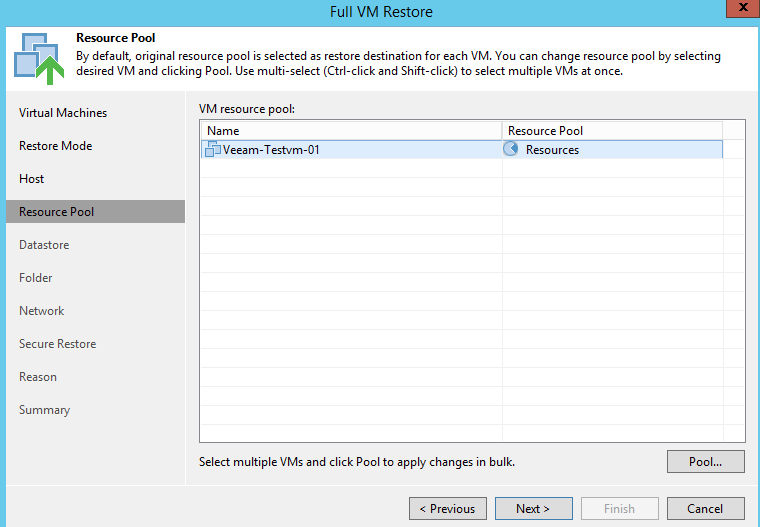
Select the Resource Pool to Restore VM and Click Next
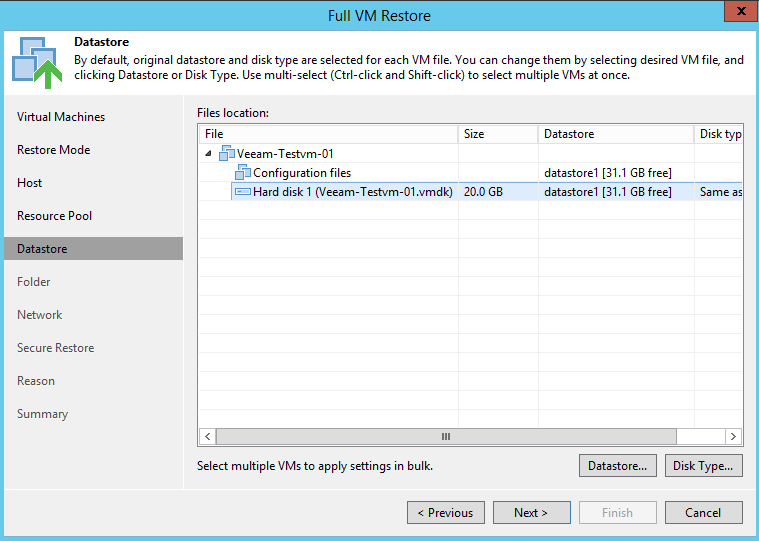
Choose the Datastore and Click Next
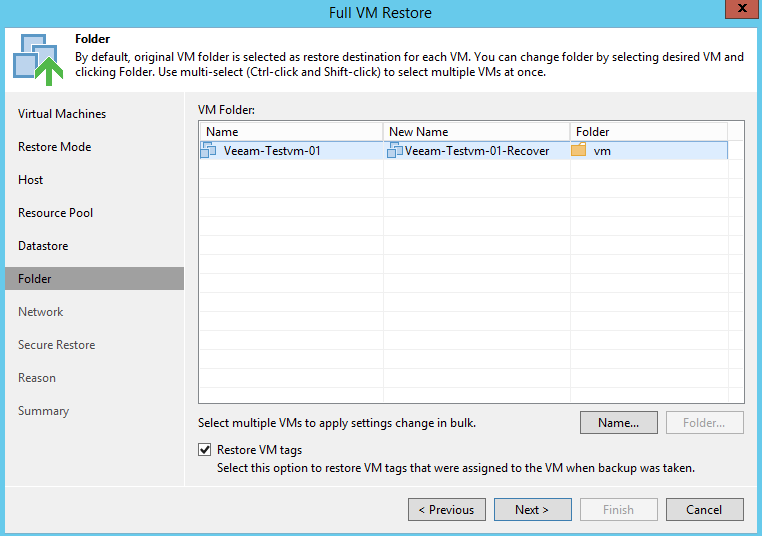
Provide New Name for VM by using Name option, also you can set the folder
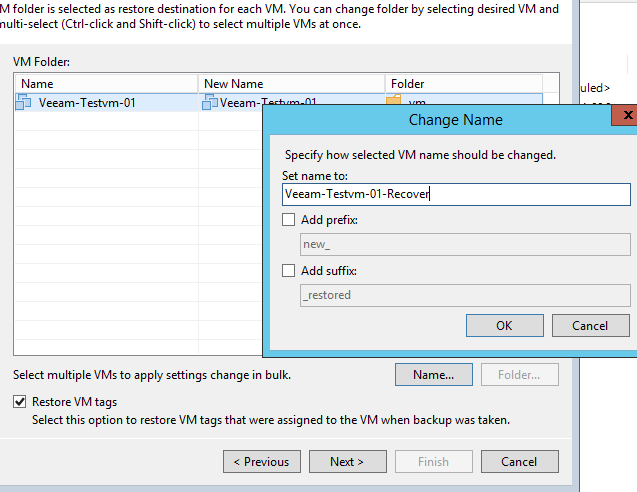
Click next after providing the New Name
Select the Network
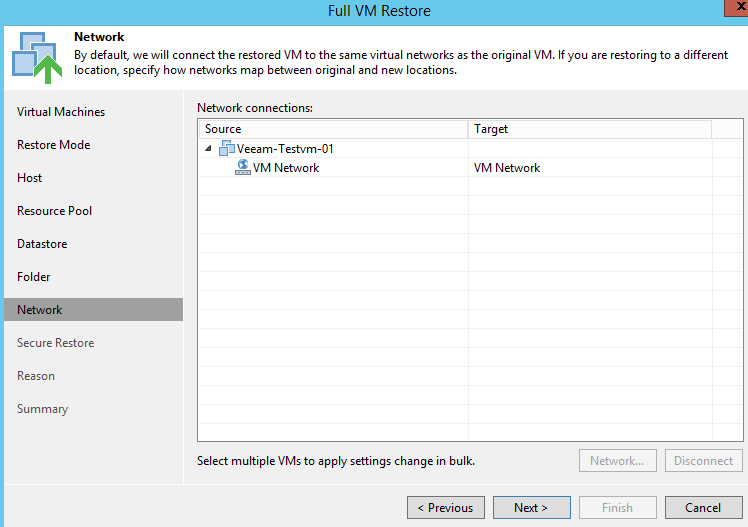
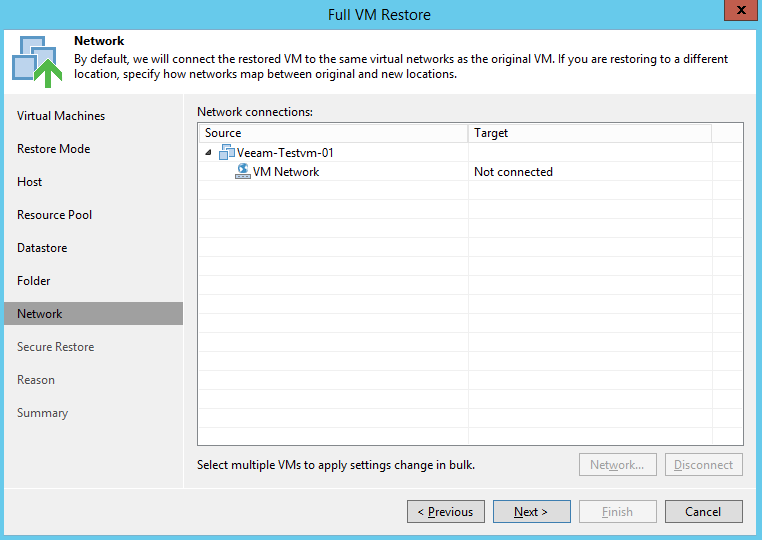
Click on the network and Select Disconnect to avoid IP conflict, you may choose another network if available
Click Next
You can choose this option to scan the restored vm for malware , Click Next
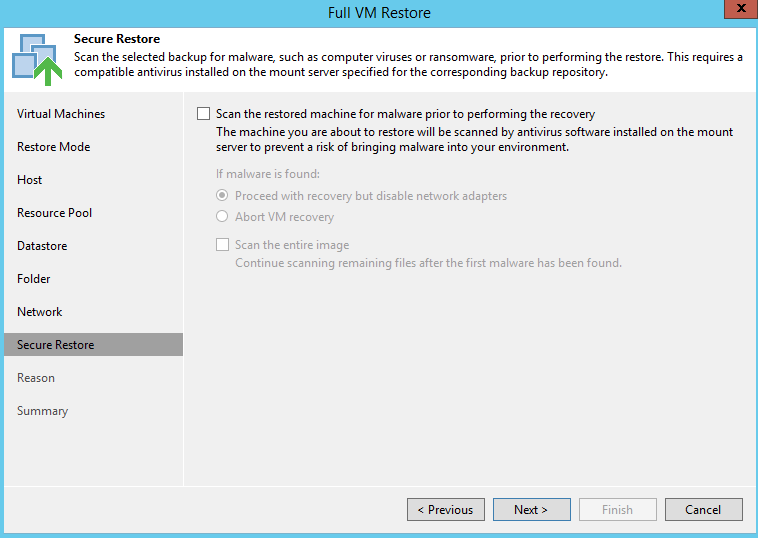
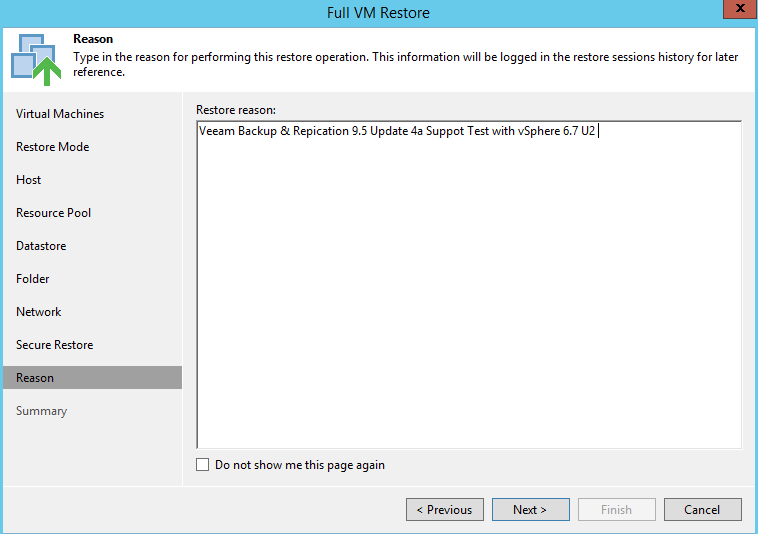
Provide Reson for the restoration and Click Next
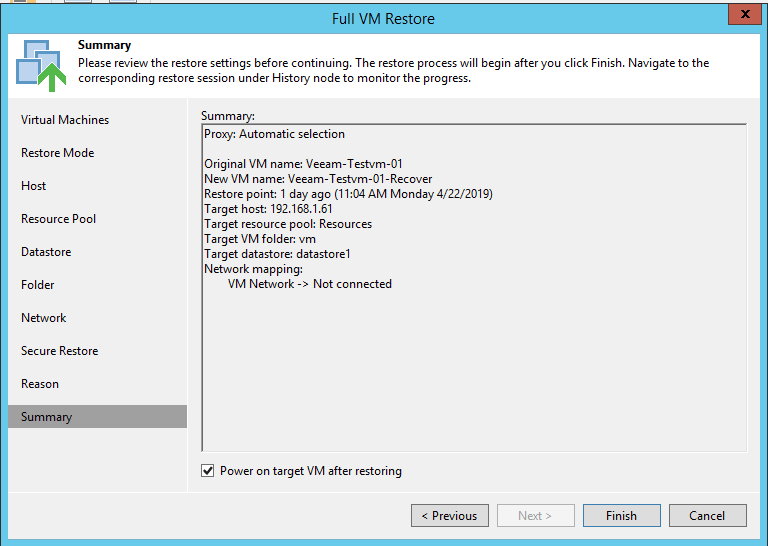
From Summary review the details and Select Power On target VM after restore and Click Finish
A new window will pop-up and you can view the progress of the restoration over there.
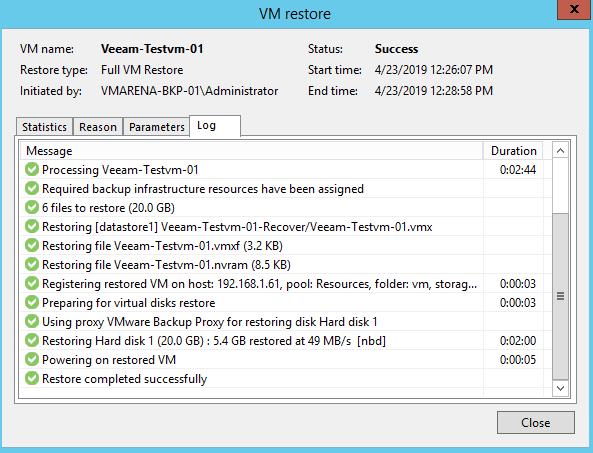
Click on Statistics to verify the restoration status
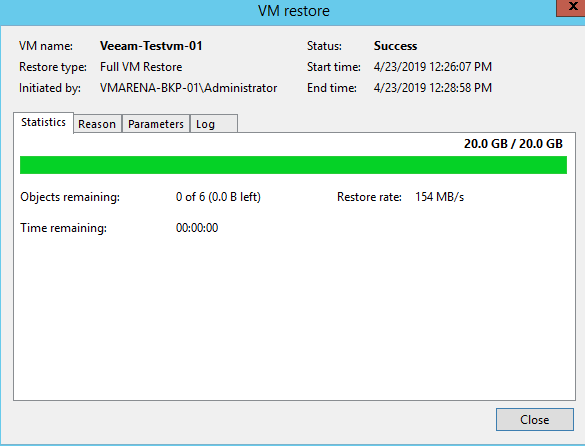
Also, you can check the status on the Last 24-hour job history
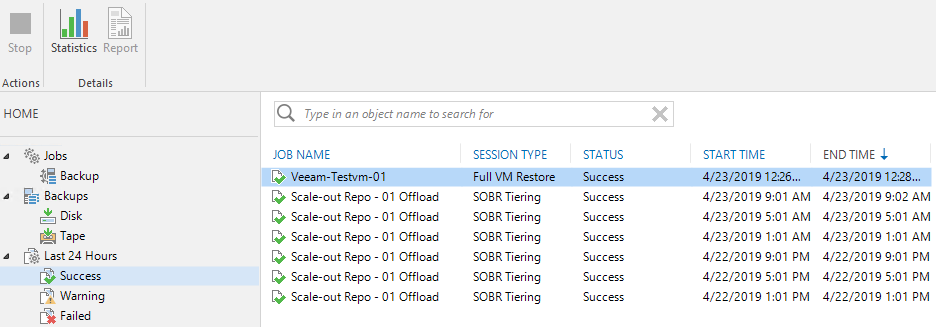
Verify the Restored VM
Login to the vSphere 6.7 U2 Host and verify that new VM has been created with the name we have given in the restoration step and it is powered on

Conclusion
We have successfully tested the backup and restoration of windows virtual machine in vSphere 6.7 U2 from Veeam Backup & Replication 9.5 Update 4a. As Veeam announced with updated 4a backup is supported in vSphere 6.7 U2 environment and Virtual Hardware 15. Veeam is the First backup solution announced the support for vSphere 6.7 u2 .