Previous Post was about NAKIVO Introduces Business Continuity and Site Recovery Orchestration Solution, NAKIVO Backup & Replication v8 on VMworld, Las Vegas, NV, United States — August 27, 2018.This new version has great capability Site Recovery allowing you to create site recovery jobs .In addition to these regular recovery or replication actions you can also orchestrate functions such as gracefully shut down source VMs, run a final VM replication , change replica VM IPs, connect replica VMs to appropriate networks, set the replica VM boot order etc.
In this post I will explain about on the best feature of the NAKIVO, which is very useful in many situations where everyone will face trouble sometimes on sudden failure and it may be a critical machine which you need data very quick .NAKIVO has a feature called Flash VM Boot, which will really provide a solution to this situation, you can boot VMs directly from compressed and deduplicated backups.

Why Fastest VM Recovery Required?
For every business, there are critical application if this business-critical application down due to VM failure, every minute of downtime can be costly and painful. With NAKIVO Backup & Replication, you can recover entire VMware and Hyper-V VMs from their backups within minutes. The Flash VM Boot feature enables you to boot the VMs directly from compressed and deduplicated VM backups, without recovering the entire VMs first.
Flash VM Boot Capabilities
- In addition to the VM recovery capabilities, the Flash VM Boot feature also has several helpful functionalities.
- Access files, folders, and application objects of any application on any OS
- Test system updates and application patches before applying them to your production VM
- Verify the VM backup to ensure that the OS and applications run properly
- Copy a VMDK or VHDX file and then delete the virtual machine
How Flash VM Boot Works
To use this feature don’t need configure any special setup ,Just choose a VM backup, a recovery point, and a recovery location then push a button – the VM is booted in no time.Once the VM is running, you can migrate the VM to production for permanent recovery. What’s important is that the backup from which the VM is booted is not affected. Changes you make to the running VM do not modify or remove data in your VM backup.
NAKIVO Backup & Replication consists of two main components. The Director is the management instance, while the Transporter performs actual data protection and recovery tasks. By default, both components are automatically installed to enable all features out of the box.When you run a Flash VM Boot job, the Director creates a new VM without any disks on the target server, then commands the Transporter to expose the VM disks from the Backup Repository as iSCSI targets. Finally, the Director mounts the exposed disks to the newly created VM.
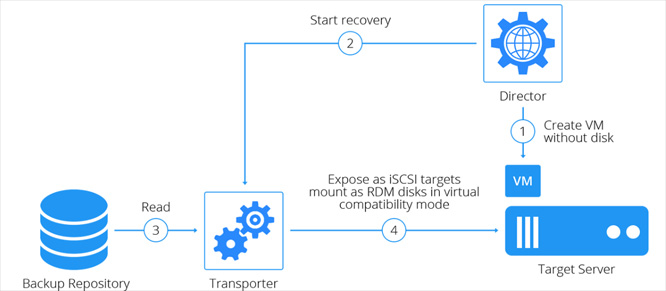
This process is fully automated and takes only seconds to complete, after which the VM OS boot is started. Once booted, the VM can be migrated to the production environment using the hypervisor’s native live migration feature.
Perform the Flash VM Boot Recovery
We are using vSphere 6.7 Host with Windows 7 Virtual Machine in this environment
Login to NAKIVO Backup & Replication and Navigate to The inventory and Identity the VM You want o perform the Flsah Boot
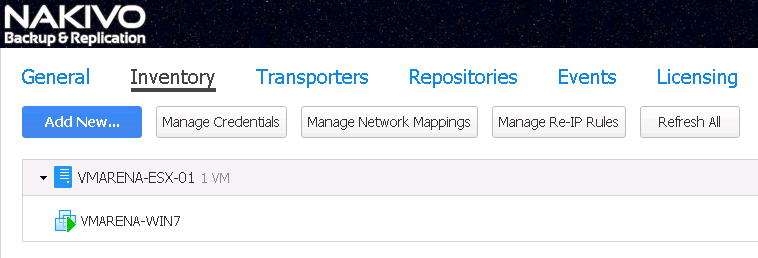
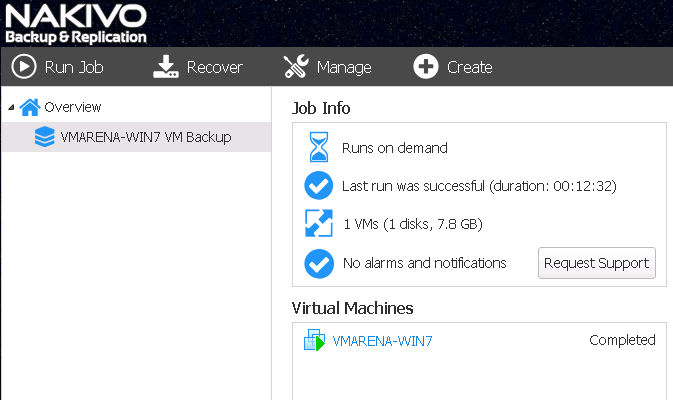
Navigate to Home -> Select the Virtual Machine
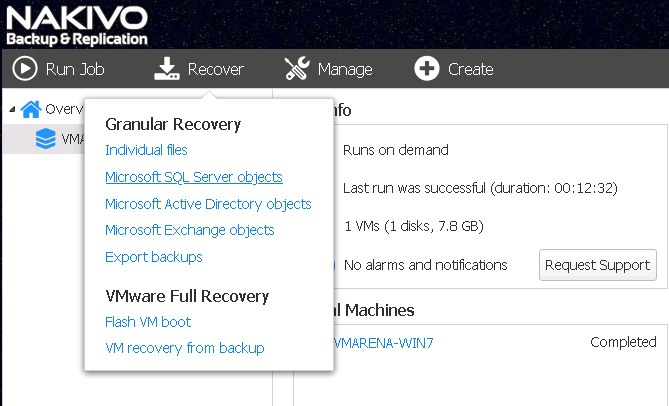
Choose Recover > VMware Full Recovery >> Flash VM boot.
New 4 step Wizard will appear and you have to select the Job& Groups since we restore from Previous Backup Job , Select the Virtual Machine from left pane and choose the backup job and the recovery point you want to use as the base for the Flash VM Boot Job from Backups Tab
Click Next to Continue

On the Destination screen, you choose the destination Container ->VMware host , Datastore -> Target restore datastore on the host and the network connection to utilize for the restored VM then Click next to Continue

Next you have option to choose the Schedule or without schedule run on demand , here we simply run once for recovery
Select the appropriate option and click Next

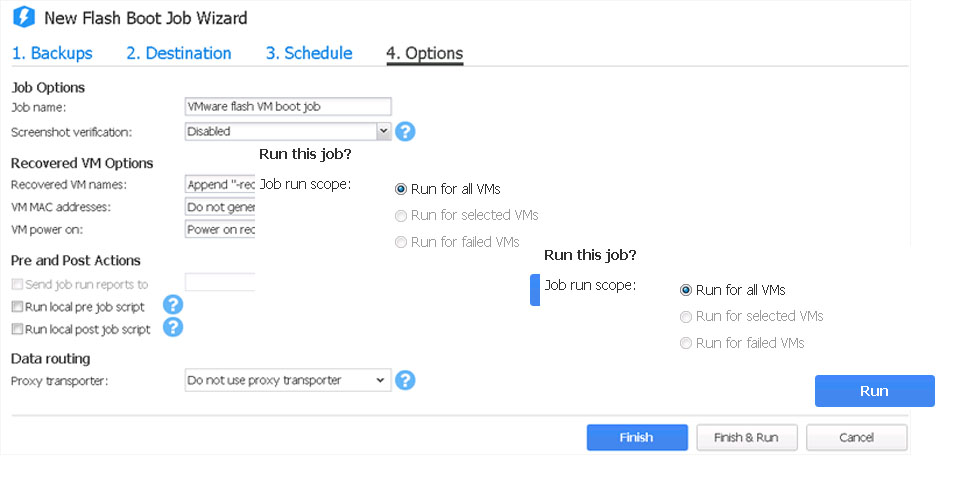
Finally select required options and Click on Finish and Run , You will get a pop-up for Run the Job Click on On Run to start the Flash Boot Process
As I mentioned above in-addition you have options to choose the VM recovery capabilities like change MAC , post actions etc in same Tab
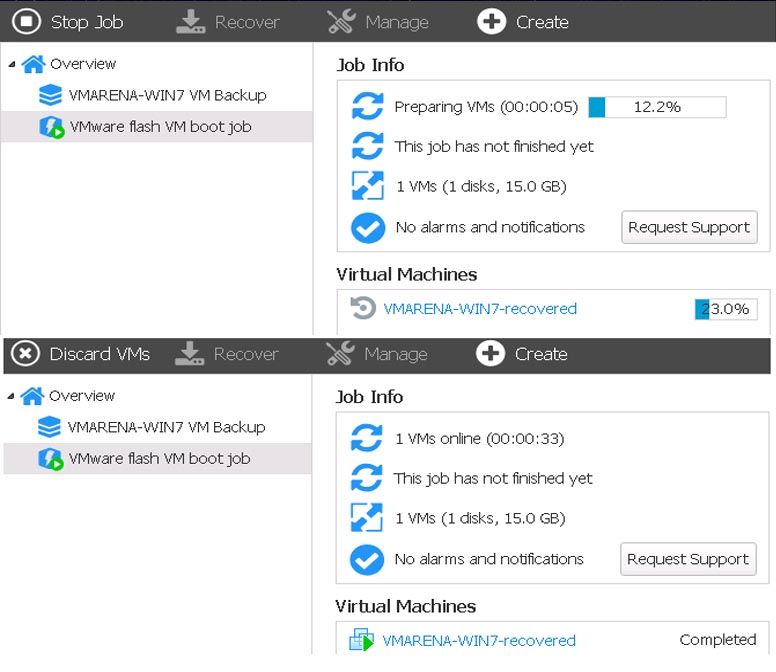
In few seconds the Recovery Will be finished as shown below
Login to the Target ESXi host and very the the Virtual Machine Status
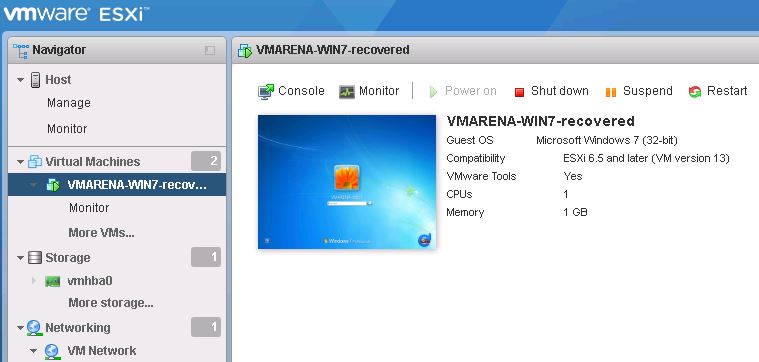
You can login to VM and access required data .
Download a full-featured free trial – Download
The Instant Recovery by Flash VM Boot Recovery bypass the full restore of VM data before accessing. And you can migrate the VM to production for permanent recovery or do instant access to data and permanent recovery. In addition Flash Boot feature is available with Nakivo Backup and Replication for Hyper-V host .