VMware has recently released its latest vSphere Version 7.0 which we already shared in our previous article. In this article, we will share some important information about new vCenter Server 7.0 and the procedure to deploy the vCenter 7.0 appliance.
There are many enhancement and features available with the latest vSphere 7.0 version and there are three important information you should know before upgrading or installing vCenter 7.0
- Removal of External Platform Services Controller
To deploy or upgrading vCenter Server in vSphere 7.0 requires the use of vCenter Server appliance only With vCenter Server 7.0 all Platform Services Controller (PSC) services, preserving the functionality and workflows, including authentication, certificate management, and licensing. And no longer necessary nor possible to deploy and use an external Platform Services Controller with vCenter 7.0. All PSC services have been consolidated into vCenter Server, and deployment and administration have been simplified.
- Removal of vCenter Server for Windows Support
In vSphere 7.0, vCenter Server for Windows has been removed and support is not available
- Deprecation of Image-Based Backup and Restore Support for vCenter Server
Image-based backup and restore for vCenter Server is deprecated in vCenter Server 7.0 and will not be supported in a future vSphere release
vCenter Server 7.0
The vCenter Server Appliance is a preconfigured virtual machine that is optimized for running vCenter Server and the associated services. Center Server provides a centralized platform for management, operation, resource provisioning, and performance evaluation of virtual machines and hosts.
The vCenter Server group of services contains vCenter Server, vSphere Client, vSphere Auto Deploy, and vSphere ESXi Dump Collector. The vCenter Server appliance also contains the VMware vSphere Lifecycle Manager Extension service and the VMware vCenter Lifecycle Manager.
The vCenter Server appliance package contains the following software:
- Photon OS 3.0
- The vSphere authentication services
- PostgreSQL
- VMware vSphere Lifecycle Manager Extension
- VMware vCenter Lifecycle Manage
Pre-Requisites
- To deploy vCenter Server 7.0 appliance you need an ESXi host 6.5 or later, or on a vCenter Server instance 6.5 or later.
- Fully Qualified Domain Name for vCenter and it is reachable from the client machine from which you are deploying the appliance.
- Client machine, ESXi host, the vCenter appliance use the same DNS server.
- The clock on the target server and all vCenter Server instances on the vSphere network should be on sync.
Hardware & Storage Requirement
You can select the vCenter Server Appliance based on the size of your vSphere environment. The option that you select determines the number of CPUs and the amount of memory for the appliance.
The storage requirements are different for each vSphere environment size and depend on your database size requirements.
Network Requirement
Unused Static IP with FQDN and designated ports should be opened for communication, Refer – Ports information
Software Requirement
vCenter Server 7.0 Software, which can be downloaded from VMware Site
Deploying the vCenter Server Appliance
There two types of deployment available, in our scenario we are using GUI mode and this deployment process includes a series of two stages.
- Stage 1 – OVA Deployment
In the first stage, you can choose the deployment type and appliance settings on the deployment wizard.
- Stage 2 – Appliance Setup
The second stage provides a setup wizard to configure the appliance time synchronization and vCenter Single Sign-On. This stage completes the initial setup and starts the services of the newly deployed appliance
Stage 1 – OVA Deployment
Mount and browse vCenter Server 7.0 ISO from the client machine , Navigate to vcsa-ui-installer->, win32 directory, and double click on installer.exe to run the setup.
From vCenter Server 7 installer wizard, click Install to start the installation of the new VMware vCenter Server 7.0.
Install – Stage 1: Deploy the vCenter Server introduction option, then click on Next.


Read the end-user license agreement and, select I Accept the terms of the license agreement and then click on Next.

Mention the target supported ESXi host where you want to install the vCenter server, type the username, password, and then click on Next.

Click Yes to accept the SSL certificate from the selected host

Provide a VM name for the vCenter Server 7 and type the password in the Set root password field and then click next to continue

Select the appropriate deployment size and the default Storage size and then click Next, in our scenario use the tiny option

Select the datastore to use, select enable thin disk mode and then click next

Configure your vCenter server network settings and then click next.

Review the settings before starting the vCenter Server 7.0 deployment and click Finish to start the installation.

vCenter Server 7.0 will start deploying on the specified target ESXi host and you can view progress on the screen

When Stage 1 is completed successfully, Click on Continue to start the Stage 2 installation

From Install – Stage 2: Set up vCenter Server page click on the next button to begin the vCenter Server process

Select the time synchronization mode and Enable the SSH access and then click next.

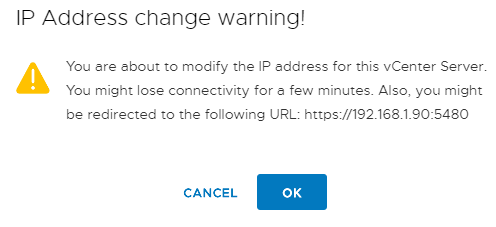
Click Ok from vCenter IP Address change warning
Select Create a new SSO domain, type the single sign-on domain name, Type the SSO password and then click next

Configure CEIP option and click next

Review the vCenter Server settings and then click Finish to finalize the setup.

Click OK on vCenter Server 7 warning to continue.

You can monitor the progress of stage 2 – vCenter Server Setup

Once the vCenter Server 7.0 setup has been complete successfully, so click close.

You can access the vCenter server 7.0 from a supported browser by using vCenter Server address / FQDN and then click Launch vSphere Client (HTML5).

Type vCenter Server username, password and click the Login button.

You are logged in to vCenter Server 7.0

Now you can start creating Data Center, Cluster and adding the ESXi hosts and assign the licenses
Conclusion
In this article, we have shared the procedure to deploy VCSA 7.0, you can follow the same to deploy in your environment. As I mentioned at the starting of the article its the latest version of vSphere and many new features are available. Check the compatibility and requirement before installing or upgrading vCenter Server 7.0.