
In the market azure is the growing and ever-expanding set of cloud services providing my Microsoft. In this post we are sharing basic details of azure storage and how you create a storage account and test it is availability.Azure Storage is Microsoft’s cloud storage solution for modern data storage scenarios. Azure Storage offers a massively scalable object store for data objects, a file system service for the cloud, a messaging store for reliable messaging, and a NoSQL store.
Some key points about Azure storage services mentioned by Microsoft
Durable and highly Available
Redundancy ensures that your data is safe in the event of transient hardware failures. You can also opt to replicate data across datacenters or geographical regions for additional protection from local catastrophe or natural disaster. Data replicated in this way remains highly available in the event of an unexpected outage.
Secure
All data written to Azure Storage is encrypted by the service. Azure Storage provides you with fine-grained control over who has access to your data.
Scalable
Azure Storage is designed to be massively scalable to meet the data storage and performance needs of today’s applications.
Microsoft Azure handles maintenance and any critical problems for you.
Data in Azure Storage is accessible from anywhere in the world over HTTP or HTTPS. Microsoft provides SDKs for Azure Storage in a variety of languages — .NET, Java, Node.js, Python, PHP, Ruby, Go, and others — as well as a mature REST API. Azure Storage supports scripting in Azure PowerShell or Azure CLI. In addition, the Azure portal and Azure Storage Explorer offer easy visual solutions for working with your data.
You have three options to create azures storage account Azure portal, Azure PowerShell, or Azure CLI. We need a Azure account with a subscription for creating a storage account. If you don’t have subscription you can create a free account from this Link .
Create a Storage Account
1. Login to Azure Portal and navigate to All services -> Storage -> Storage accounts and Click on Add
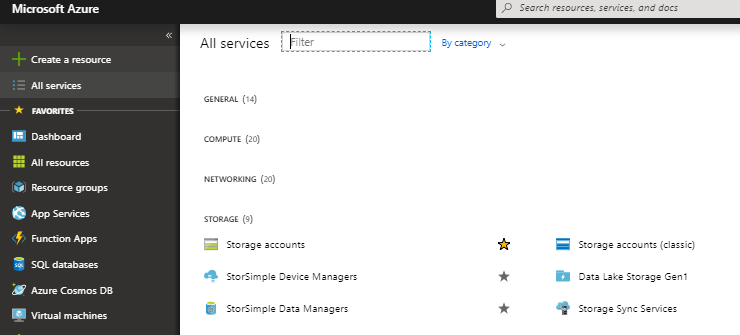

New Page like below image will appear and you have fill the required fields over there
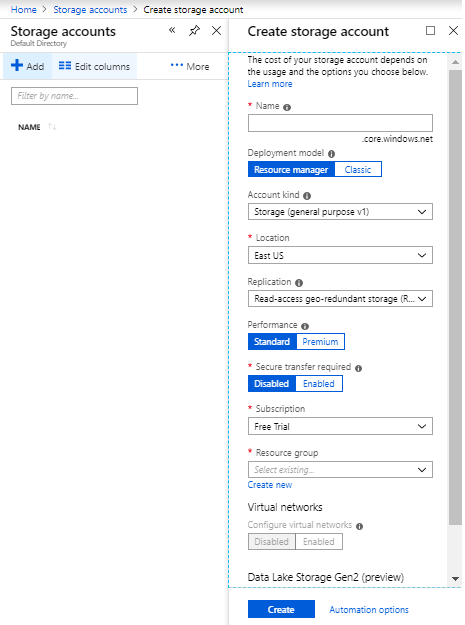
2. Enter a name for your storage account. ( Note:- account name should conation only lower letters and number )
3. Set the Account kind field to Storage (general-purpose v1) or Storage V2 (general-purpose v2) , Refer more about Account Type
4. Set the Replication field as to Locally-redundant storage (LRS) or you can chooose Zone-redundant storage (ZRS), Geo-redundant storage (GRS), or Read-access geo-redundant storage (RA-GRS).
5. Leave other fields set to their defaults: Deployment model, Performance, Secure transfer required.
6. Choose the subscription in which you want to create the storage account .
7. In the Resource group section, select Use existing, then choose the resource group you created in the previous section .
Note:-if this your new account and you have not created any resources group , you may create from Create new option from below the option
Resource Group Creation
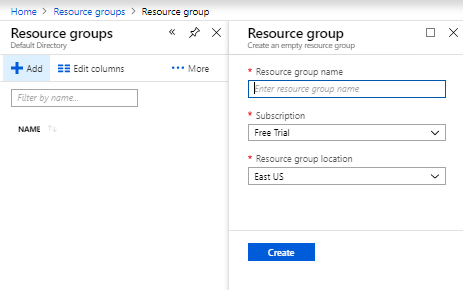
8. Choose the location for your new storage account.
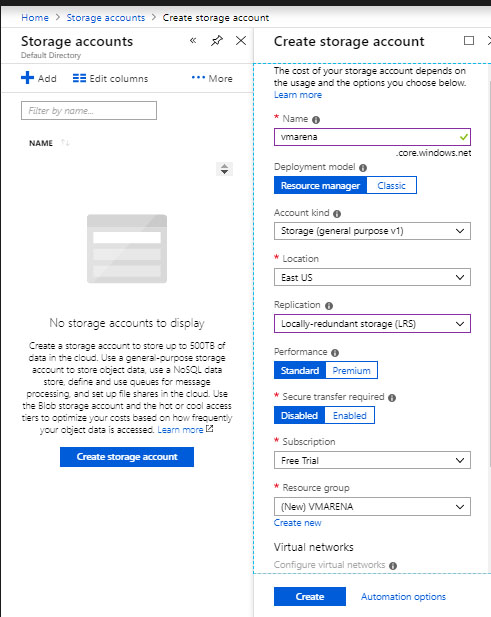
9. Click Create to create the storage account.
How to Test the Storage Account you have created is Accessible ?
Access the Storage Account
You can use access keys to authenticate this Azure storage account and it can found from Storage Account- >Access keys option
and right side you can see find the access keys , by default you you will have two keys and each key has a connection string and second key option is helpful to keep the access available in case you generate new key for key 1 .
Note:- Always Store your access keys securely and Azure recommends to regenerating the access keys regularly. And when you regenerate your access keys, you must update any Azure resources and applications that access this storage account to use the new keys. This action will not interrupt access to disks from your virtual machines .

Test the Storage Account Availability
You can use free tool Azure Storage Explorer provided by Microsoft to test the connectivity to Storage Account . Not only testing you can use Storage Explorer for upload, download, and manage blobs, files, queues, tables, and Cosmos DB entities. Gain easy access to manage your virtual machine disks. Work with either Azure Resource Manager or classic storage accounts, plus manage and configure cross-origin resource sharing (CORS) rules.
You can download the Storage Explorer from this link – Download , Note you need .net 4.6 or above any version to start this tool after installation .
Open the Storage Explorer
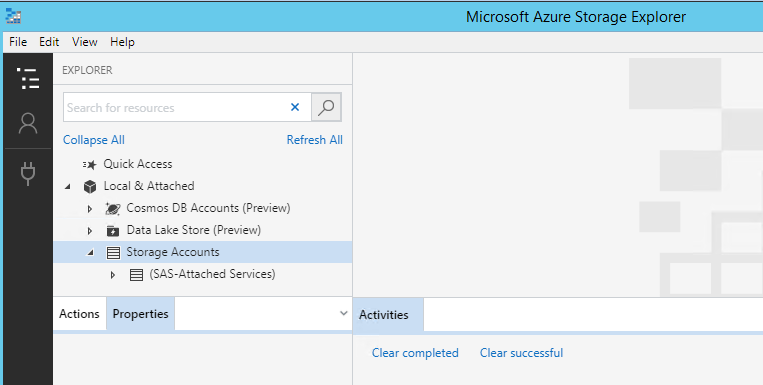
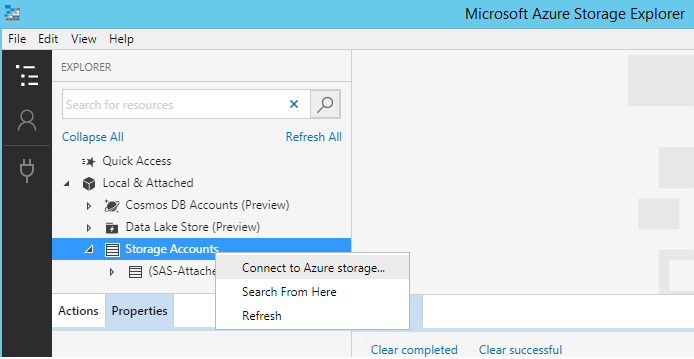
Select the Storage Account -> Right Click and Select Connect to Azure Storage
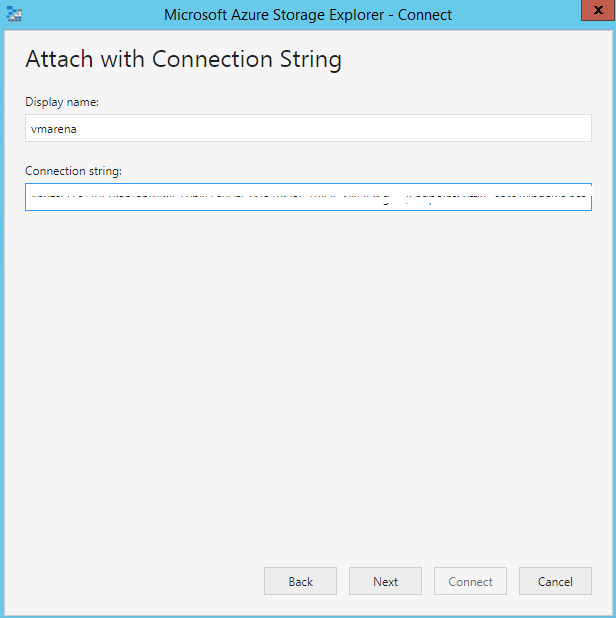
Use any one of the options to connect to the storage account , here we use connection string
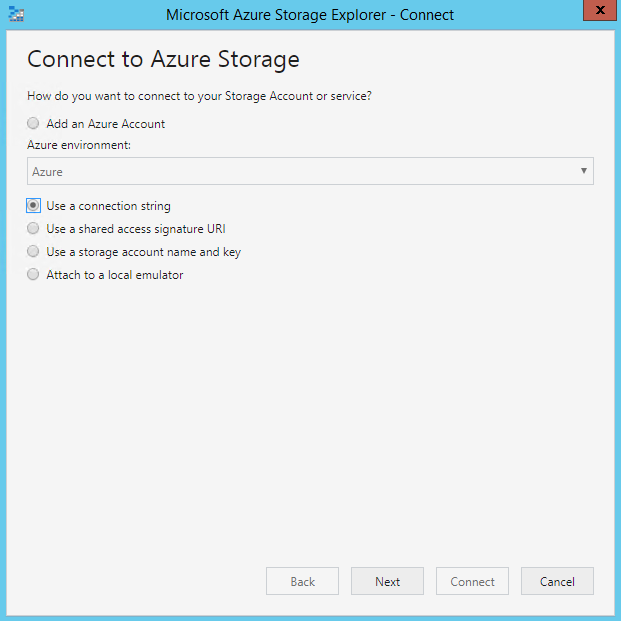
Add the connection string here and account name will automatically appear and click Next to Continue
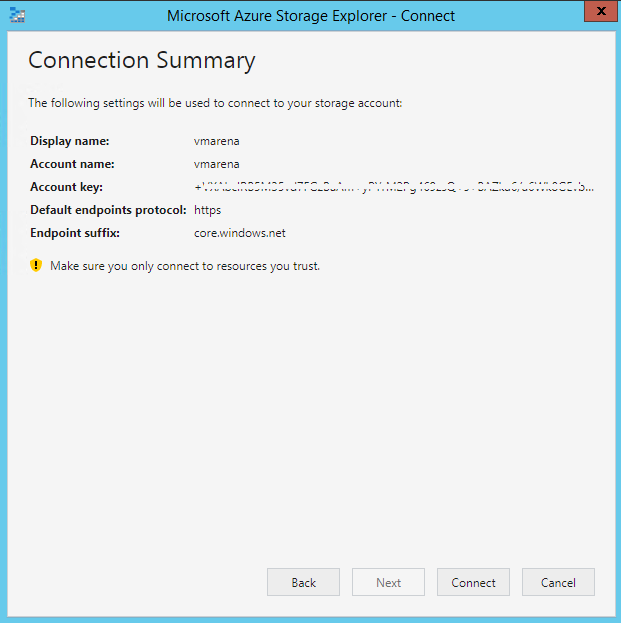
Verify the connection Summary and Click on Connect
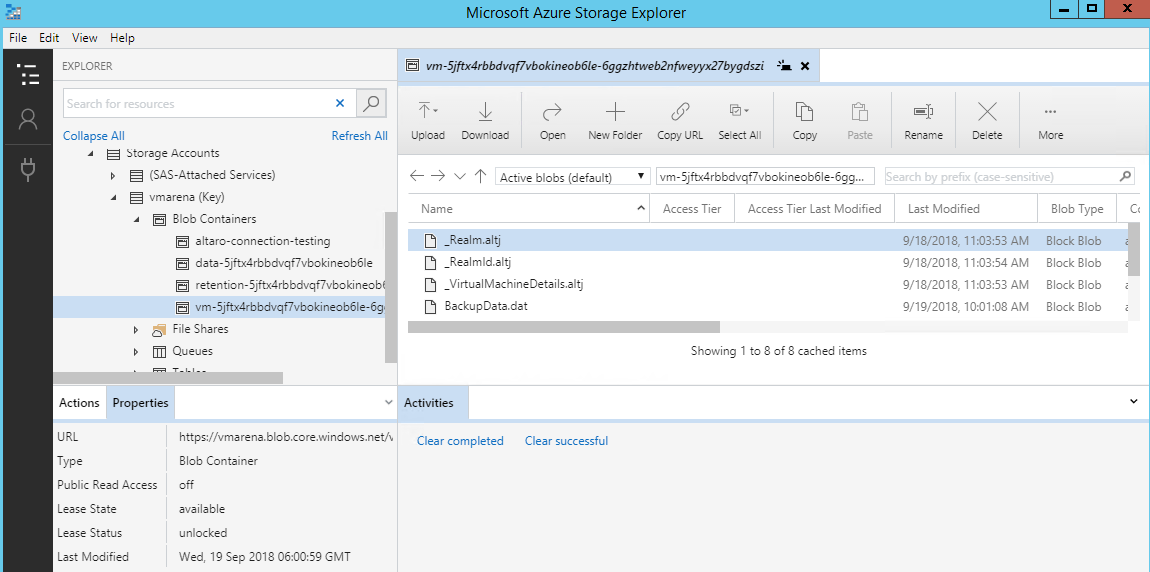
Now you have access to the Storage Account , you can explore storage account and view the Blob Containers .
Reference – Azure Storage Explorer
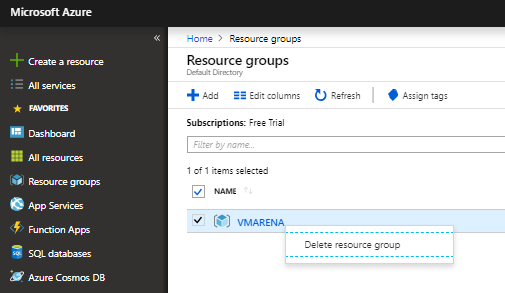
Remove a Resource Group
For more details on Azure Storage Refer – Introduction to Azure Storage