
We all are creating and using Virtual Machines is VMware or Hyper-V infrastructure , same way Virtual machines can be provisioned in the cloud . In the Cloud you don’t have any real control over the host operating system or hypervisor, and configuration must be done through the cloud portal . In this post I will be sharing the procedure how to deploy a Windows 2016 Standard Server in Microsoft Azure .

In Azure, you cannot specify the custom resources like CPU and Memory values for Virtual Machine. Azure is offering resource templates of Virtual Machine and you have choose correct size of VM is selected to deploy .This is very important in Azure since based on the template resource only you will get right performance for applications and pricing.
What s you need to create a Virtual Machine in Azure ?
In my previous post , I shared the procedure to how to create azure storage , and here we start with creation of Virtual Network , Network Security Group and Deploy 2016 Virtual Machine .
Creating the Virtual Network
Log into the Azure Portal and select “Create a Resource” – >click on Networking > Virtual Network
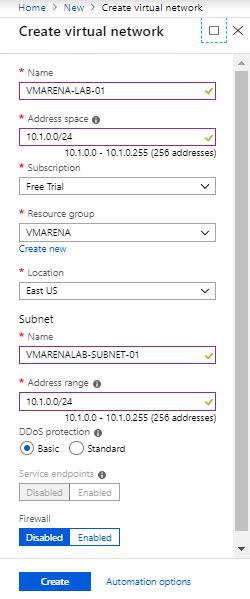
Specify the settings for Virtual Network as shown below image and Click on Create
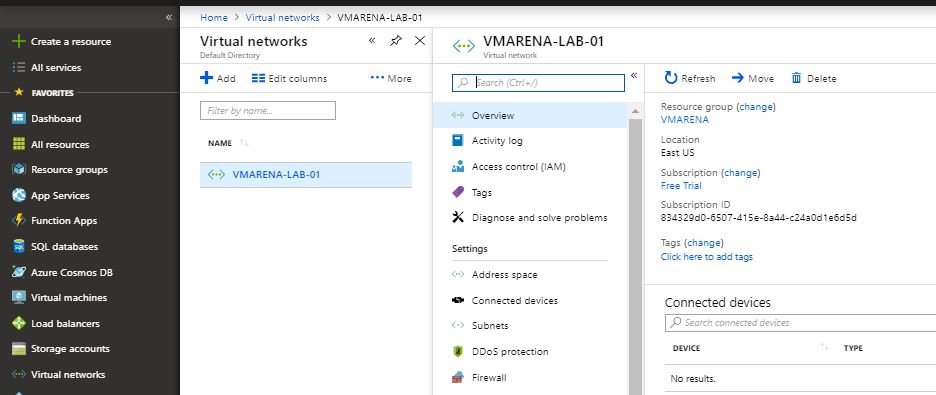
Navigate to Virtual Network we created and you can see all details .
Create Network Security Group (NSG)
Network security group is required to provide any access to virtual machine and it act like the firewall for the VM. It is required in order to provide any access to our VM, so it’s important we set this up before deploying virtual machine .
Navigate to All services -> Network Security Groups

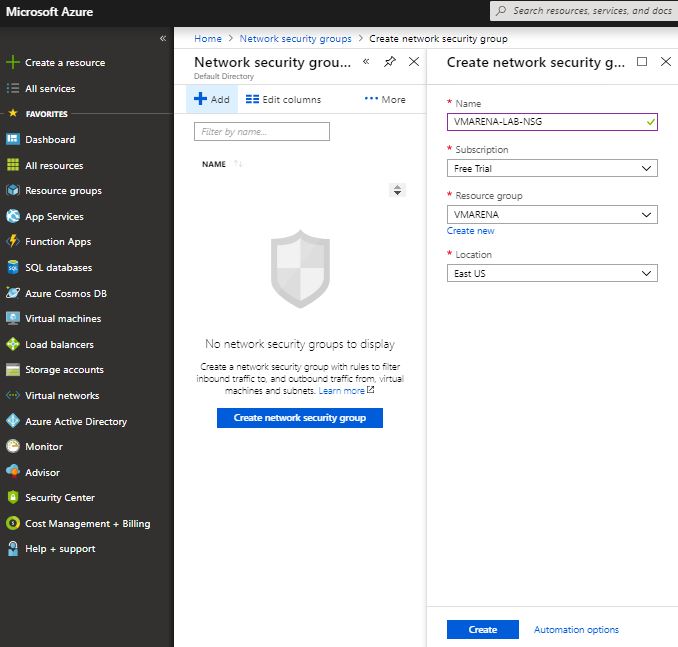
Click “+” Add option and add the Details as show below and click on Create
Once the deployment completed navigate to All Services -> Network Security Groups and you can see the newly created group
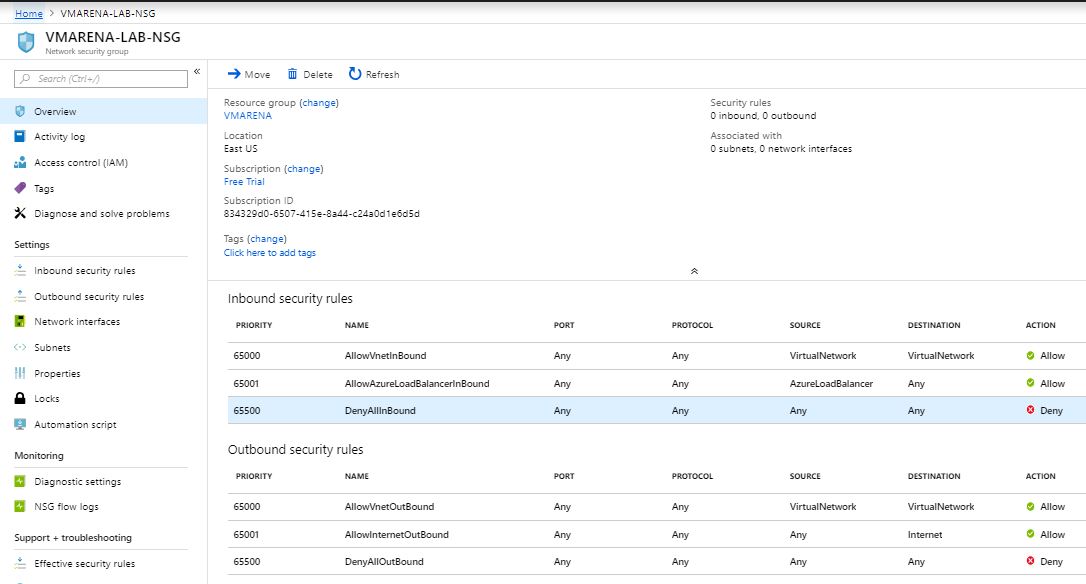
Click on the Created NSG and you can view all the configuration option associated with that
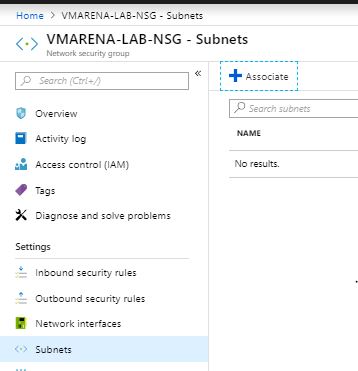
Now Click on the Subnets option
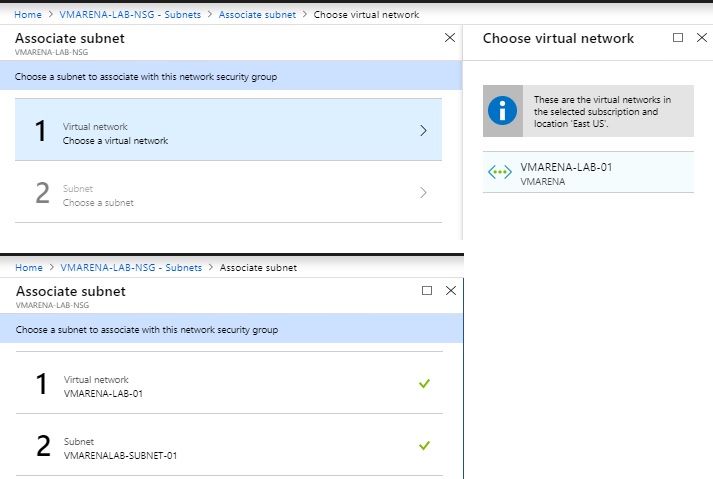
Click on Associate option to identify and the subnet’s and the virtual network
we can see the virtual network and subnet assigned to NSG , Cick Ok to configure
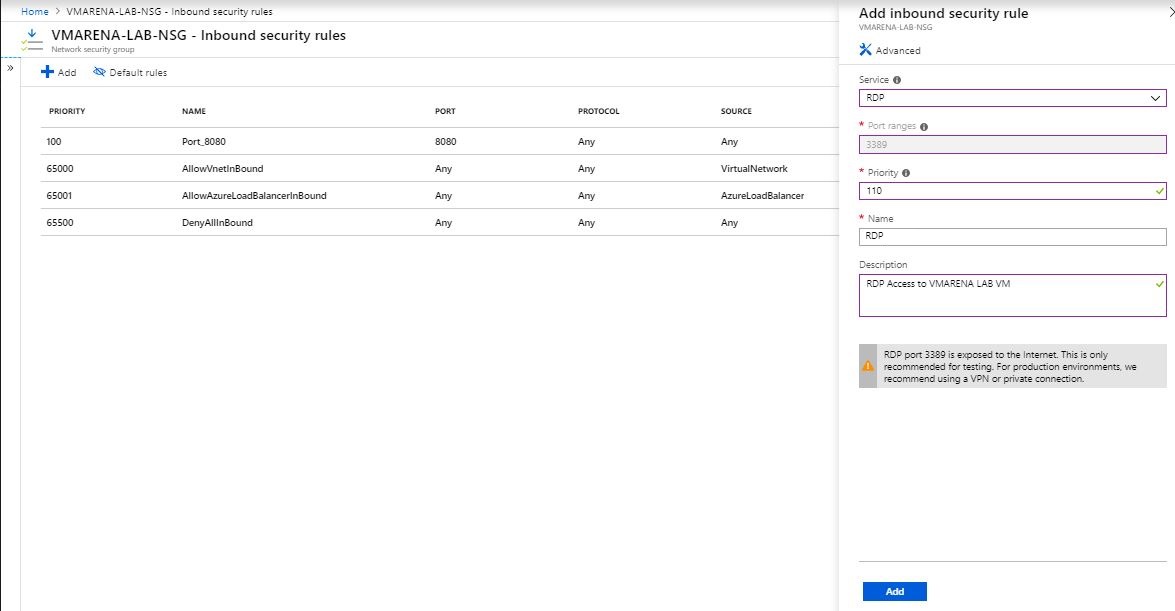
Next we have create rule to enable RDP access to the virtual machine we are going to create , here are allowing the access through internet , for production always use the VPN connection for more security
Select Inbound security rules from NSG we created select RDP services and give a name and description the click on Add
Deploy Virtual Machine
We have created Virtual Network and Network Security Group now its time to deploy the Virtual Machine.
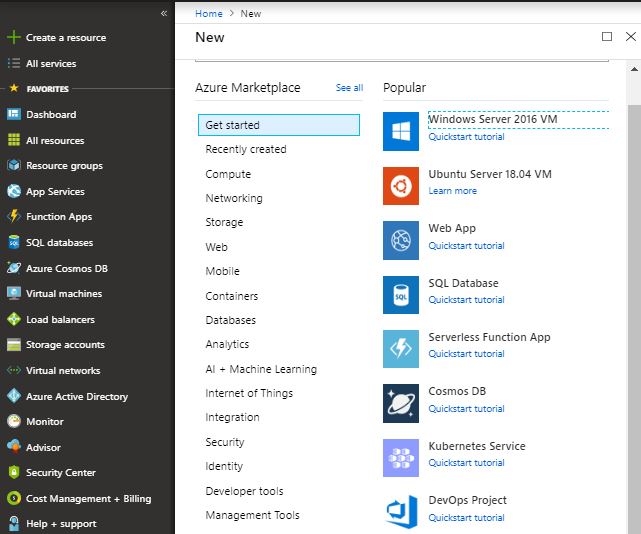
Clik on Create a resource on the left-hand side and select Windows Server 2016 VM
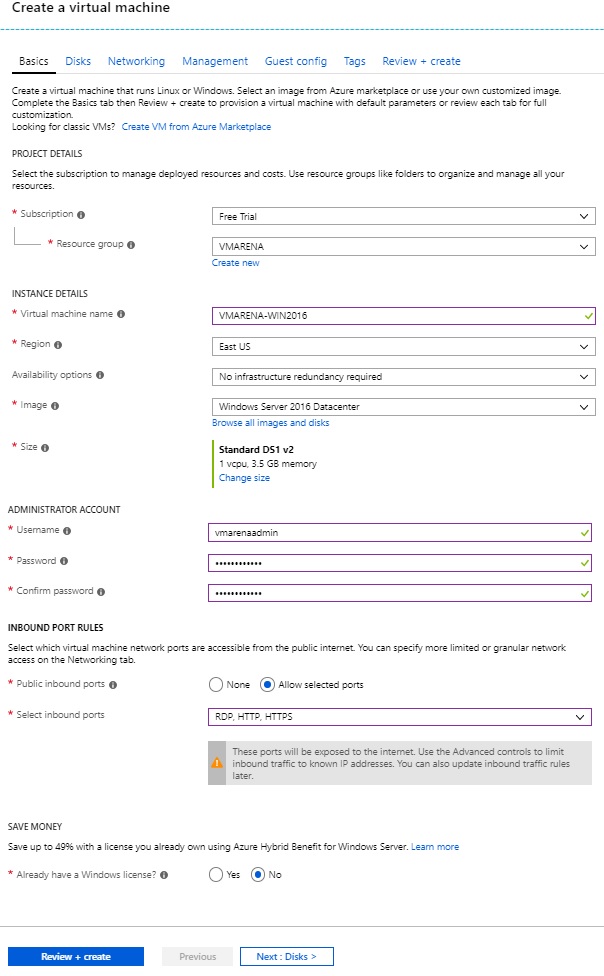
Fill all the require detaisl as shown below to configure our Virtual Machine.
Select the subscription , Resource group , VM Name , Region , if redundancy required select availability option, image of the VM here we choose 2016 Server , also you have option to create Windows 2012 or Linux machines . You also need to give a admin account with username and password and select the inbound rue created and appropriate licensing option for the virtual machine .
Note that *Size option is the one define the resources of the VM , you can choose based on your requirement
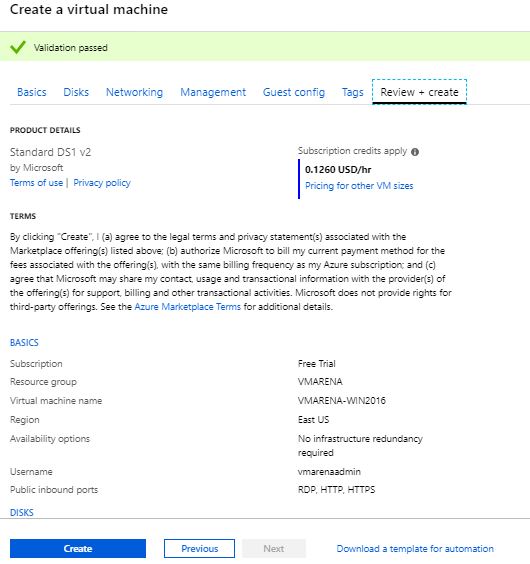
Click on Review + Create , also if you want manually select the resources by clicking next and follow screen option
You will get a validation passed message on the window and and you can review the pricing and configuration of the VM
Click on Create to start deploy the virtual Machine
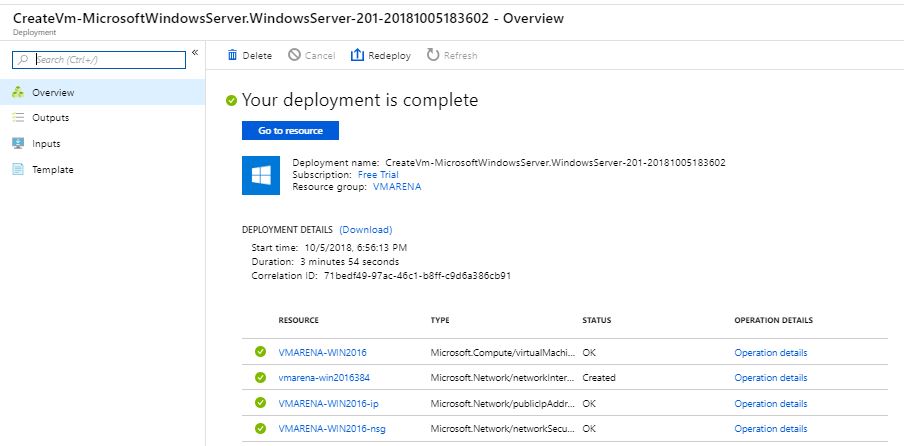
Finally we have created the windows 2016 virtual machine , now let check other options where you can see the VM , how start and verify the access .
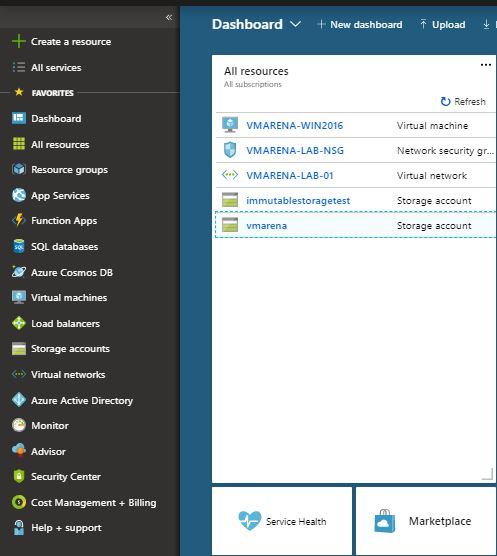
Navigate to the Dashboard and you can view all resources you have created , Click on the virtual Machine created , here it is VMARENA-WIN2016
You can view the VM details here , as shown below , Since the VM is running you access that using RDP
Select the RDP tab and click on Download RDP file

Open the downloaded RDP file , Select connect and input the credentials that we provided admin credentials while creating VM
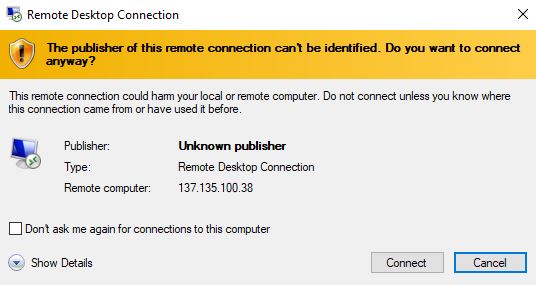
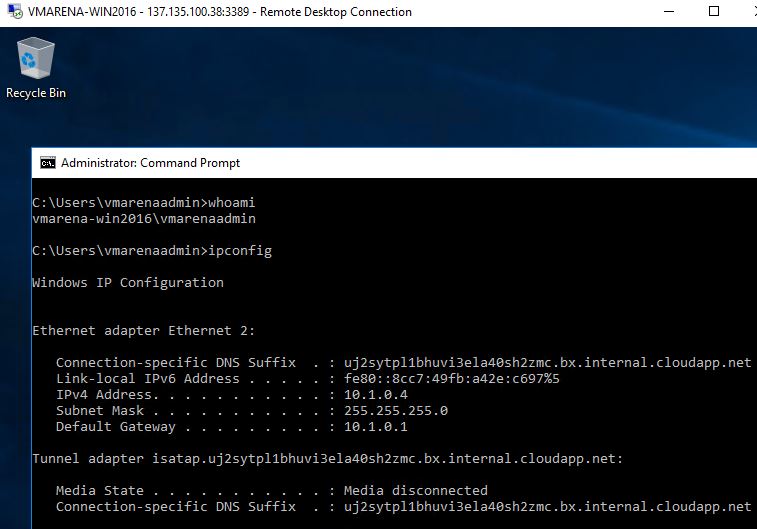
And you have accessed the VM created , lets verify some details from command prompt
Open command prompt and check the logged user , ip details etc
Important Note
In Azure everything is “pay as you go” , so if you don’t need the VM you have to completely remove that , If you don’t completely remove you can still get a charge. Just powering off the will not stop the meter from running because you are still reserving the hardware space from Microsoft . Also when you delete the VM, you are going to have to delete the managed disk as well separately .Cost is applied not only on the VM when it is running , all resources are part of that .
Conclusion
We have deployed a windows 2016 virtual machine from azure very quickly , it very fast when we compare to a virtual infrastructure.This is on the advantage of the cloud , it allows us to bring up VM very quickly and you can scale out on massive levels .