Virtual machines on AWS EC2 also called instances and it has many advantages. You can scale the instances with more resources like RAM, CPU etc. Also, you can start and stop easily and pay for what you use, AWS provide different platforms (operating systems ). In this post, we will explain how to launch a Windows-based virtual machine and other options available to launch instances / create VMs.
An Amazon Machine Image (AMI) provides the information required to launch an instance, which is a virtual server in the cloud. You must specify a source AMI when you launch an instance. You can launch multiple instances from a single AMI when you need multiple instances with the same configuration. You can use different AMIs to launch instances when you need instances with different configurations.
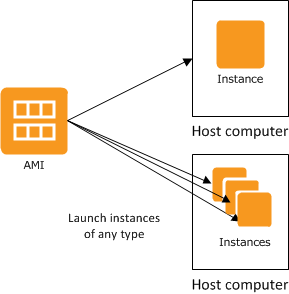
An Amazon Machine Image (AMI) is a master image for the creation of virtual servers (known as EC2 instances) in the Amazon Web Services (AWS) environment. Amazon Machine Image (AMI) provides the information required to launch an instance, which is a virtual server in the cloud. You must specify a source AMI when you launch an instance. You can launch multiple instances from a single AMI when you need multiple instances with the same configuration. You can use different AMIs to launch instances when you need instances with different configurations.
The machine images are like templates that are configured with an operating system and other software, which determine the user’s operating environment. AMI types are categorized according to the region, operating system, system architecture (32- or 64-bit), launch permissions and whether they are backed by Amazon EBS or backed by the instance store.
Each AMI includes a template for the root volume required for a particular type of instance; a typical example might contain an operating system, an application server, and applications. Permissions are controlled to constrain AMIs for instance launches to the appropriate AWS accounts. A block device mapping ensures that the correct volumes are attached to the launched instance.
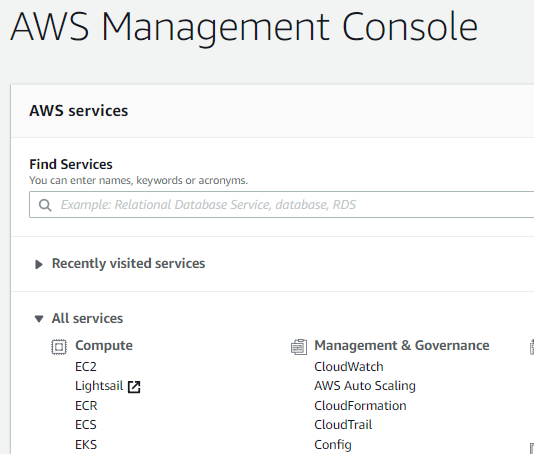
1. First, you have to log in to AWS console
2. On the Console Dashboard, click on EC2.
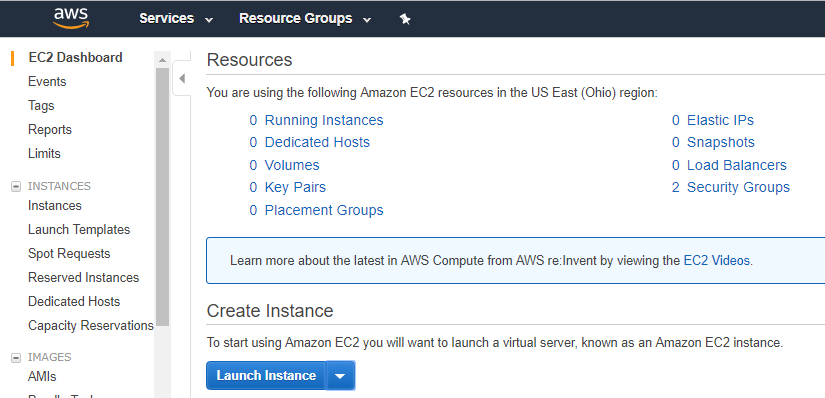
3. On the Amazon EC2 console, click on Launch Instance.
4. Click on the “Select” button in the row with the required operating system, here we choose Microsoft Windows Server 2016 Base.

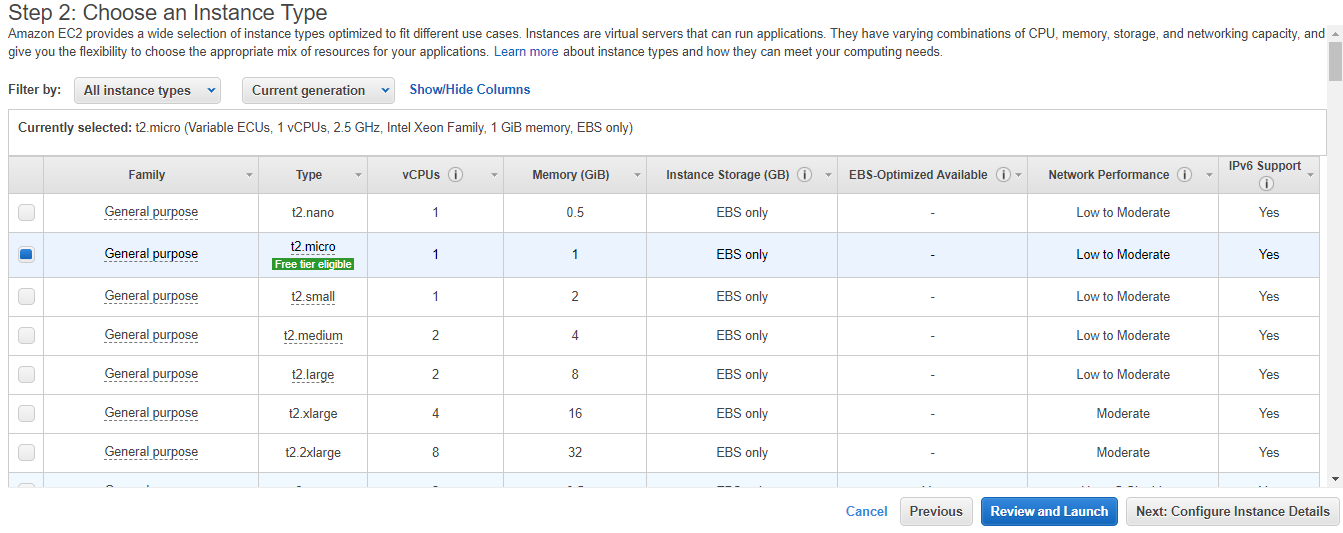
5. You can Choose the family and typer as per requirement, here we choose t2micro (free instance type) .
6. Click on “Review and Launch”
6. Click on Launch.
This is the easy method you can choose and launch the instance if you want to go through detailed options and select the resources and other configuration manually follow below steps
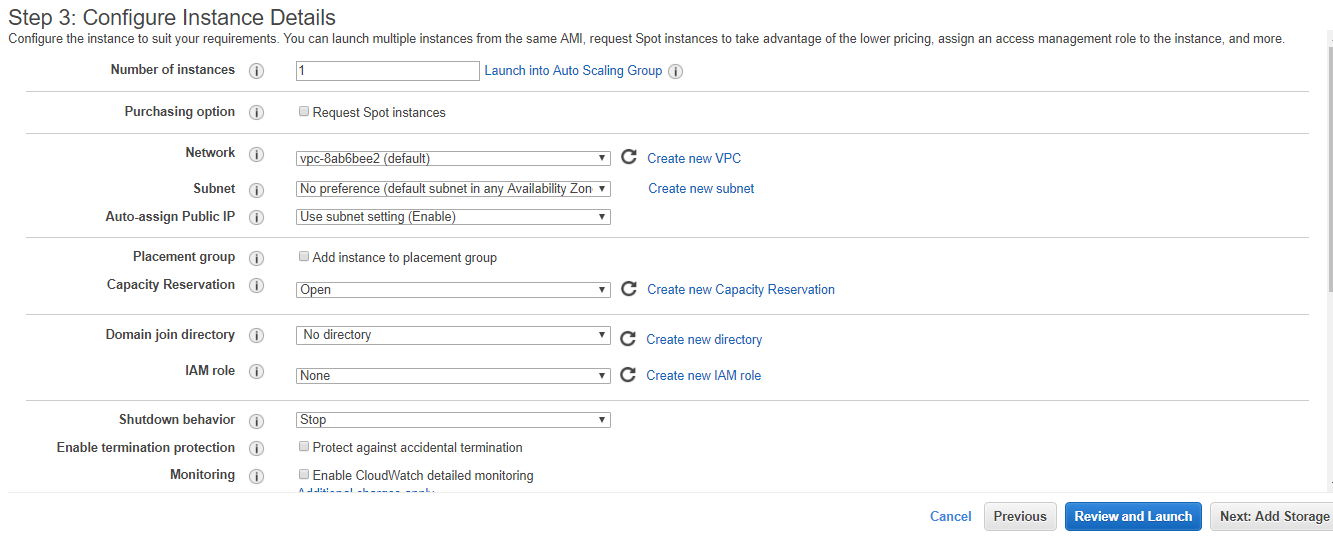
In Step 5 Choose the family and type as per requirement and click on Configure Instance Details and provide the instance details on the page and click Next: Add Storage
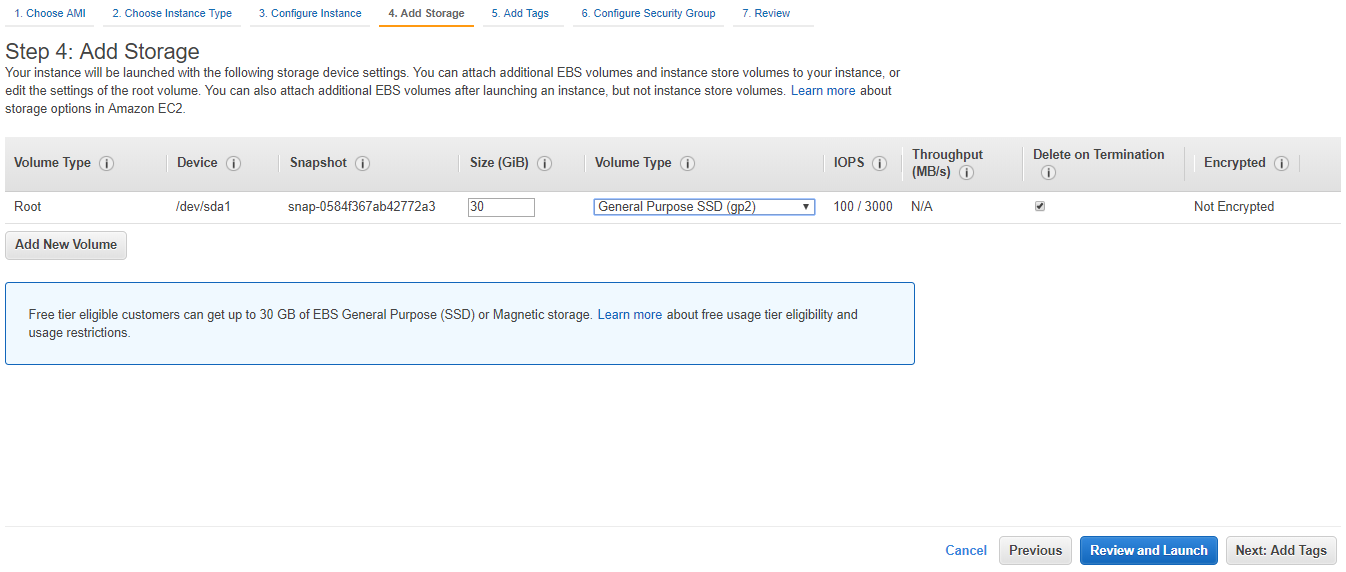
You can choose the tier and size of the storage and Clik on Next: Add Tags
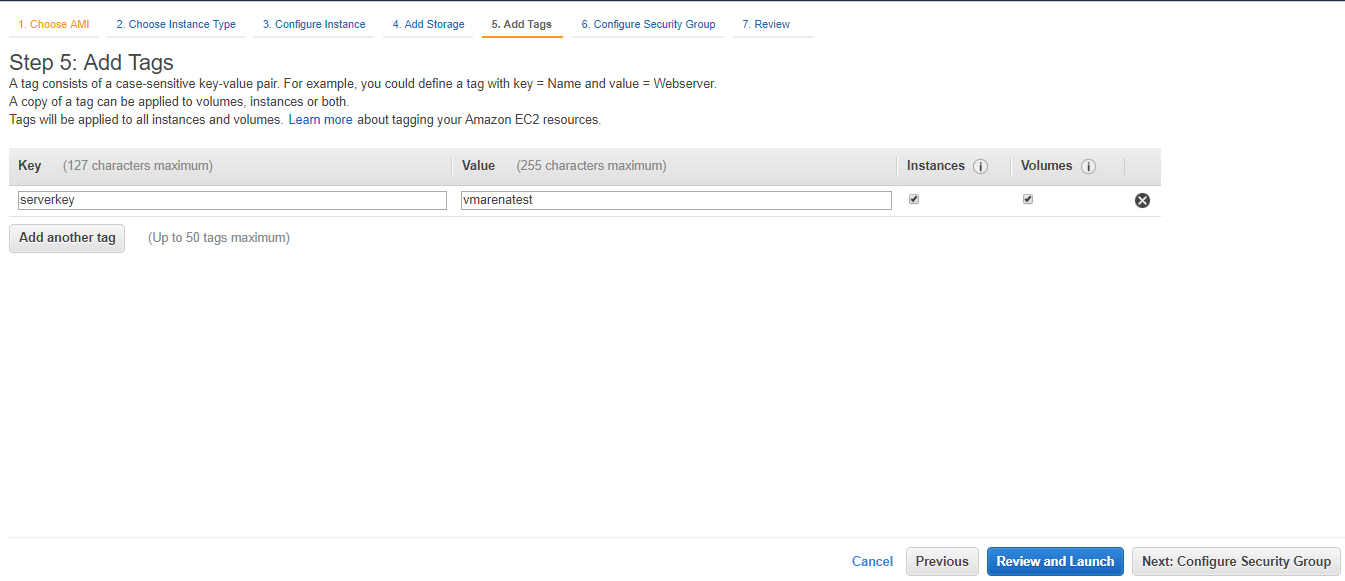
 Fill the required details for the Tags windows and Clik Next: Security Group
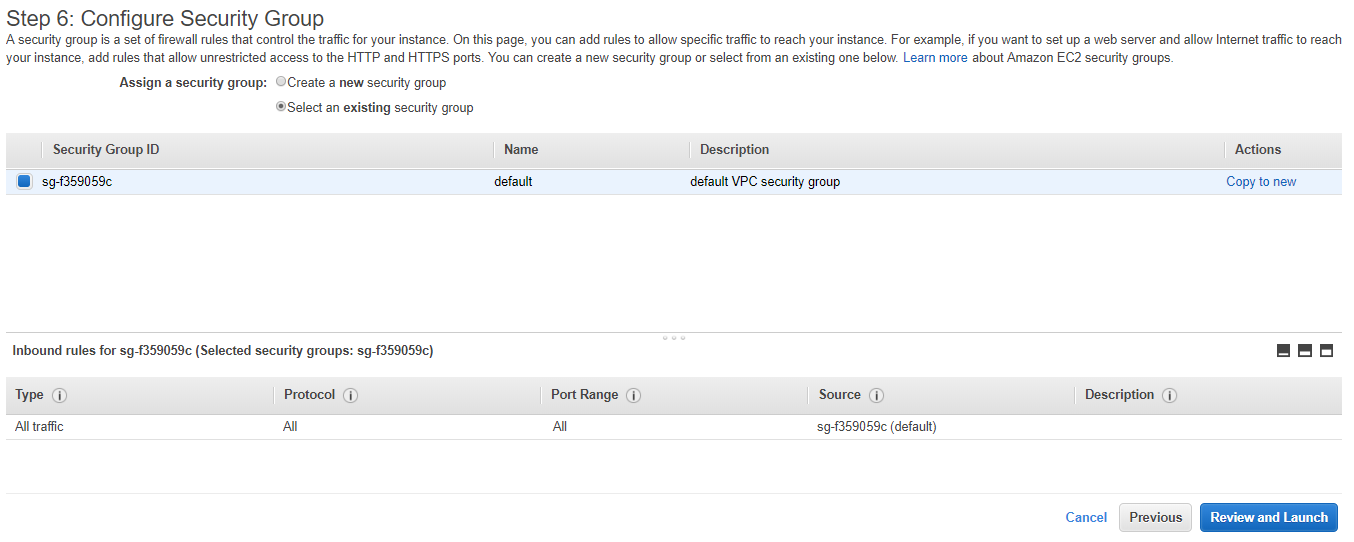
Next step is selecting the security group,, You may selct the defalt one or you can create seperate form this window / choose te one already created and Clik on on Review and Launch
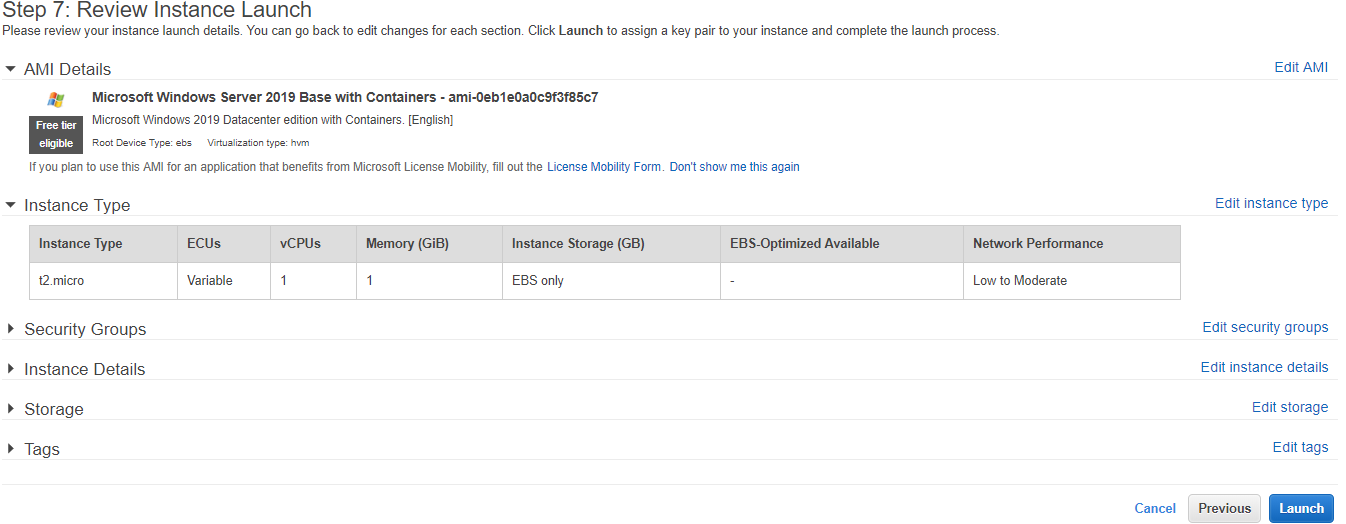
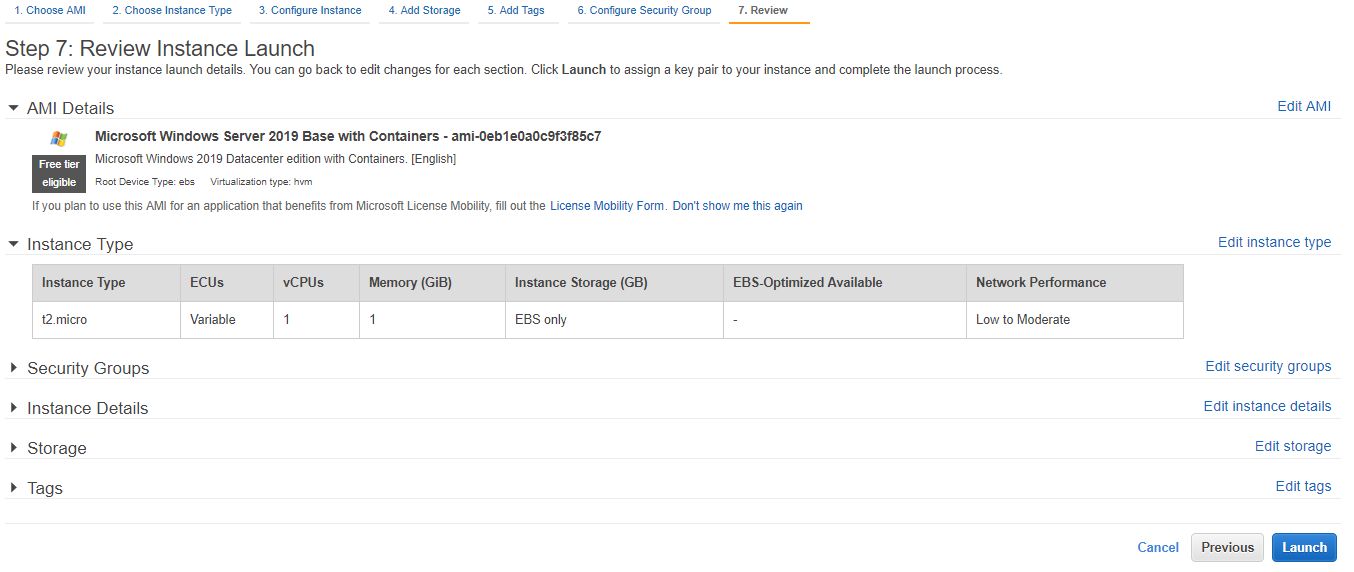
Review all configuration we selected and Click on Launch
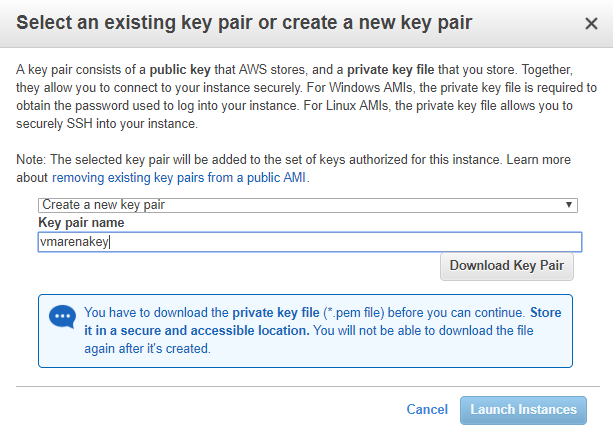
7. Next step is to configure the access to the VM, Select “Create a new key pair”. In the box below (“Key pair name”), fill in a key pair name with your required name and Click on “Download Key Pair” which downloads the key.
Note:- You have to keep the downloaded key in some safe place.
Next, click on “Launch Instances”

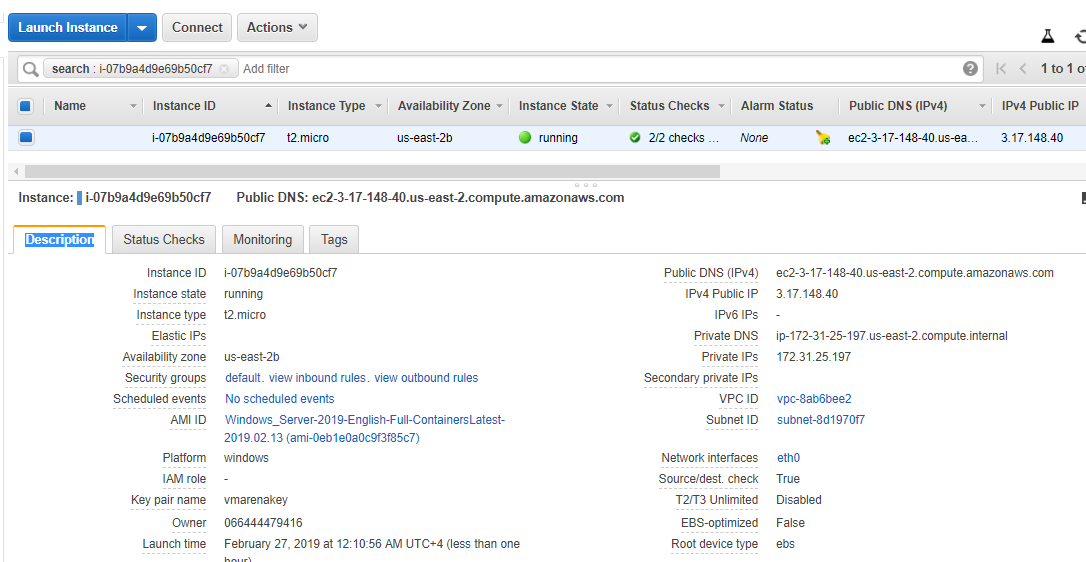
The instance is now launched, navigate to the Amazon EC2 console or you can click on the inatance (i-07b9a4d9e69b50cf7)to bring you back to the console.
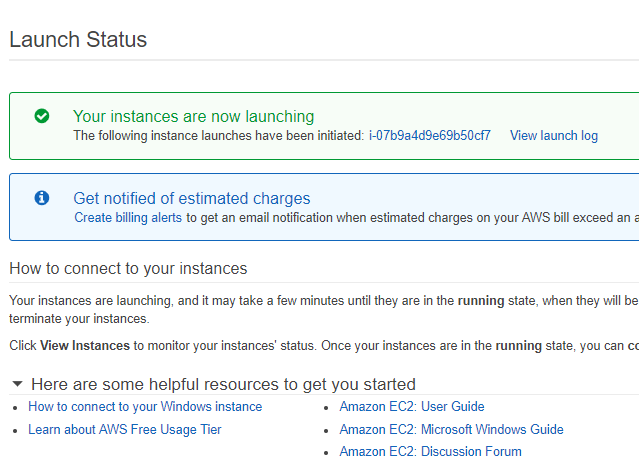
Wait till you see that “Instance State” is running before you proceed to the next step. This can take a few minutes.
Click on connect for connecting to Instance
Click on “Download Remote Desktop File” and Save the remote desktop file (rdp) file
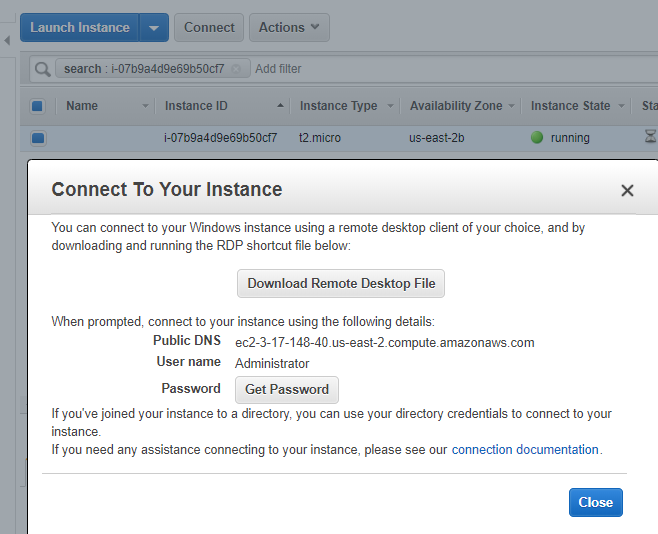
Click on “Get Password”.
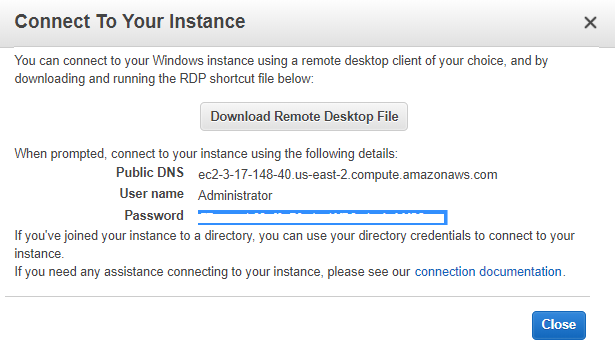
Choose the pem file you downloaded on previosu step (Pair key Step ) and then click “Decrypt Password”

Note:- At least wait 4 minutes after you launch an instance before trying to retrieve your password.
After you decrypt your password, save it somewhere safe now you can log into your instance.
Open your rdp file downloaded and Click on connect
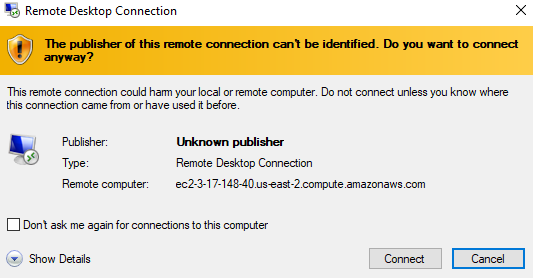
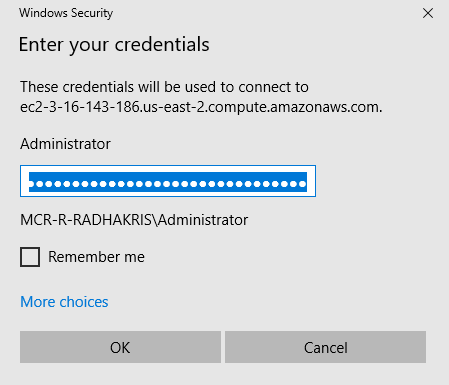
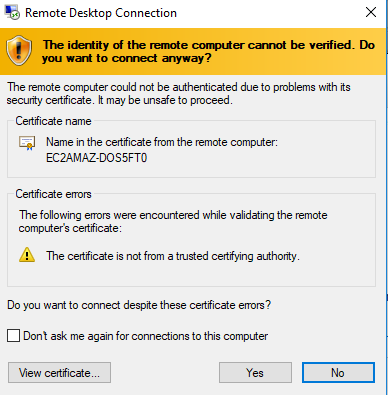
Enter your password you got on previous step and Click on Yes to connect to your VM
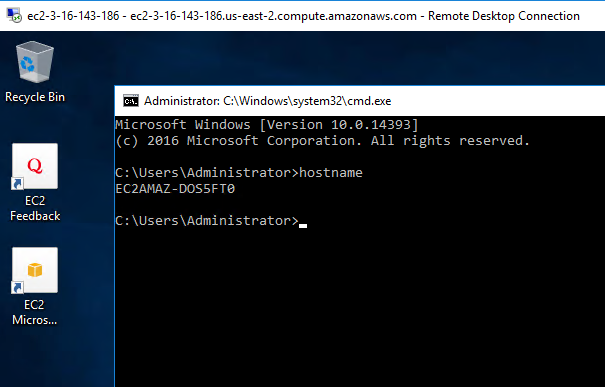
After RDP session is loaded you can check any commands in CMD to confirm the access
Conclusion
We have shared the information of AWS AMII and steps to follow to create VM in Amazon Web Service (AWS). After finishing use of an instance always it’s better to stop or terminate the instance if you are not using always to reduce the billing. In our post the instance created in the “free tier” and we have terminated after creation and will share you another post how to terminate the instance.