Connect Veeam to vCenter 6.5
In my lab environment, I have deployed a vCenter Server Appliance 6.5 (VCSA). The VCSA FQDN is admin.vsphere.lab.
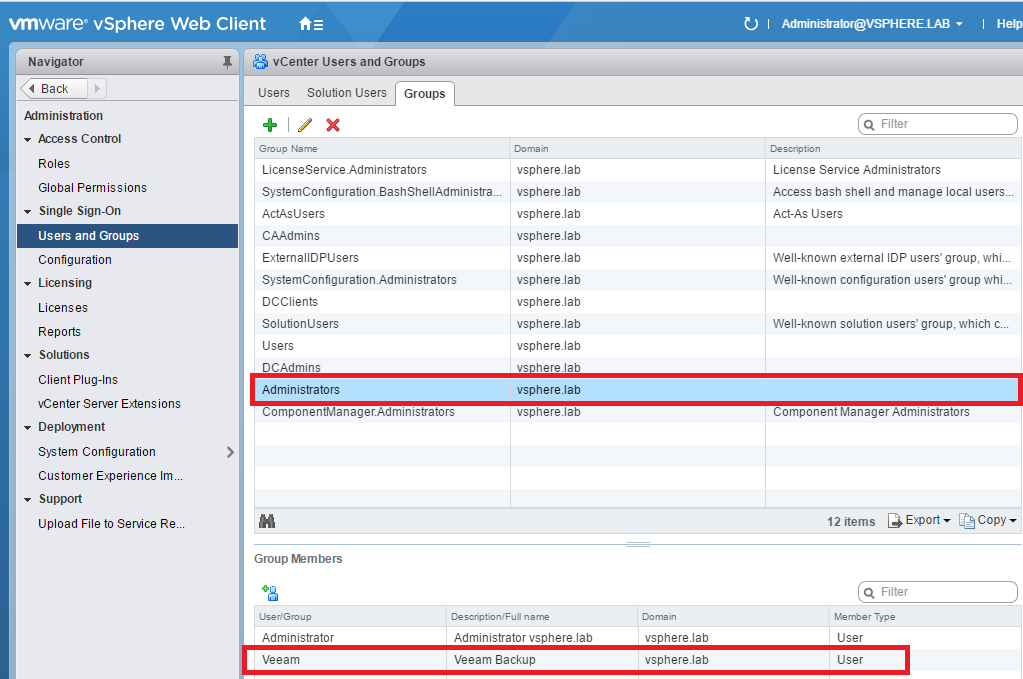
First, you need an administrator user to connect to vCenter from Veeam. From vCenter, add a new user as below. I have called mine Veeam.

Next, add this user to Administrators group.
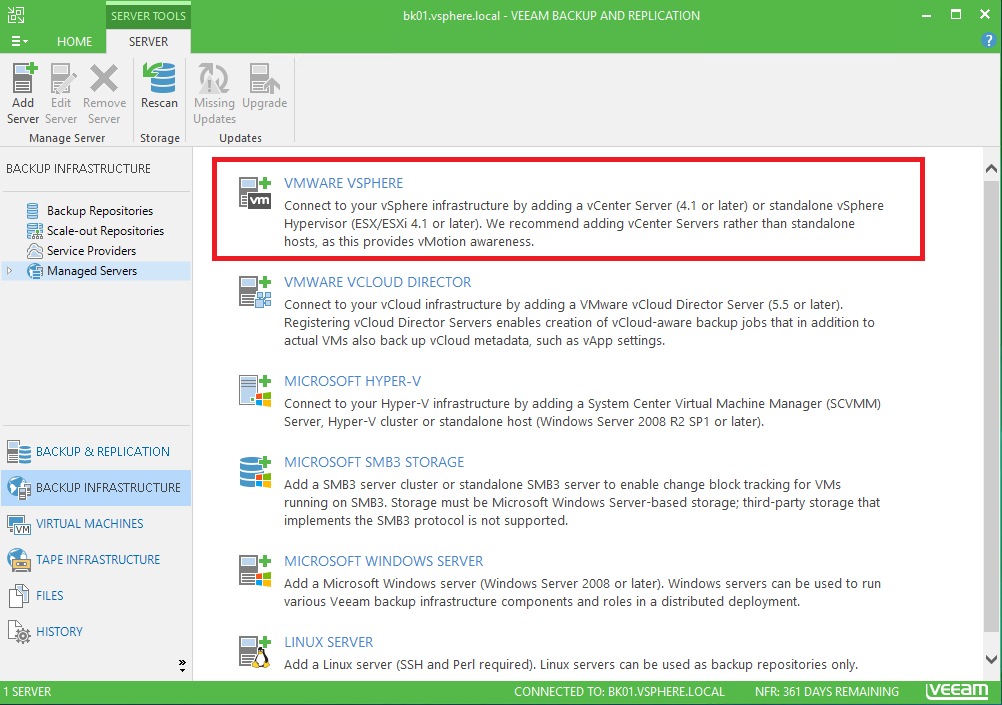
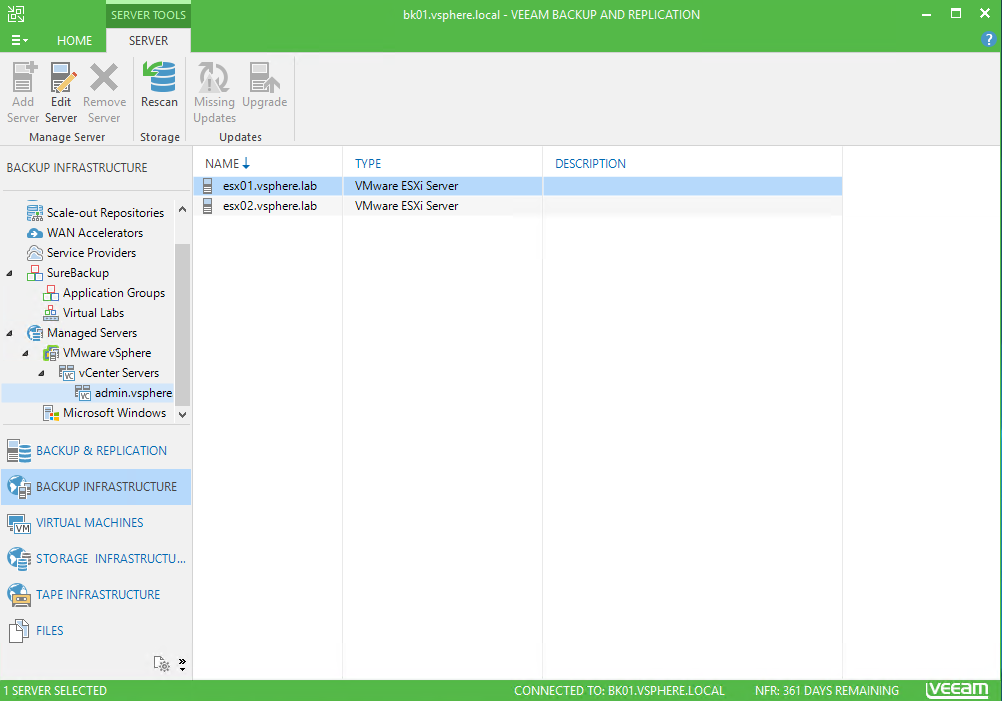
In Veeam, navigate to Backup Infrastructure and Managed Servers. Then click on VMware vSphere.
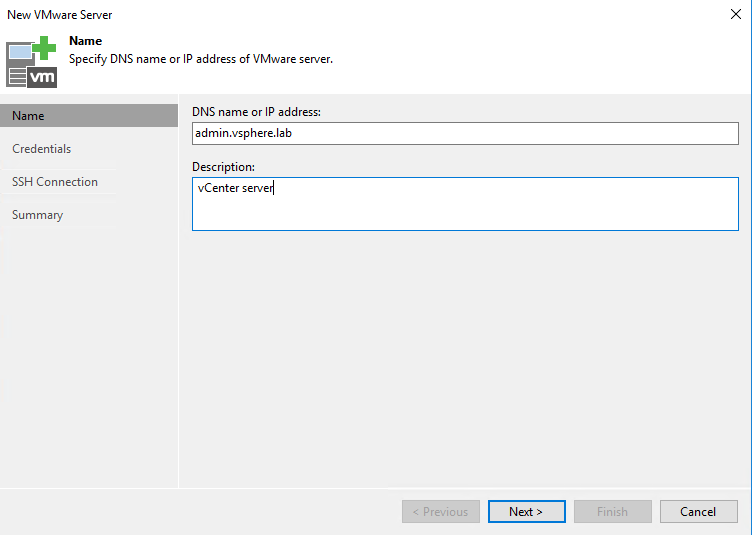
Next, specify the vCenter or ESXi IP address or DNS Name. For this example, I specify the vCenter FQDN.
In the next window, specify the credentials of the user that you have added in vCenter previously. To do so, click on Manage accounts and add.
Then select the credentials and click on next. A security warning is shown. Just click on Connect.

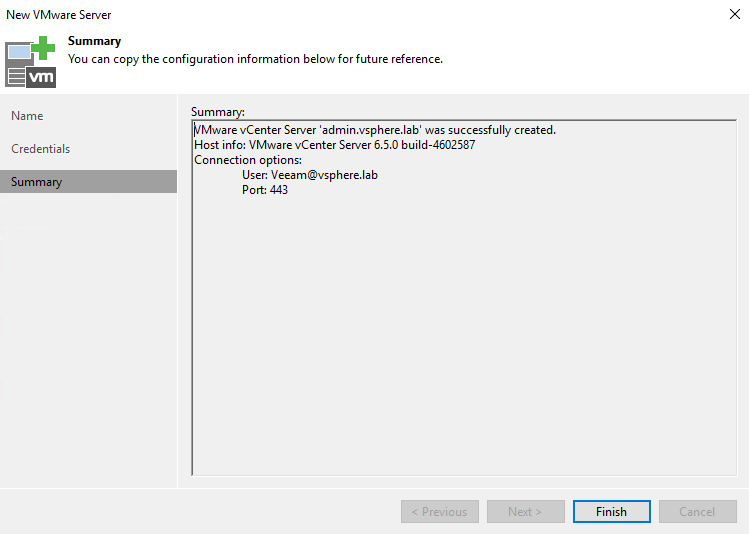
If all the settings are fine, just click on finish to connect the vCenter to Veeam.
Once the vCenter is added, you can navigate in managed servers to show all ESXi managed by the vCenter.
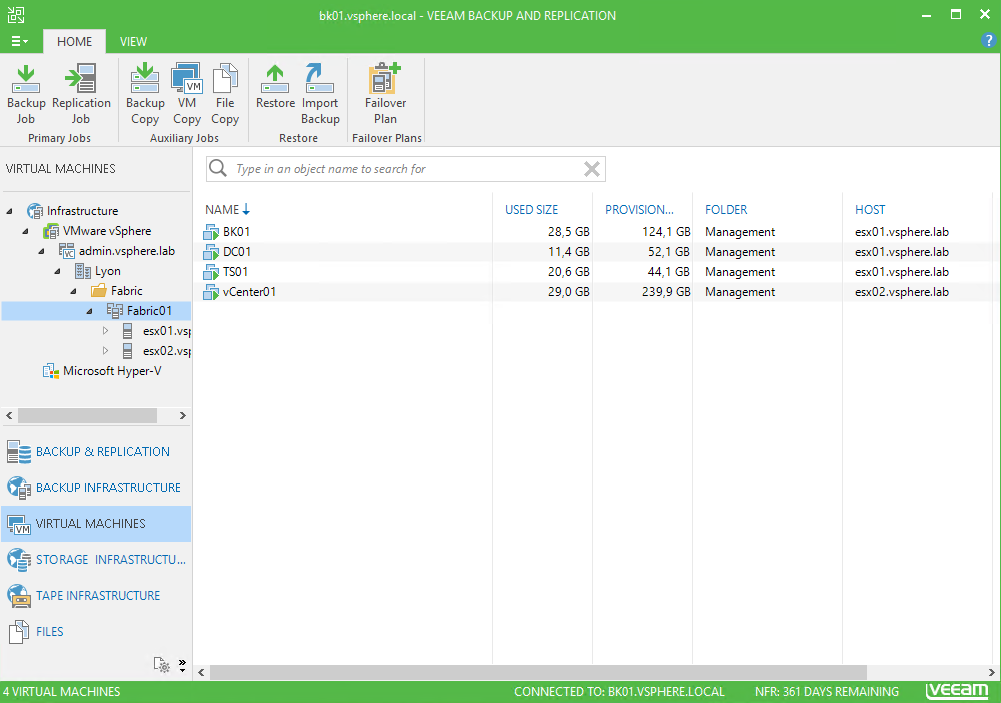
If you navigate in Virtual Machines, you can see all the VMs hosted in the cluster or ESXi host managed by vCenter.
Add a backup repository
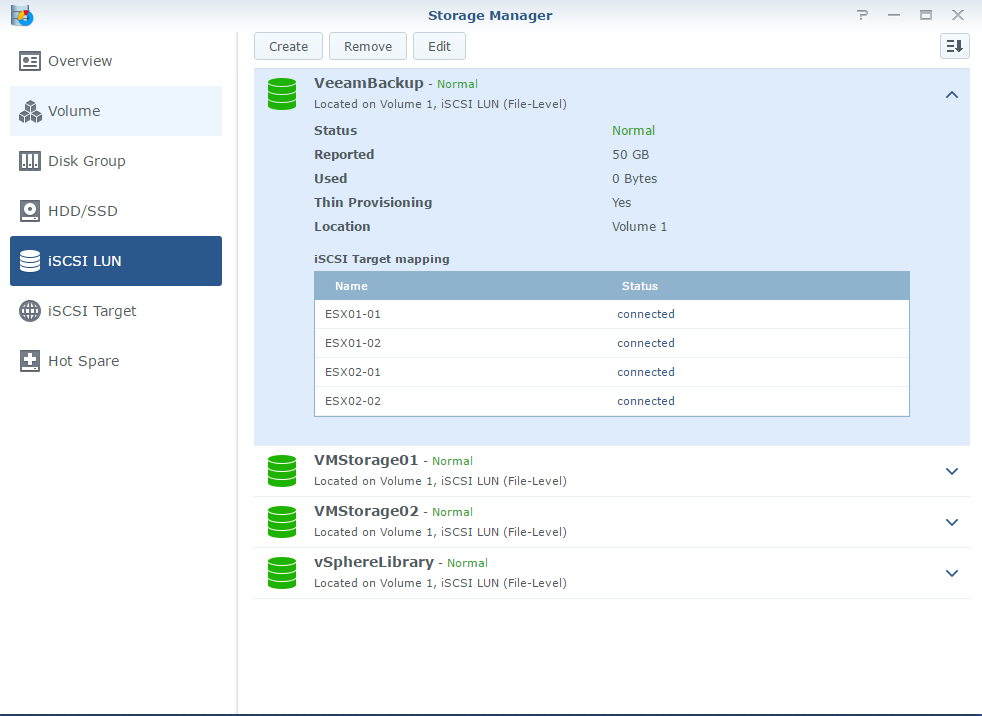
Now that vCenter is connected to Veeam, we can backup VM. But we need a backup repository to store the backup. First I create an LUN in the Synology NAS and I map this LUN to right iSCSI target.
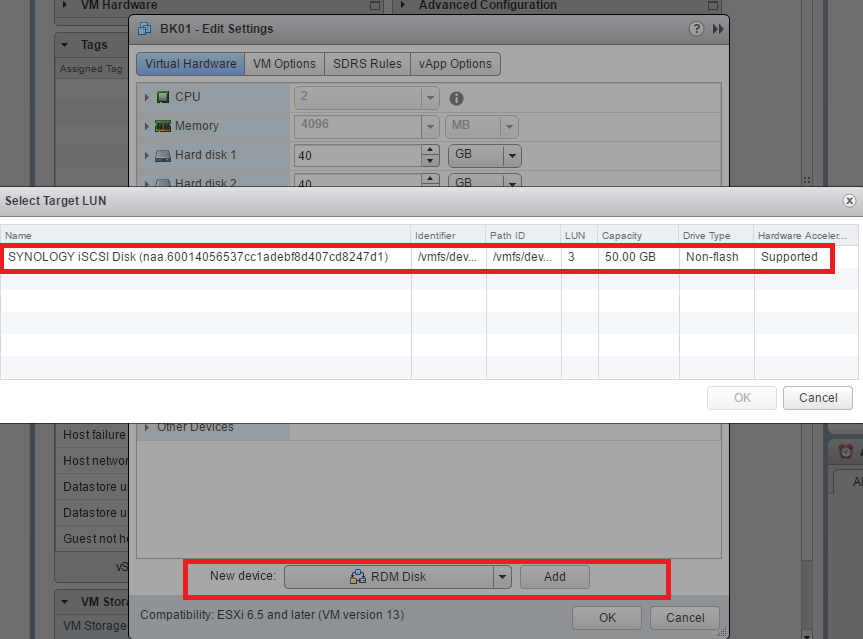
Then I add a RDM disk to the backup VM and I select the LUN.
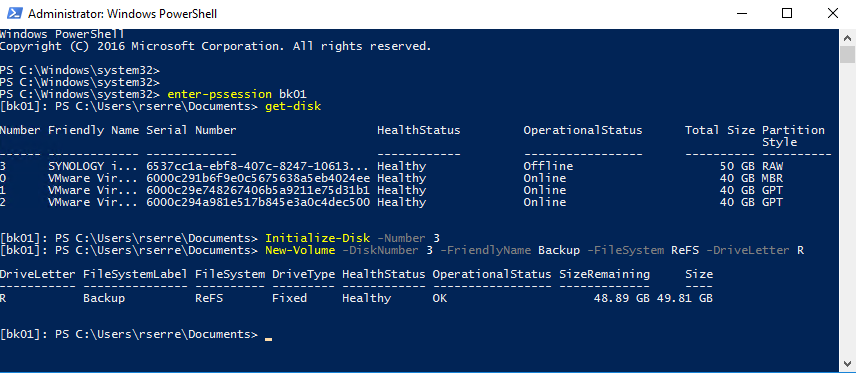
In the virtual machine, I initialize the disk and I create a new volume. I choose the ReFS file system and I map the volume to R:.
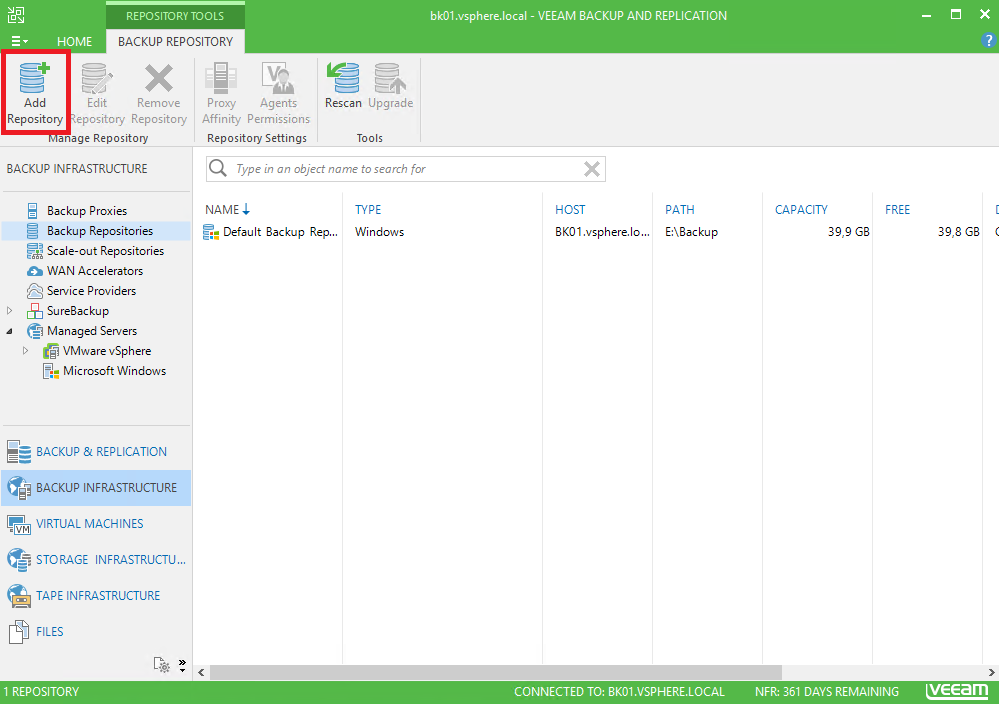
Next, I come back to Veeam and I navigate to Backup infrastructure. Then I click on Add Repository.
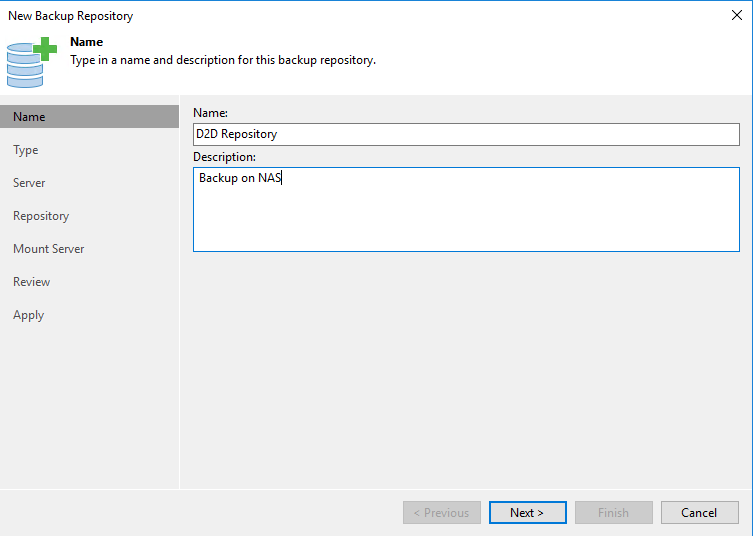
In the first screen, specify a name for the backup repository.
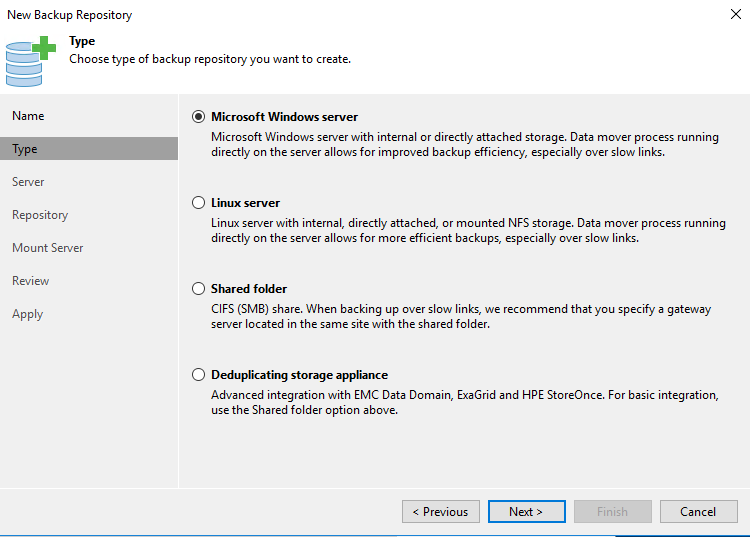
Next, choose the type of backup repository. Because I will store the backup on a local volume, I select Microsoft Windows Server.
Then I choose the repository server. I select the backup server itself but you can also choose a remote server.
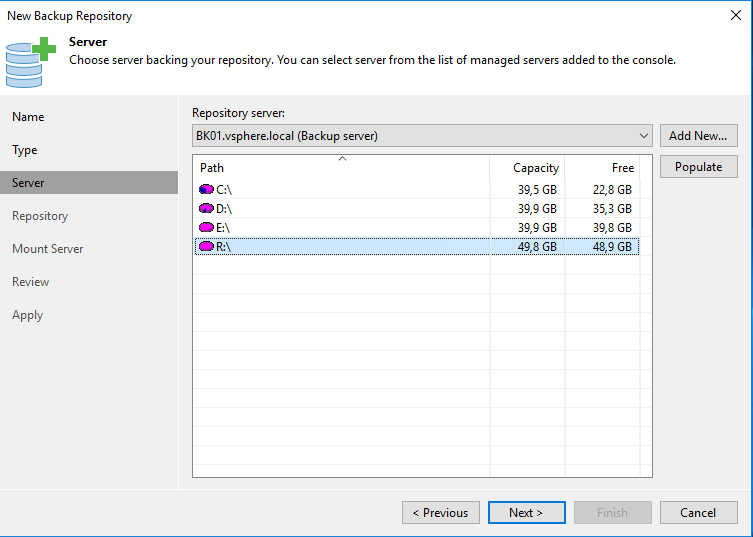
Next, specify the location of the backup. You can also limit the concurrent tasks and the read-write bandwidth.

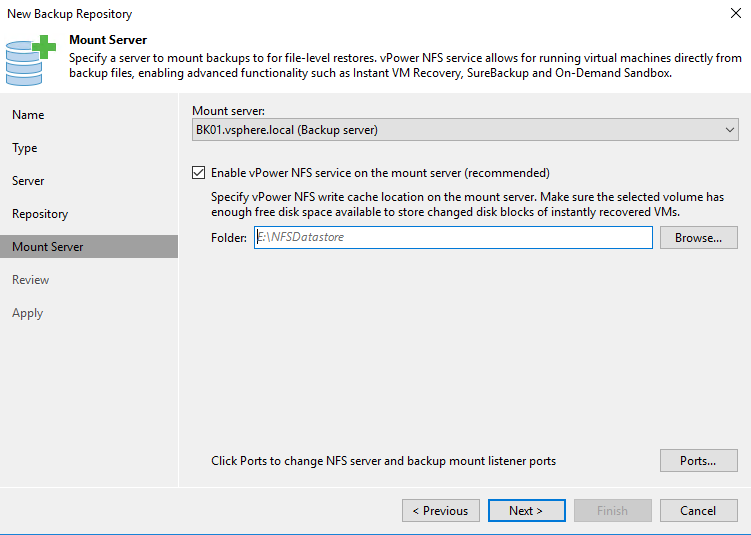
Next, choose the mount server and choose if you want to active vPower NFS service.
To finish, review the settings and click on Apply to add the backup repository. If you check Import existing backups automatically, all Veeam backups that exist in the repository will be imported in Veeam.
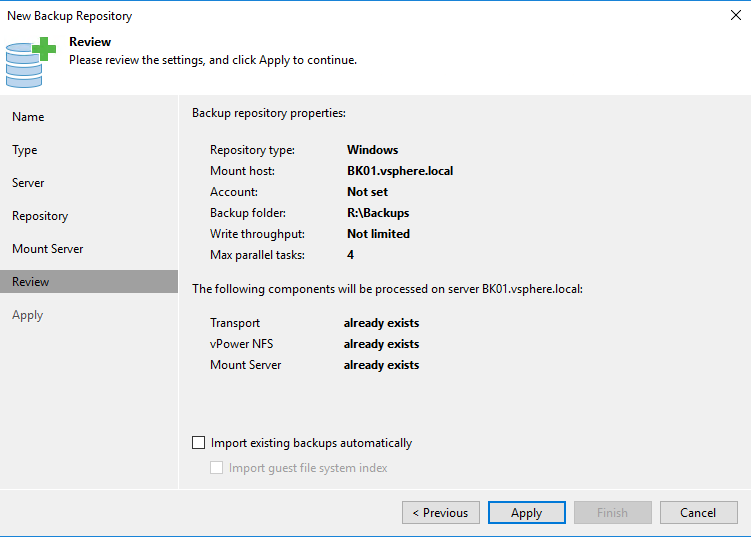
Once the repository is added, you can click on finish.

Once the repository is added, Veeam asks you if you want to change the location of the Veeam configuration backup files. I choose yes.

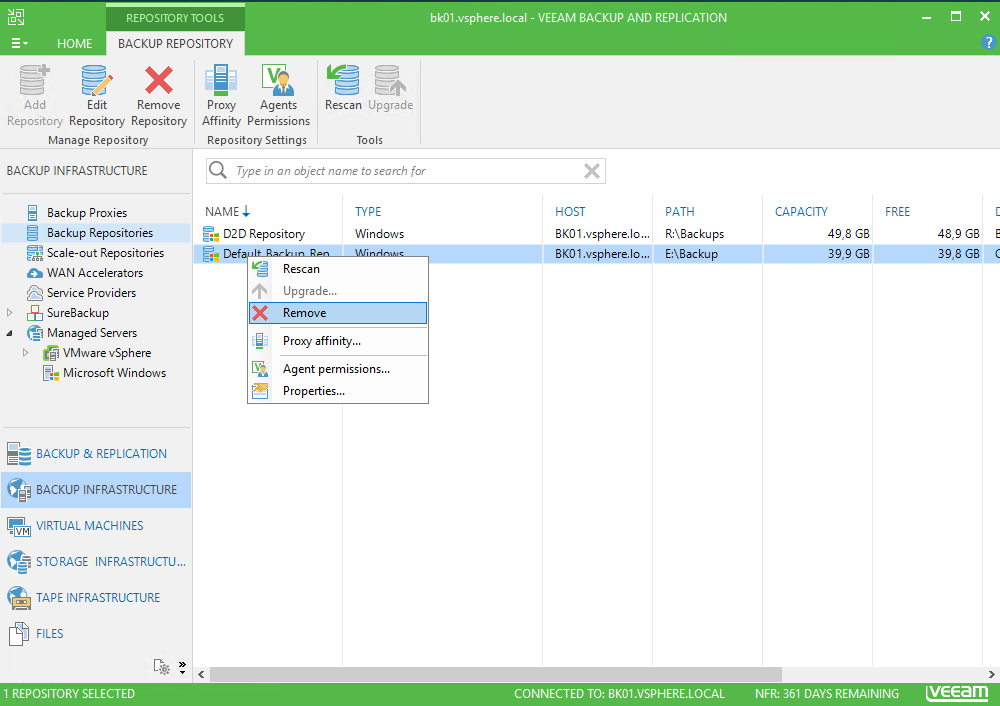
To finish, I remove the Default Backup Repository.