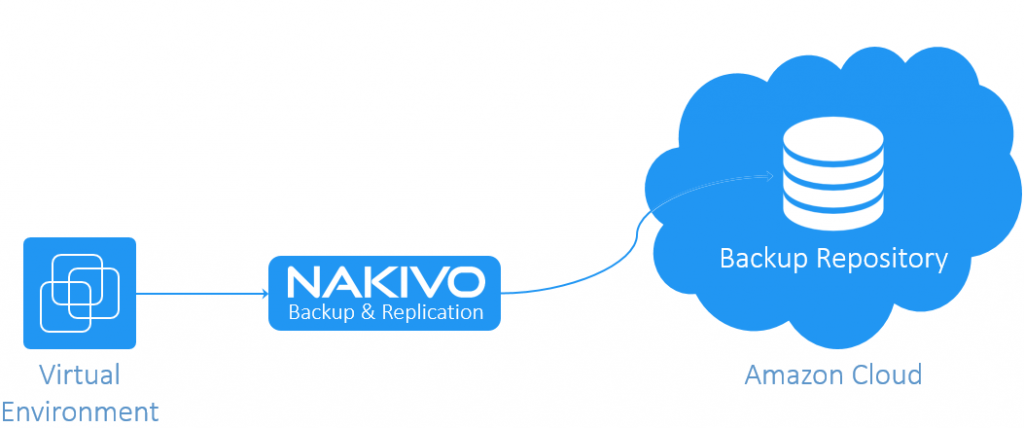
In my previous post, we shared about configure Nakivo Backup & Replication on Amazon S3 using Storage gateway. NAKIVO has another capacity to store backups to AWS (Amazon Web Services) Elastic Cloud Compute (EC2) environment. Using this feature, you can keep a copy of your critical backups to offsite and your data will be available in case of a local disaster.
In this post, we will share the procedure to configure Nakivo Backup & Replication to AWS EC2.
Prerequisites
- • Amazon Web Services Account
- A dedicated User is available in AWS IAM Console.
- Permissions for the dedicated user to access the EC2 Instance
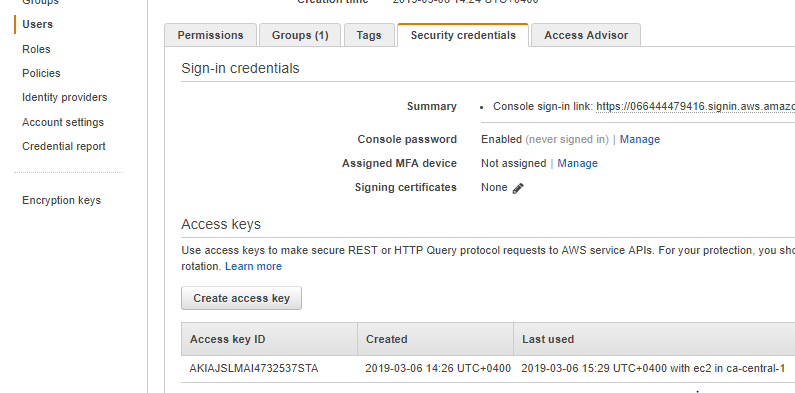
- Access keys to make secure REST or HTTP Query protocol requests to AWS service API
- NAKIVO Backup & Replication Setup with Access to AWS cloud
Procedure
- Configure the AWS Account in the NAKIVO Backup & Replication Inventory
- Add a new Transporter
- Add a new Repository.
- Configure the Backup Copy Job
AWS IAM
AWS Identity and Access Management (IAM) enables you to manage access to AWS services and resources securely. Using IAM, you can create and manage AWS users and groups, and use permissions to allow and deny their access to AWS resources. IAM is a feature of your AWS account offered at no additional charge.
Here we need to perform below from AWS console
- Create a dedicated user first

- Create a Group and assign the Users membership and attach the requested Policies to grant specific permissions to access the EC2 instance.

- Create an Access Key make secure REST or HTTP Query protocol requests to AWS service API
Configure Nakivo BR for AWS EC2
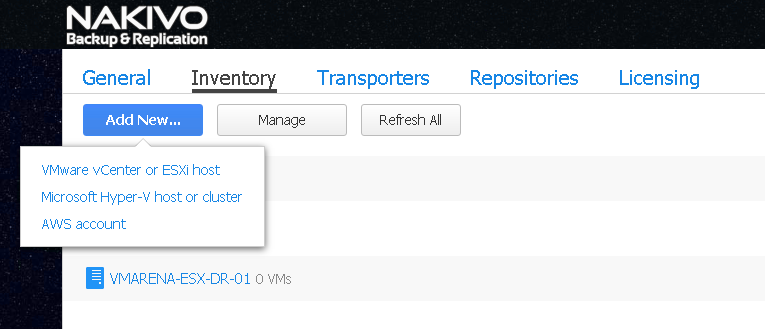
As mentioned above we have to add the AWS account to Inventory.
- Login to the Nakivo web console and navigate to on Configuration -> Inventory
- Click Add New button then select AWS Account.
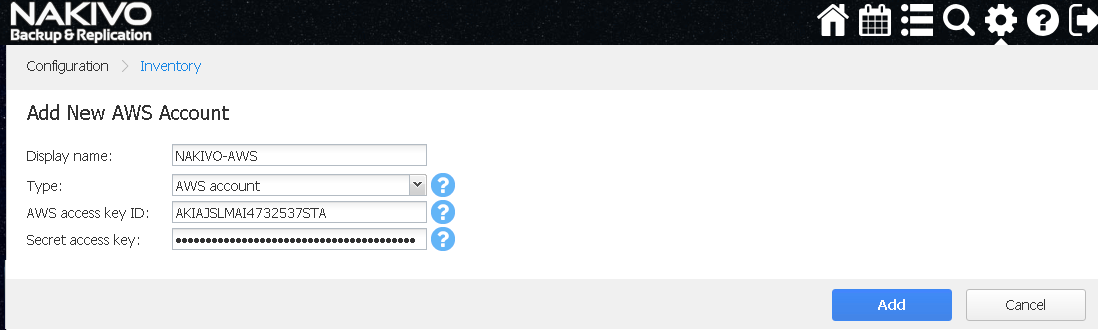
- Provide a Display name and select Type as AWS account from the drop-down menu.
- Enter the AWS Access Key ID and the Secret access key you have created for the dedicated user and Click on Add
- New Inventory will be added to Nakivo in a minute or less
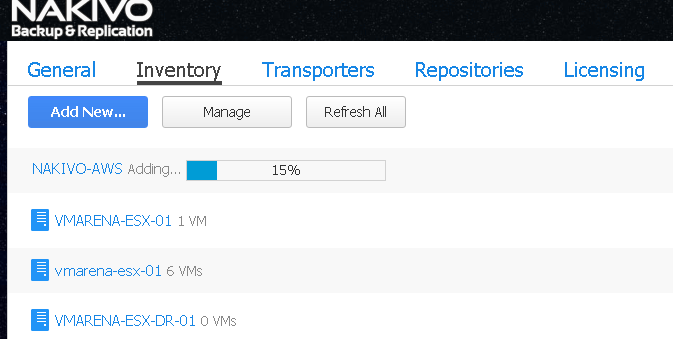
- Once the AWS Inventory has been added you can view in the console as shown below, you can click on the inventory to list the available Regions are displayed.
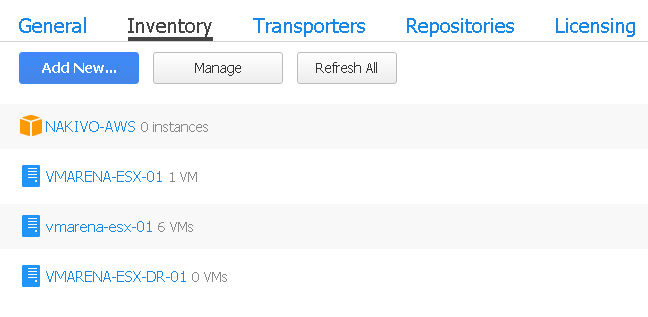
As you can see there is no instance available and the next step is to create a New Transporter
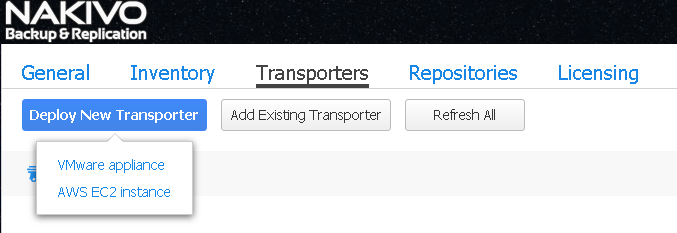
- From the same window Select the Transporters and click on Add Transporter button.
- Select Deploy New transporter (AWS EC2) option.
- Provide a Transporter Name, select the Region on which you want to deploy the transporter and specify the Instance type. Leave Automatically configure VPC for this transporter option enabled and click Deploy to start the deployment.
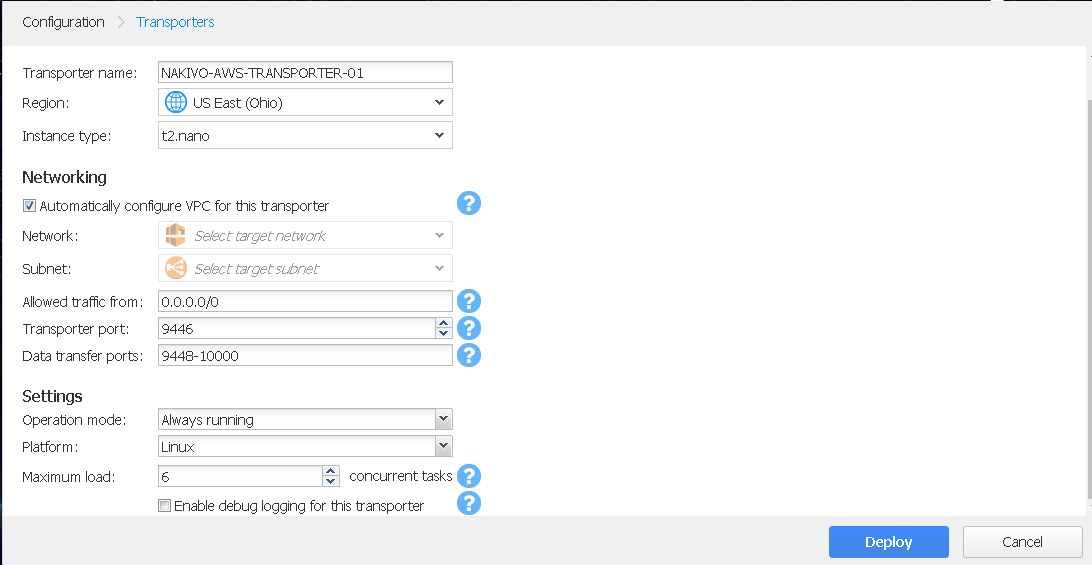
- You can view that the new AWS transporter is being added to the system.
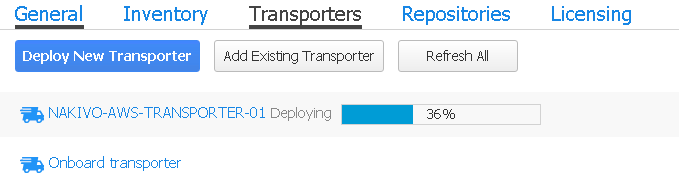
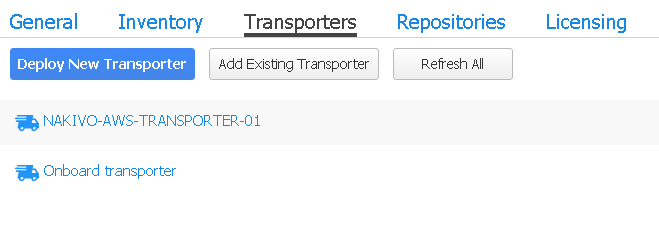
- Once transporter has been deployed successfully it will list in the Transportes, You may click on the transporter to view the details
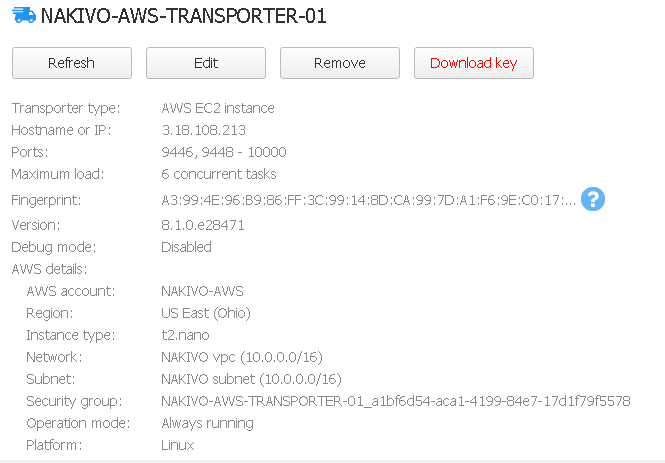
Note:- Since you have selected automatically create VPC, you can check in the AWS console whether VPC created or not and you will find same as below image.

Next step is to configure the Backup Repository
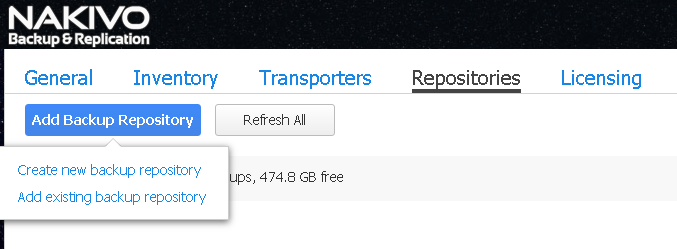
- From same windows Select Repositories tab and click Add Backup Repository button.
- Click on Create new backup repository option.
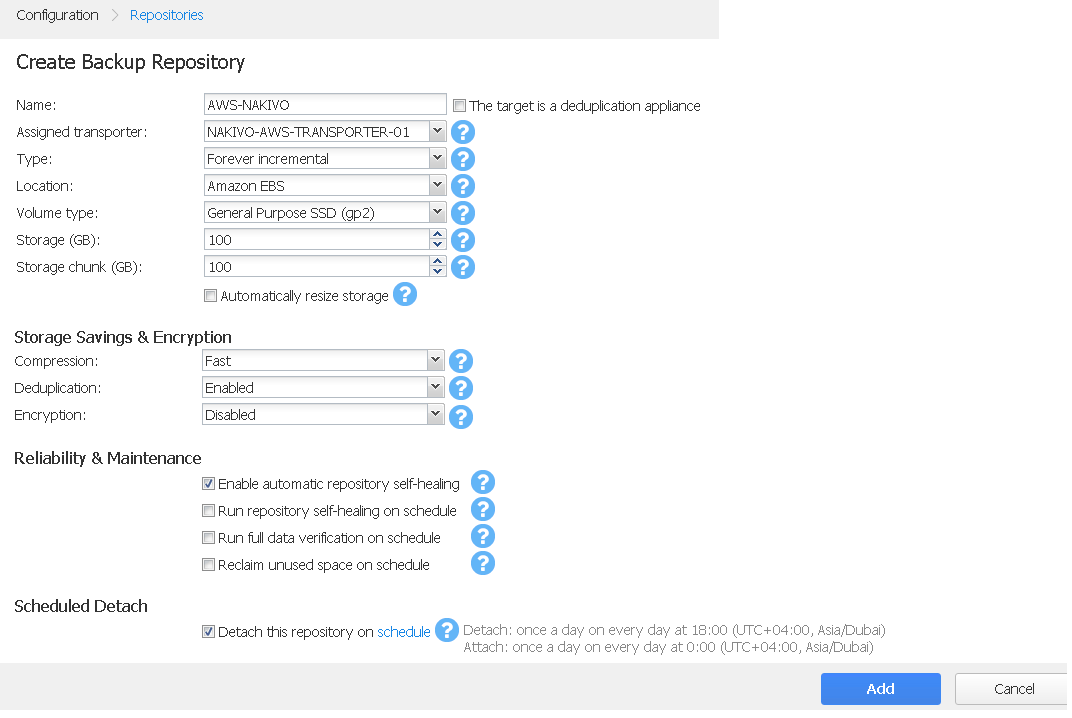
- Provide a Name, select the Assigned Transporter as you created newly from the drop-down menu and Location Amazon EBS
- You may choose the Type as Forever incremental / Full and Incremental from the drop-down list
- Click on Add button
- You may select the schedule to Detach option to schedule detach and attach the repository and it’s optional
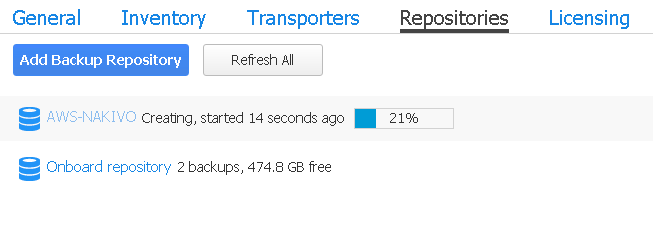
- The new repository is being added to Nakivo BR
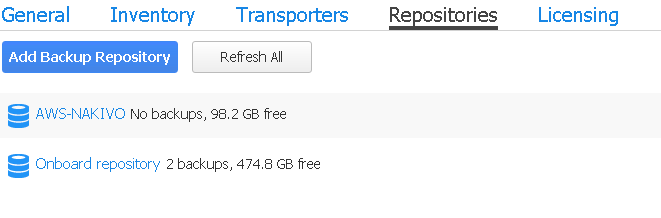
- The new backup repository has been created successfully, you may click on the Repository to view the details such its created as Location Amzon EBS

Now We can create backup job and Schedule or manually run as per requirement to keep an offsite copy to AWS to save the data in case of a disaster in your enevirionment.
Create a Backup Job
We can create this backup job for offsite purpose and this backup repository as a secondary one in Amazon cloud. Backing up data are transferred via AES 256 encrypted link to AWS and it has great security for the data integrity.
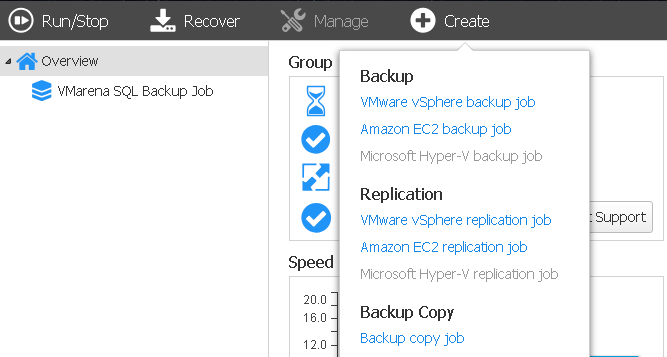
- Navigate to Create option from Dashboard and select Backup copy job option.
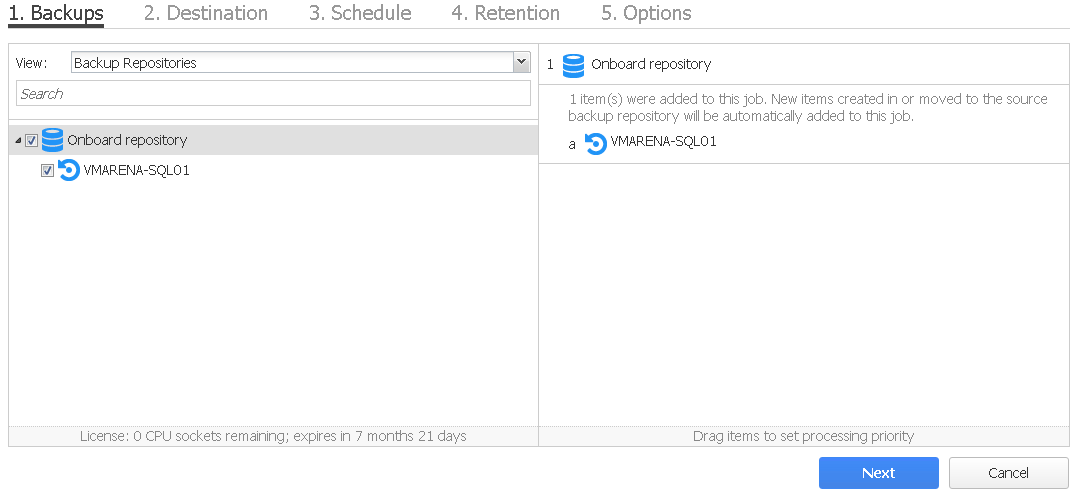
- Select the source backup click Next.
- Select AWS Backup repository you have configured on the previous step and click Next.

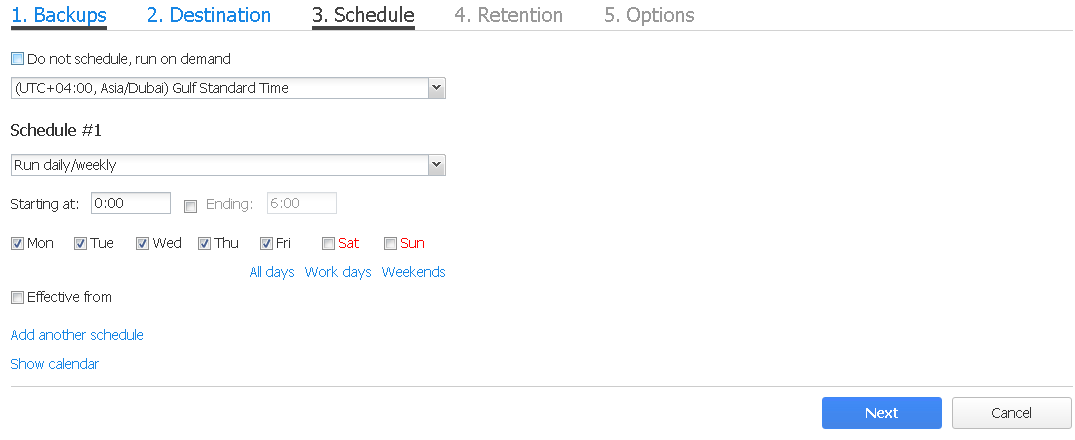
- Now you can Specify a Schedule or Run on demand option for manual operation and click Next
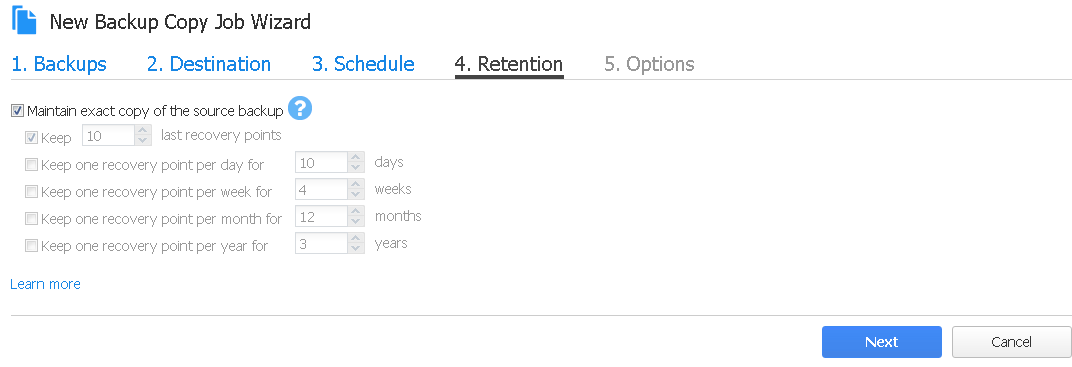
- Select the required Recovery points retention and click next
Provide a Job Name and configure the required options and click on Finish / FInish & Run

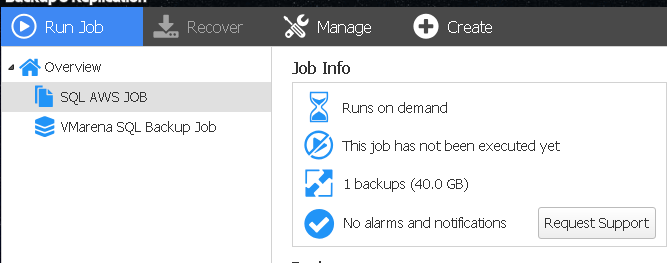
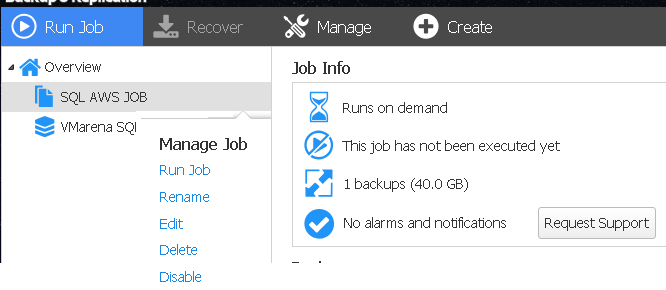
- Navigate to Run Job from Dashboard you can view the newly configured Job
- You can right-click the backup copy job select Run Job.
Download the Full-Featured Free Trial
Fast, reliable, and affordable data protection solution for VMware, Hyper-V, and AWS EC2
![]()
Conclusion
We have successfully configured the AWS account and backup job on NAKIVO Backup & Replication to AWS EC2, You can follow the steps shared in this post to keep your data safe in AWS cloud. This is an awesome feature provided by NAKIVO to keep your data safe in AWS could with security and integrity. You can keep the backup data as offsite data in AWS and you can use that in case of any disaster in your local site. Also, You can back up your EC2 instances to the same AWS region, to a different AWS region, or to your own datacenter.