
Virtual machine checkpoints allow you to capture the state, data, and hardware configuration of a running virtual machine, and formerly known as virtual machine snapshots. In this article, we will discuss checkpoints, types of Checkpoints available in Hyper-V and how to use checkpoints.
Prior to Windows Server 2012 R2 there was no checkpoint it was formerly virtual machine snapshots. And to Windows Server 2012 R2 onwards snapshots are renamed to virtual machine checkpoints in Hyper-V manager to match the terminology used in System Center Virtual Machine Management. Checkpoints are very useful to plan new changes to the systems such as software patches or software installation. By using checkpoints, you can revert a VM to a previous state and prevent data loss from any unexpected error that occurs, reverting the VM to previous state will discarding all the changes made.
Checkpoint tree
Checkpoint tree provides a hierarchical view of all the checkpoints created on the virtual machine and every subsequent checkpoint is a branch from the previous one. The actual delta data stored on this checkpoint’s hard disk is a difference between the actual state and a state at the last time of checkpoint creation. Normally per virtual machine, you can create 50 Checkpoints from Hyper-V manager and by using System Center Virtual Machine Manager or SCVMM up to 64 checkpoints.
Types of Hyper-V Checkpoints
Starting with Windows Server 2016 and Windows 10 there are two types of Hyper-V checkpoints Standard and Production available for each virtual machine. Production checkpoints are the default for new virtual machines.
Standard checkpoints
Standard checkpoints capture running virtual machine state, data, and hardware configuration at a particular point in time. A standard checkpoint doesn’t enable application consistency and it may result in incomplete data transactions of virtual machines running with applications like an exchange, SQL etc.
Standard checkpoints are useful in the development and test environments, this will help you to troubleshoot a problem by recreating a specific state of a running virtual machine
Production checkpoint
Production checkpoints are “point in time” images of a virtual machine, which can be restored later and supported for all production workloads. Production Checkpoints can create a data-consistent backup with the help of Volume Shadow Copy Service (for VMs running on Windows) or File System Freeze (for VMs running on Linux). This is backup technology inside the guest to create the checkpoint, instead of using saved state technology and When creating a production checkpoint, no snapshot of the VM memory state is taken.
By default, production checkpoints are enabled, and you can modify type using either Hyper-V Manager or PowerShell.
Enable or disable checkpoints
You can enable or disable the checkpoints manually for virtual Machines from Hyper-V manager or power shell.
Using PowerShell
Use the below command to enable or disable checkpoint form power shell
Enable the Standard Checkpoint
Set-VM -Name <vmname> -CheckpointType Standard
Enable the Production Checkpoint
Set-VM -Name <vmname> -CheckpointType Production
Also, you can set only production checkpoints will be created
Set-VM -Name <vmname> -CheckpointType ProductionOnly

Change Checkpoint Type
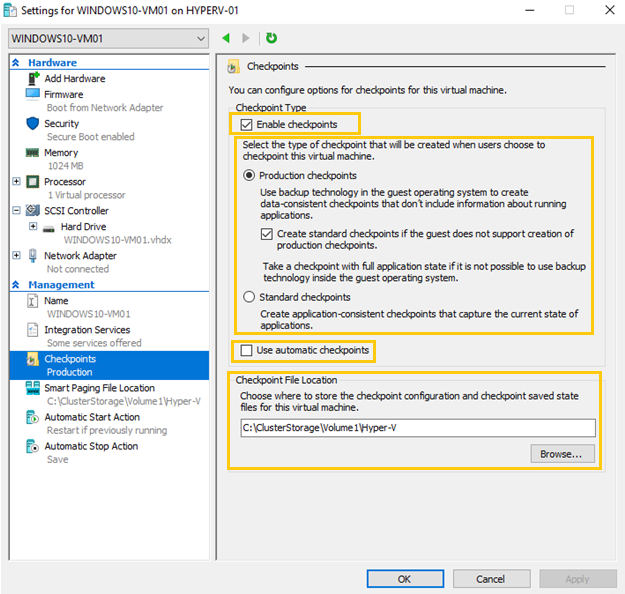
You can change the type of Checkpoints as per requirement from management section -> Checkpoint option of the VM
As per your requirement select Standard or Production checkpoints, also you can enable automatic checkpoint feature which automatically takes checkpoints of VMs when they’re started and deletes them as soon as they are stopped.
Set up a checkpoint location
You can set the location for Checkpoints from management section -> Checkpoint option of the VM
Create checkpoints
You can create checkpoints from Hyper-V Manager or PowerShell, follow below procedure
Using Hyper-V Manager
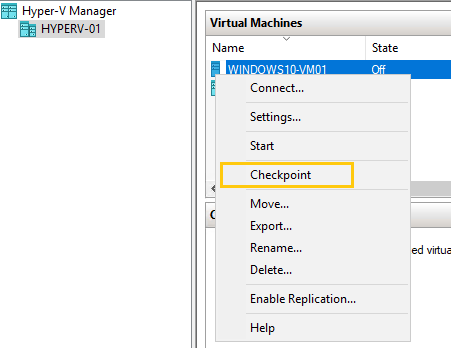
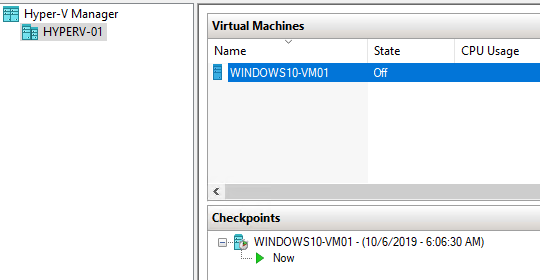
Checkpoint will be created and can be managed from the Checkpoints section
Using PowerShell
Run the following command to create Hyper-V checkpoints
Checkpoint-VM -Name <VMName>
![]()
Run the following command to list all Hyper-V checkpoints
Get-VMCheckpoint -VMName <VMNAME>

Revert a VM to a previous state using checkpoints
Hyper-V checkpoints are primarily used to revert a VM to its previous state. Use the steps below to apply the checkpoint for this purpose.
Using Hyper-V Manager

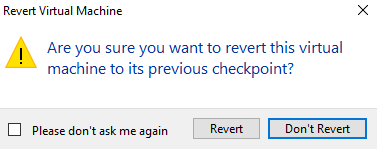
You can choose the required option from a dialog box to for reverting a Checkpoint

When you click on create Checkpoint and Apply as mentioned above new checkpoint of the VM is created, find the below image for reference
Also, you can revert to the previous Checkpoint by Right Click on the VM and select the Revert Option

Select Revert for going back to the previous state.
Using PowerShell
To Restore to the checkpoint via the PowerShell, run the following command:
Restore-VMCheckpoint -Name “<checkpoint name>” -VMName “<VMName>” -Confirm:$false

Delete Checkpoints
Checkpoints are stored as .avhdx files in Hyper-v , And deleting checkpoints, the .avhdx and .vhdx files will be merged to save space and ensure that no critical data is lost and finally, checkpoint’s .avhdx file will be deleted from the file system.
You can delete checkpoints using Hyper-V Manager or PowerShell
Using Hyper-V Manager
Opening Hyper-V Manager, select the required VM.
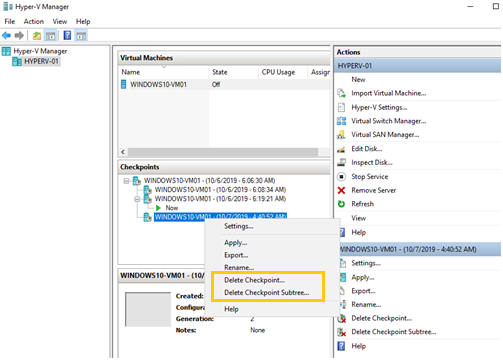
From the Checkpoints section, right-click the checkpoint that you want to delete and Click Delete Checkpoint.
Note:- If you want to delete a checkpoint tree containing the primary checkpoint and all subsequent checkpoints, click Delete Checkpoint Subtree.
Using PowerShell
To remove a Checkpoint, follow the below command
Remove-VMCheckpoint -Name “<checkpoint Name>” -VMName “<VMNAME>” -Confirm:$false
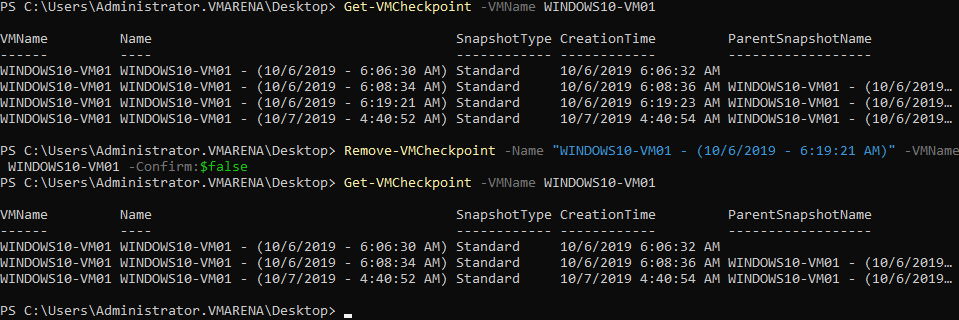
Before Deleting the Checkpoint

After Deleting the Checkpoint

Exporting Checkpoints
You can Export the checkpoint as a virtual machine for moving to a new location. Once imported, the checkpoint is restored as a virtual machine. Checkpoint exported can be done from Hyper-V manager or PowerShell
Using Hyper-V Manager
Opening Hyper-V Manager, select the required VM.
From Checkpoints section, right-click the checkpoint that you want to export and Click Export
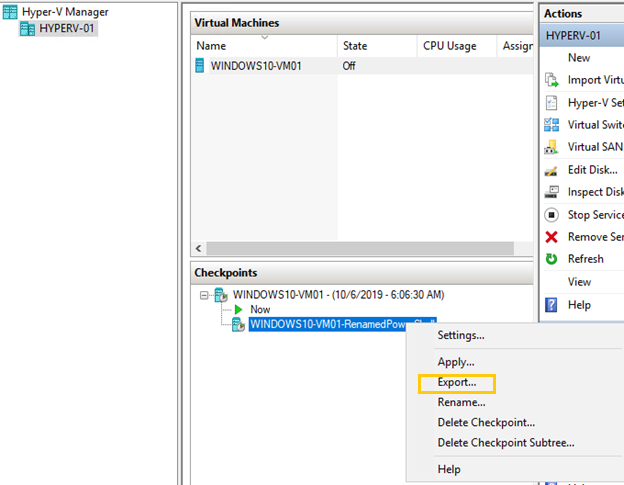
Browse and provide a valid path to export the VM and click on Export

Using PowerShell
To Export a VM from PowerShell use the following command
Export-VMCheckpoint -VMName “<virtual machine name>” -Name “<checkpoint name>” -Path “<path for export>”

Now you can navigate to the path and verify that VM Export is available or not

Rename checkpoints
As you can see from the above steps standard checkpoint name includes the name of the VM, the date, and the time when the checkpoint was created). Easy to understand you can rename the checkpoint using Hyper-V Manager or PowerShell.
Using Hyper-V Manager
Open Hyper-V Manager and select the required VM.
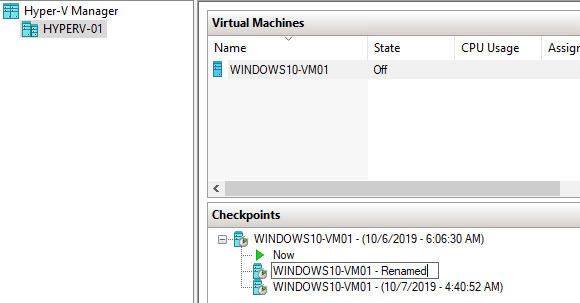
From the Checkpoint section right-click the checkpoint and select the Rename option
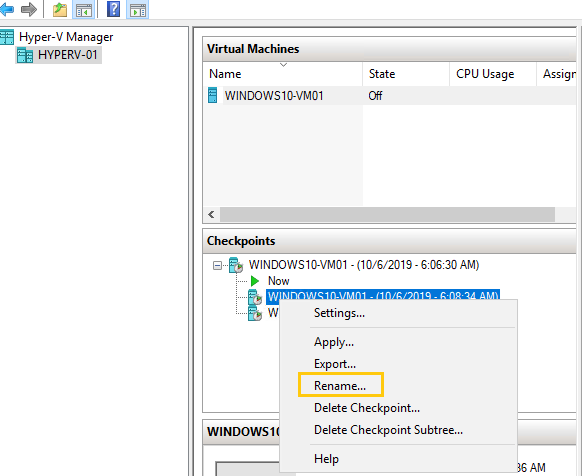
And you can provide the name you required to identify the checkpoint
Using PowerShell
To Rename the checkpoint in the PowerShell CLI, run the following command
Rename-VMCheckpoint -VMName “<VM NAME >” -Name “<checkpoint name>” -NewName “<new checkpoint name>”

Checkpoint is a backup?
The first point you should aware of the checkpoint is it is not backup or an alternative for backups. By default, checkpoints are stored on the same datastore location of VM hard disk. If any issue occurred on the datastore you will lose the VM.