
The scale-out backup repository is a logical entity which groups several backup repositories called extents. When you configure the scale-out backup repository, it creates a pool of storage devices and systems, summarizing their capacity. For long-term storage, you can instruct Veeam Backup & Replication to offload data from extents to the cloud-based object storage such as Amazon S3, Microsoft Azure Blob Storage, IBM Cloud Object Storage, and S3 Compatible. The scale-out backup repository functionality is available only in Enterprise and Enterprise Plus editions of Veeam Backup & Replication.
In this article, we will share the procedure to configure the scale-out backup repository in Veeam Backup & Replication 9.5 update4. Our setup is vSphere 6.7, Veeam Server 2012 R2 and Azure Blob storage using part of the scale-out repository. You can configure this with VMware and Hyper-V infrastructure.
To safely reclaim valuable storage space on your on-premises devices and make it easier to place the backup data to cloud repositories, Veeam Backup & Replication implements proprietary mechanisms that help you efficiently offload your data from the extents to cloud-based object storage every 4 hours.
If your backup data grows and the backup repository reaches the storage limit, you can add a new storage system to the scale-out backup repository at any moment. And the free space on this storage system will be added to the capacity of the scale-out backup repository. As a result, you will not have to move backups to a backup repository of a larger size.
A scale-out backup repository can be used for the following types of jobs and tasks:
Backup files stored on the scale-out repository can be used for all types of restores, replication from backup and backup copy jobs. You can verify such backups with Sure Backup jobs. The scale-out backup repository can be used as a staging backup repository for restore from tape media. Files restored from the tape media are placed to the extents according to data placement policy configured for the scale-out backup repository.
Note:- Since you need Enterprise License to configure the scale-out backup repository and any time downgraded the license to Standard, you will not be able to run jobs targeted at the scale-out backup repository. However, you will be able to perform restore from the scale-out backup repository.
First, you have to configure Backup repositories before you add a scale-out backup repository to the backup infrastructure. And it is recommended to check limitations for scale-out backup repositories from Scale-Out Backup Repository Limitation
Configure Backup Repositories
To configure the scale out repository you need a backup repository ( local or share ) and an object storage repository.
Add Backup Repository
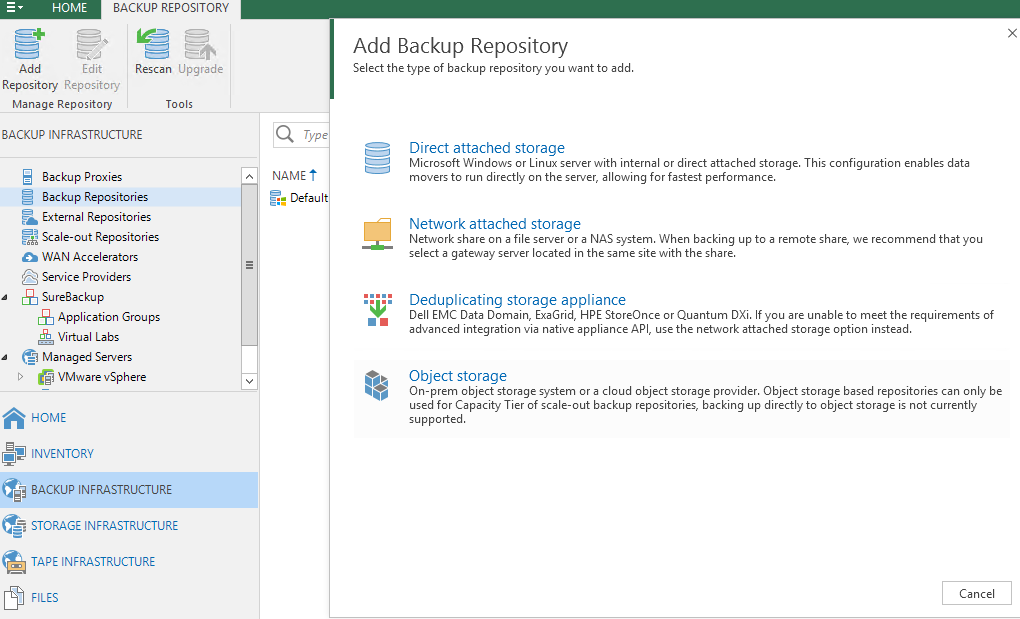
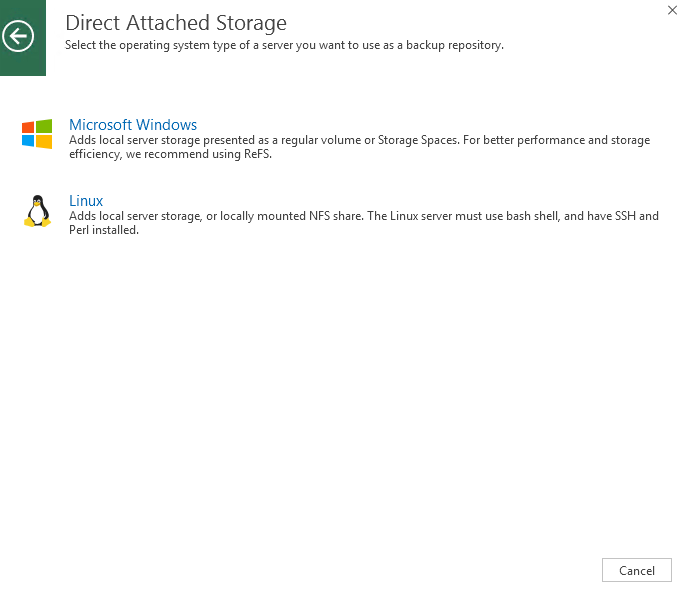
Select the Microsoft Windows
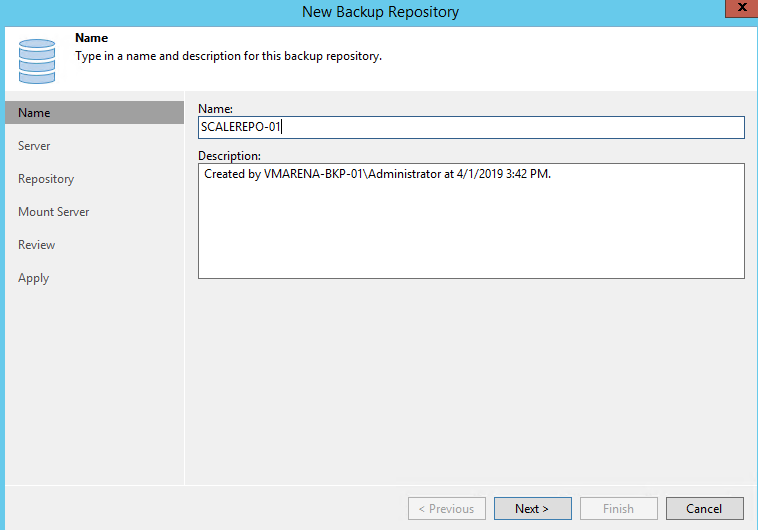
Provide a name for the backup repository and description in the description field and Click Next
Note:-Description is only for future reference and it is optional, by default description contains information about the user who added the backup repository, date and time when the backup repository was added.
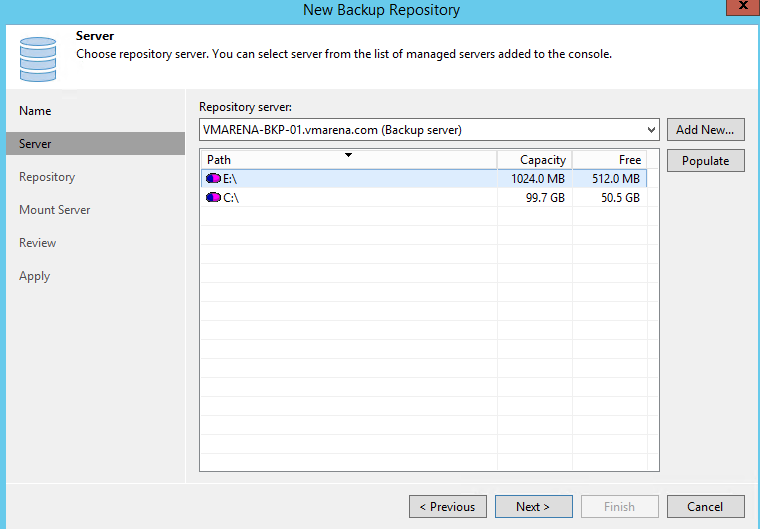
From the Repository server list, select the Microsoft Windows server and Click Populate to list of disks connected to the server with their capacity and free space. In our case backup server is repository server .
Note:-Repository server list contains only servers that are added to the backup infrastructure and If the server is not added then click on Add New and follow to add .
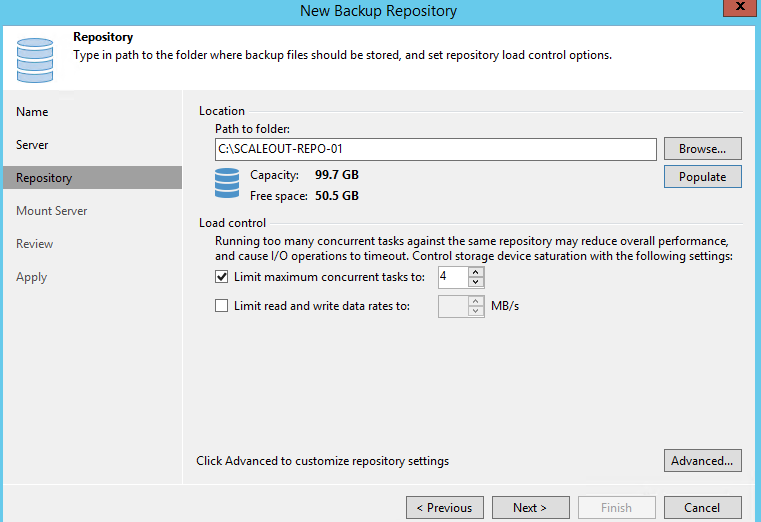
specify a path to the folder where backup files must be stored and load control repository settings asper requirement and Click Next
Note:- Load control section to limit the number of concurrent tasks and data ingestion rate for the backup repository. These settings will help you control the load on the backup repository and prevent possible timeouts of storage I/O operations.
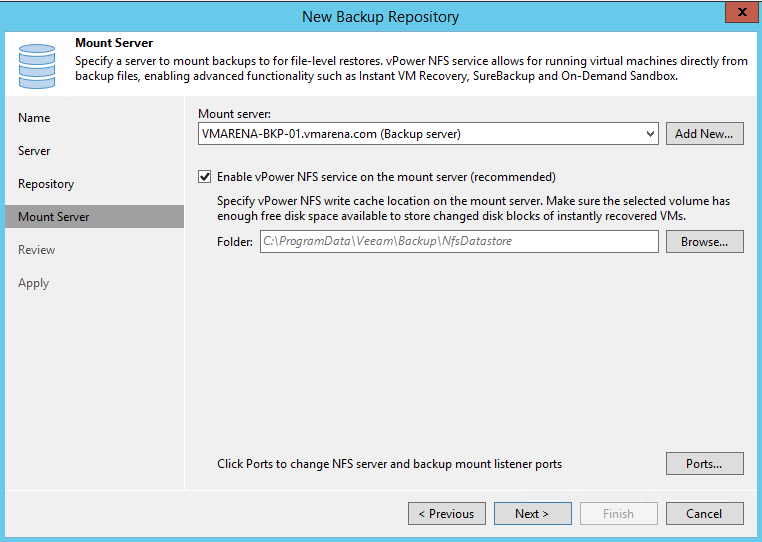
From the Mount Server list, select a server that you want to use as a mount server. The mount server is required for file-level and application items restore and select the Enable vPower NFS server if required else no need to select, Click Next to continue
Note:- The Mount Server list contains only Microsoft Windows servers that are added to the backup infrastructure. If the server is not added to the backup infrastructure yet, click Add New on the right to open the New Windows Server wizard. Also do not enable Microsoft Windows NFS services on the machine where you install the Veeam vPower NFS Service. If Microsoft NFS services and Veeam vPower NFS Service are enabled on the same machine, both services may fail to work correctly.
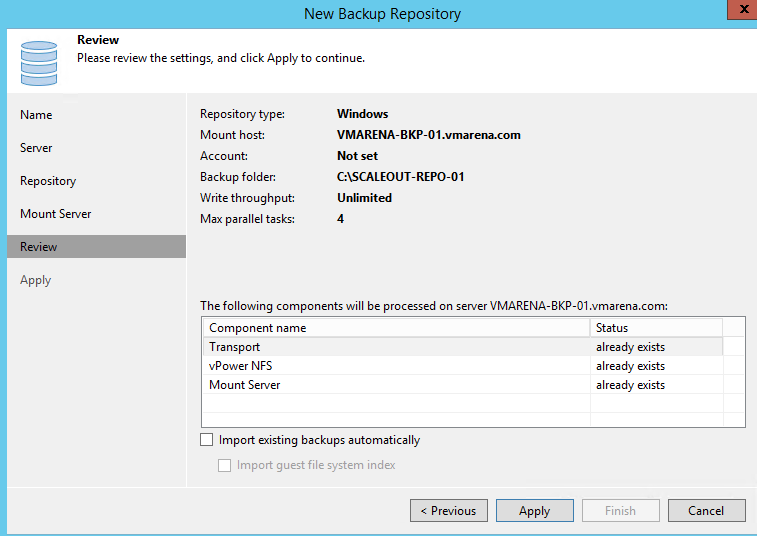
Review the backup repository settings and list of components that will be installed on the backup repository server and Click on Apply
Note: If the backup repository contains backups that were previously created with Veeam Backup & Replication, select the Import existing backups automatically check box. And If the backup repository contains guest file system index files that were previously created by Veeam Backup & Replication, select the Import guest file system index check box. Index files will be imported with backup files, and you will be able to search for guest OS files inside imported backups.
Once you select Apply wait for the backup repository to be added to the backup infrastructure. You can review details for the added backup repository.
Click Finish once it is comeplted to exit the wizard.
Next, we have to add an Object Storage Repository
Create An Object Storage Repository
Object storage repositories are part of Capacity Tier that expands your scale-out backup repository abilities and simplifies offloading existing backup data from your extents directly to cloud-based object storage such as S3 Compatible, Amazon S3, Microsoft Azure Blob Storage, IBM Cloud Object Storage.
We will be adding Azure Blob storage as Object Storage here, refer my blog post How To Create Azure Storage Account And Access , if you need information to create blob storage.
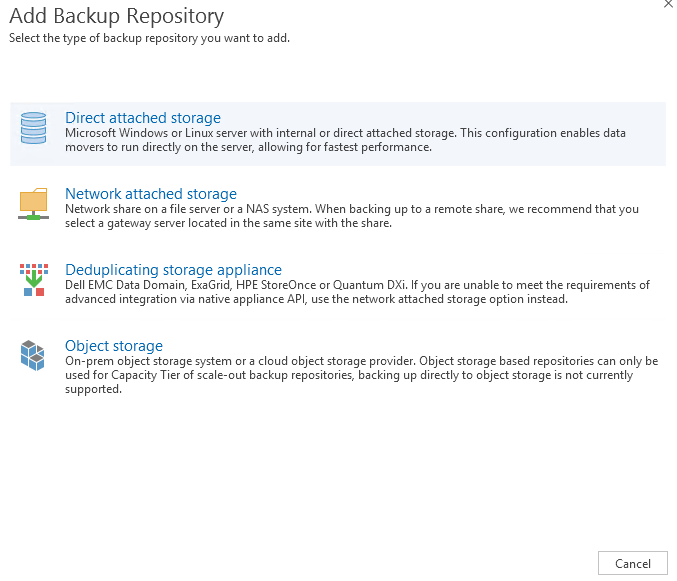
From Veeam Backup & Replication Console navigate to Backup Repositories node and select Add Backup Repository
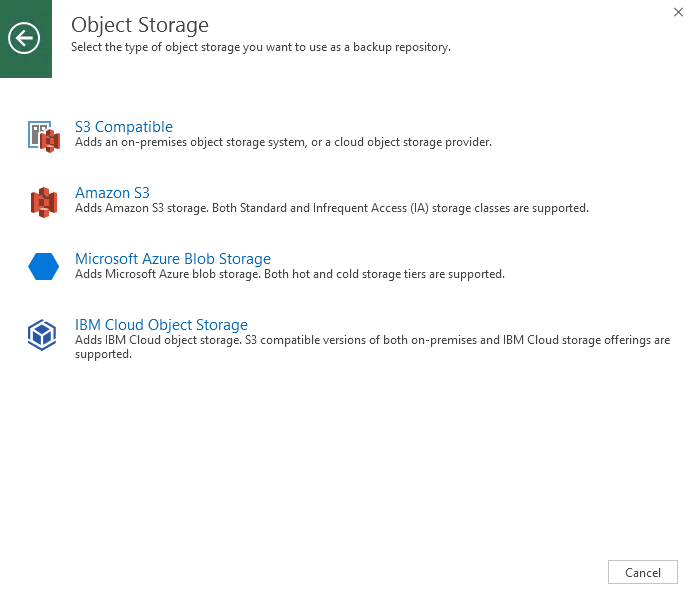
Select the Object Storage
From Object Storage Window Select Microsoft Azure Blob Storage
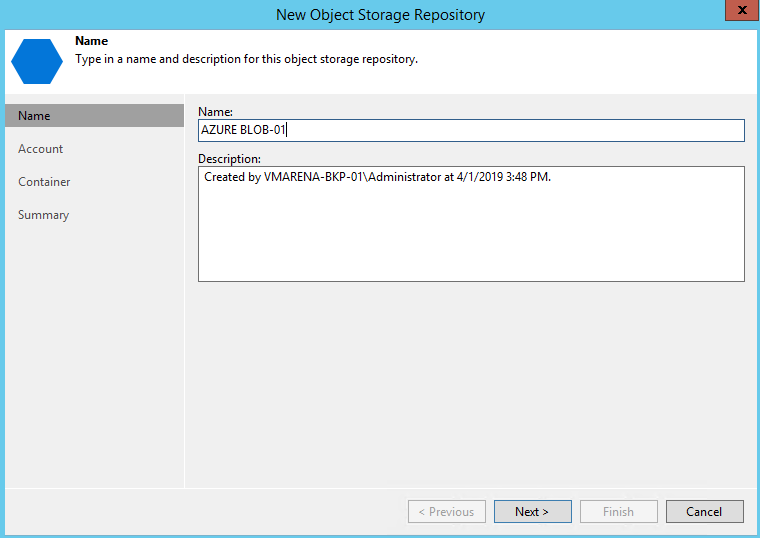
Privide a name and optional description for the object storage repository and Click Next
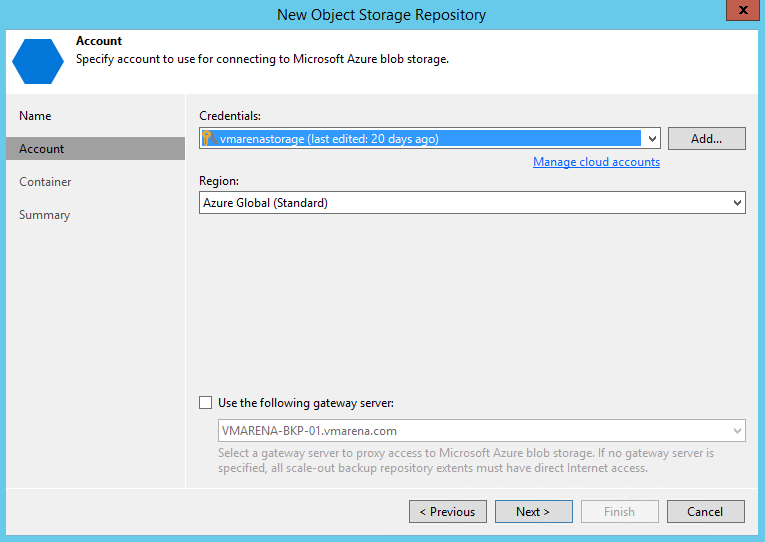
Note:-If you already have a credentials record that was configured already you can select, ,Otherwise, click Add and provide your account name and a shared key .
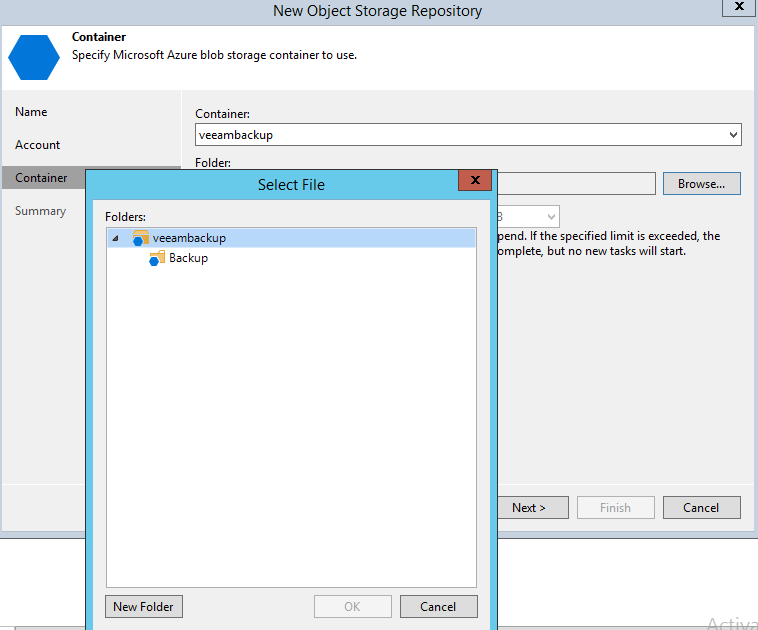
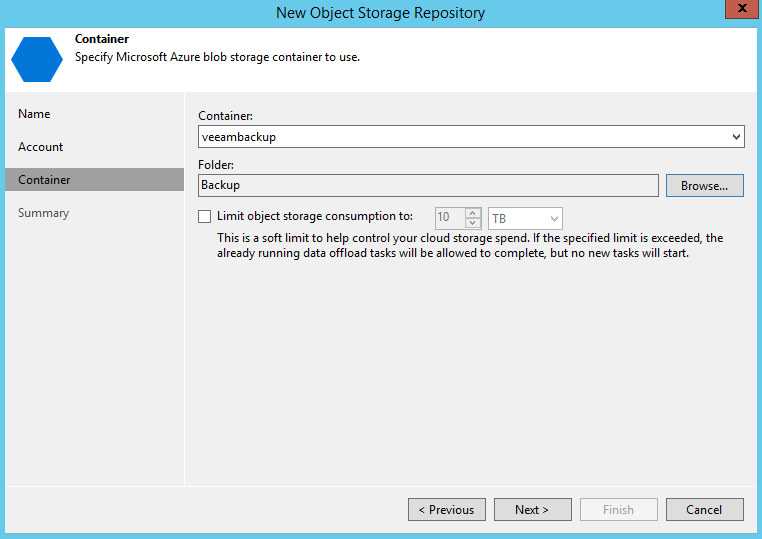
From the Container drop-down list, select an Azure container which is created already in Azure portal and select the cloud folder to which you want to map your object storage repository and which will be used to store offloaded data. and Click Next
Note:- You can click Browse and either select an existing folder or create a new one by clicking New Folder.
|
Note:- Never add more than one object storage repository that is mapped to the same cloud folder. Although not prohibited by the system, mapping the same cloud folder to several object storage repositories at the same time leads to unpredictable system behavior and inevitable data loss. |
If required you can define a soft limit for your object storage consumption that can be exceeded temporarily, select the Limit object storage consumption checkbox and provide the value in TB or PB.
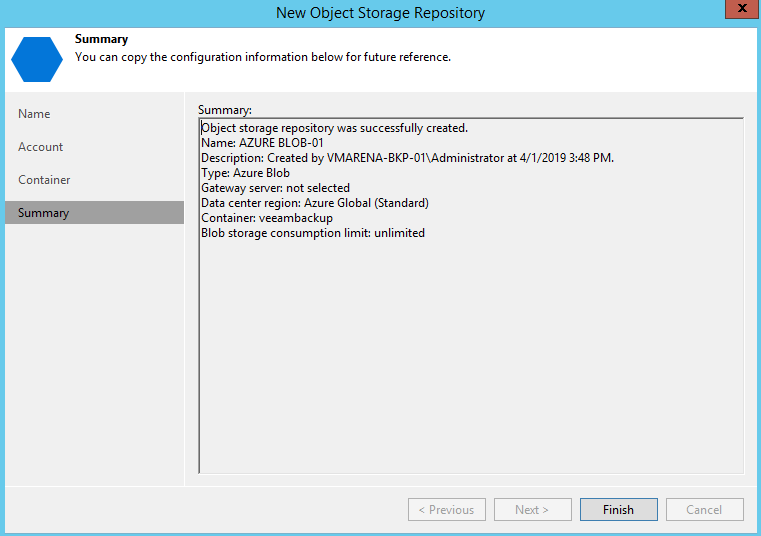
From Summary wizard review details of the object storage repository configuration and Click Finish to exit the wizard.
Navigate to the BAckup Repositories and verify the Newly Created Reposotioes are available or not.
our case SCALEREPO-01 and AZURE BOLB-01 are the repositories we created to configure scale out repository

Conclusion
The scale-out backup repository is a logical entity which groups several backup repositories called extents. This is used for long-term storage, you can instruct Veeam Backup & Replication to offload data from extents to the cloud-based object storage such as Amazon S3, Microsoft Azure Blob Storage, IBM Cloud Object Storage, and S3 Compatible. Here we created two repositories Local and Object, which are prerequisite of the Scale-Out Backup Repository. Next Part we will cover the configuration fo the Scale-Out Backup Repository and testing. All the steps we performed is completely referred from Veeam Documentation