Deployment of FOM (Failover Manager)
Use the Same file which used for Deployment of VSA Applianace
HPE_StoreVirtual_VSA_2014_and_StoreVirtual_FOM_Installer_for_VMware_vSphere_TA688-10544.exe
- Ran this file as Administrator, it is a self-extracting one. After the extraction a CMD will comes up asking, if you want to use the GUI or CLI interface.
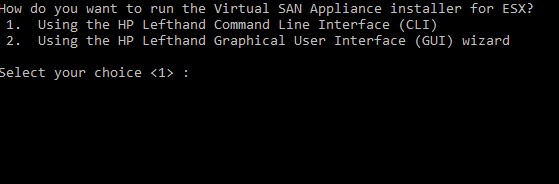
- Chose the GUI wizard.
- On the welcome page simply click “Next”.
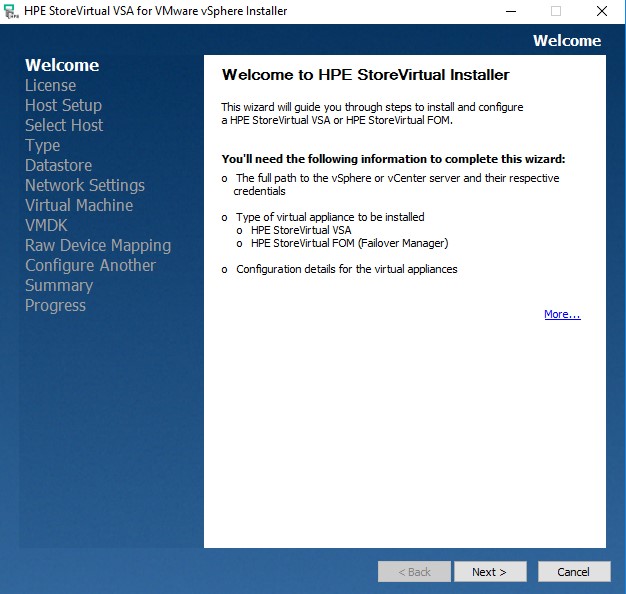
- Accept the License Agreement and Click Next

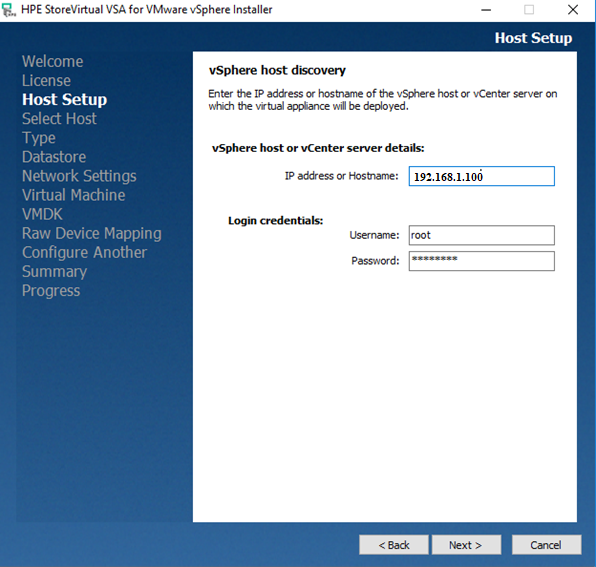
- Provide hostname or IP address and login credentials for the target the vCenter server and click Next
- Select the host name / IP address of the ESXI host from drop down menu and click Next
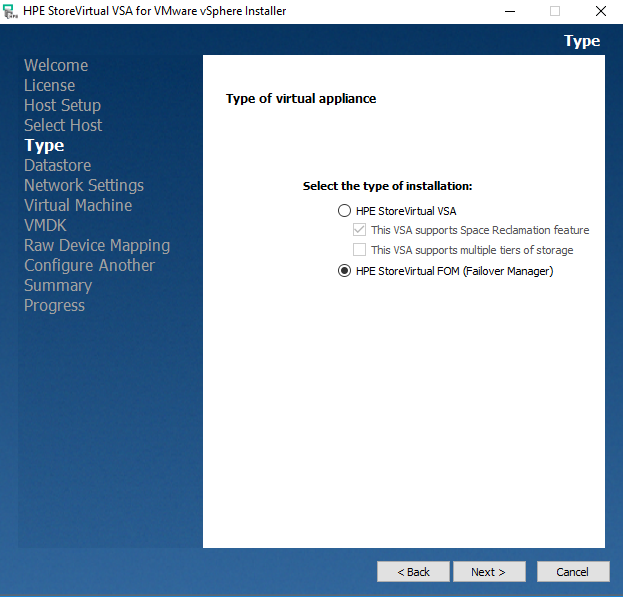
- Select the HPE Storevirtual FOM as shown in the below image and click Next
- Select the Data store and click next to install the Failover Manager (FOM)
Note:  You must select the Storage that is not provided by the Storevirtual installation it is protecting.
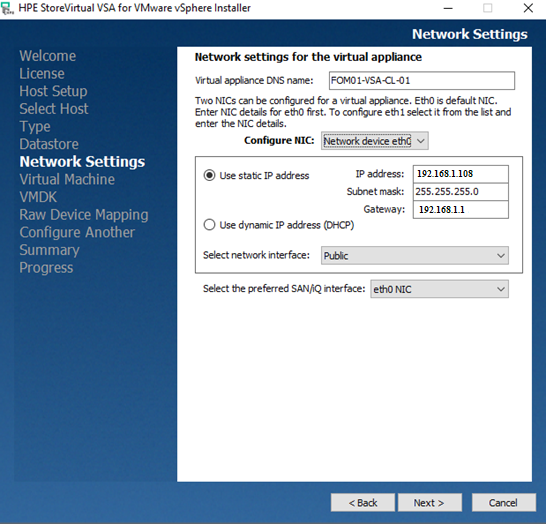
- Provide the Name for FOM, Select the NIC & input the IP Address and VM port group for communicating to Public Network and Click Next.
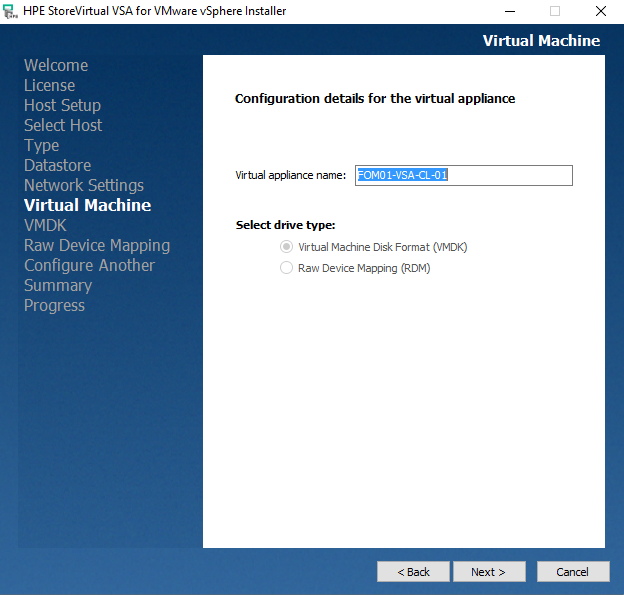
- Give a name to the VM and to select the drive type
- The wizard allows to deploy FOM.
 Note: – There will be a pop-up message for before deployment as shown in the below image
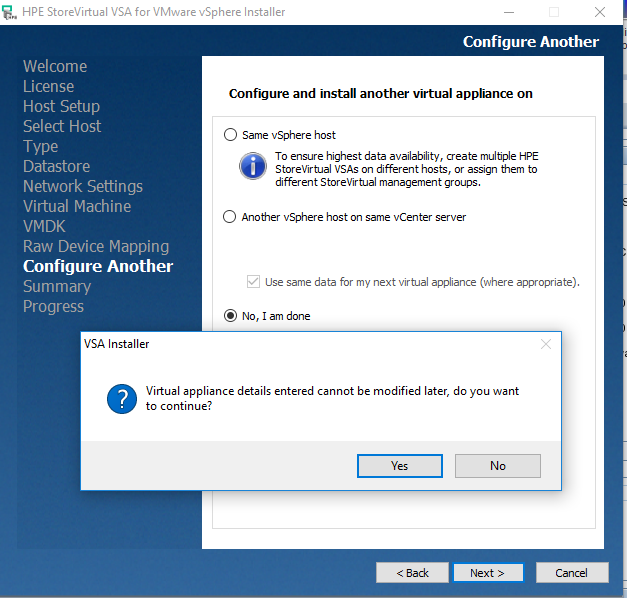
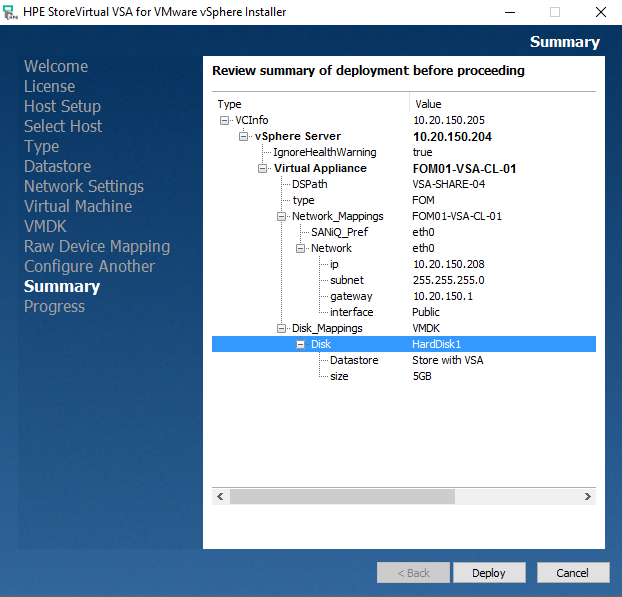
- Before you click Deploy check the settings of Appliance. If everything is fine, click the Deploy button. The deployment will start immediately
- Deployment started and it may take few minutes to complete
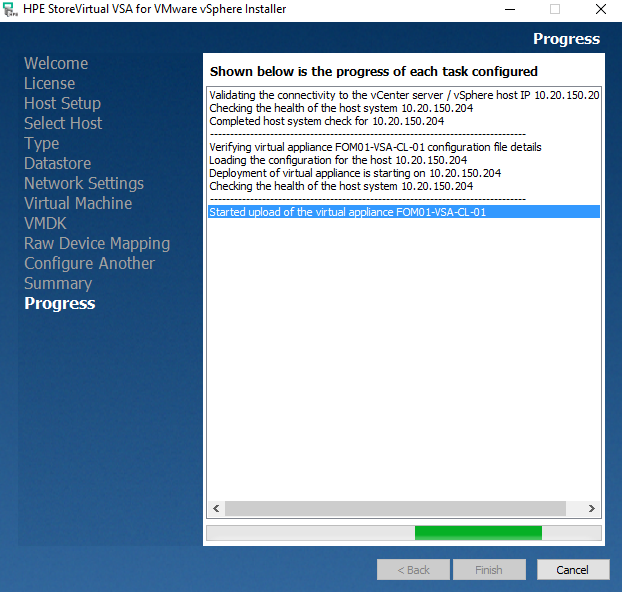
Once the deployment is finished, Click “Finish”. Start the Centralized Management Console (CMC) and add the FOM nodes.
Continue PART 4
See – Part 1 , PART 2 , PART 3 ,