
Windows Server 2019 is Generally Available and hope you are started testing or using this new version .And we can configure SSH on Windows server and with 2019 it become more easy . In this post i will share how to configure ssh on windows server 2019 .
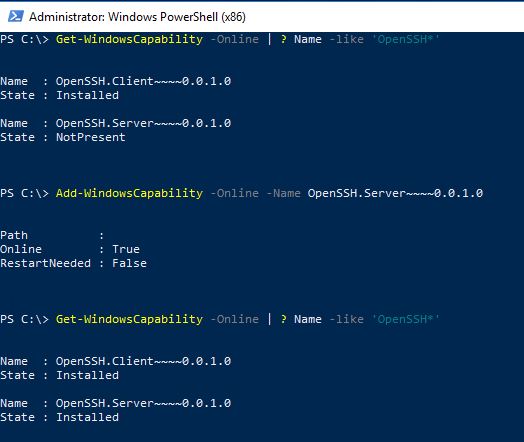
Get-WindowsCapability -Online | ? Name -like 'OpenSSH*'
Add-WindowsCapability -Online -Name OpenSSH.Server~~~~0.0.1.0
Set-Service sshd -StartupType Automatic

Set-Service ssh-agent -StartupType Automatic

Start-Service sshd

Start-Service ssh-agent

Connect the Windows 2019 Server from any Linux machine where ssh available or you can connect using a putty clinet , in my scenario i am using putty
Connecting to Server in Domain using SSH – Domain Username Should have access to server remotely
ssh username@domain.com@servername
Connecting to Server in Workgroup using SSH – Username Should have access to server remotely , Local admin user can be used
ssh username@servername
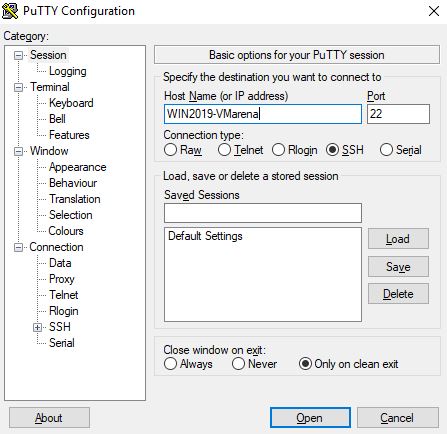
Connect Server using Putty
Open Putty Client – > type server name or ip and click on Open
Type the username and it hit enter , you have to type the password on the next line

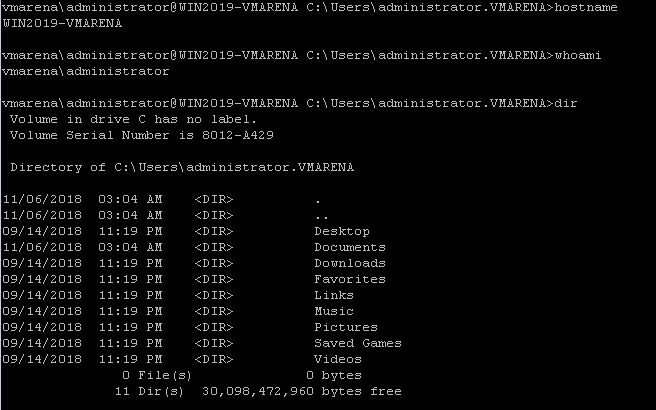
Now you are connected the Windows server 2019 machine

Test ssh is working or not , you can type some commands to verify as shows below
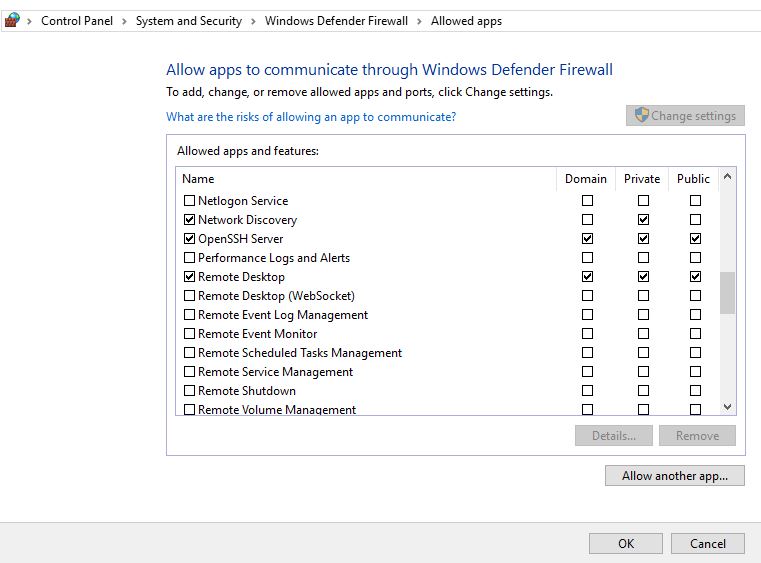
In windows 209 Server While installing Open SSH it will automatically create application rule to accept the connection through widow firewall. You can verify that from
Control Panel – > System and Security -> Windows Defender Firewall – > Allowed apps
Conclusion
Using OpenSSH you can connect to windows servers without remote PowerShell and get a full CMD and PowerShell Experience. This feature will make your life easy in a mixed environment to by accessing Windows machines from Linux with a remote CMD shell.