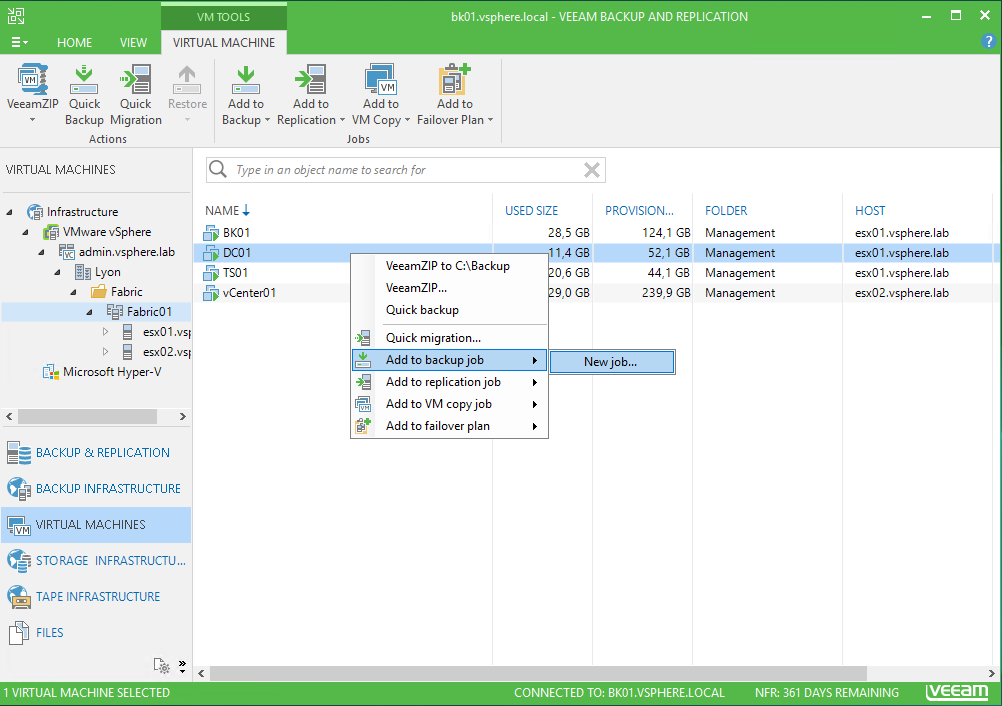
Backup a virtual machine
To protect a VM, navigate to virtual machines and select the one you want to backup. Then right click on the VM and select Add to the backup job. For this example, I choose to protect a domain controller.
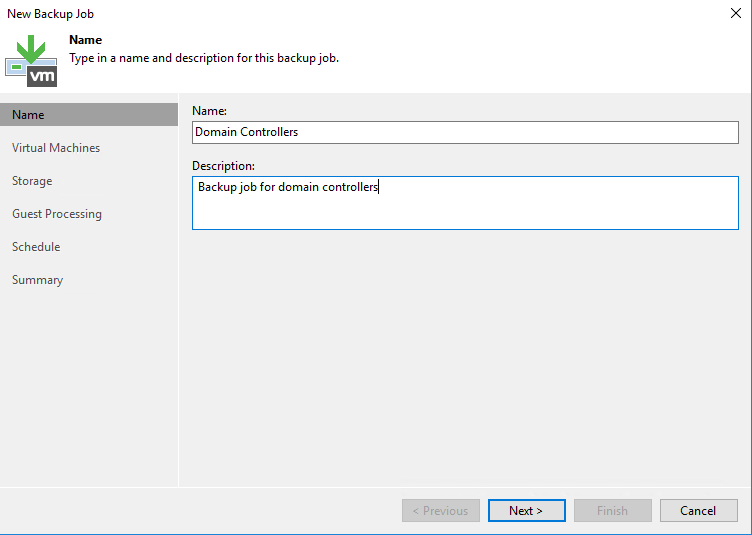
Give a name and a description to your backup job and click on next.
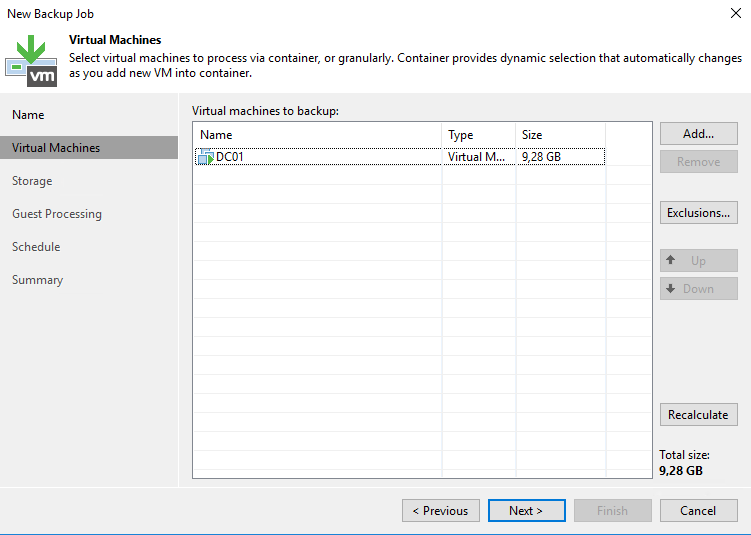
By default, the backup job contains the VM that you have selected. If you want to add more VMs to this backup job, just click on Add and select other VMs.
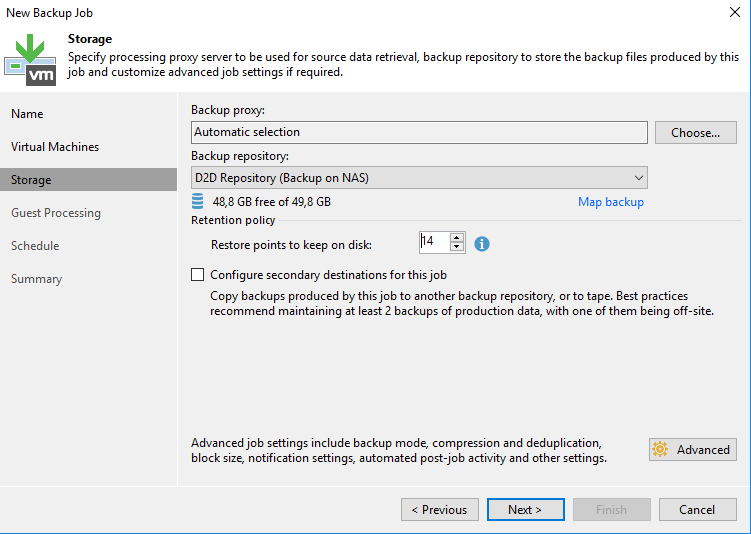
Then specify the backup repository and the backup proxy (a server that takes care of compression, process job and delivers backup traffic to offload the backup server). You can also specify the number of restore points to keep. If you click on Advanced, you can set some specific settings such as notification, deduplication and so on.
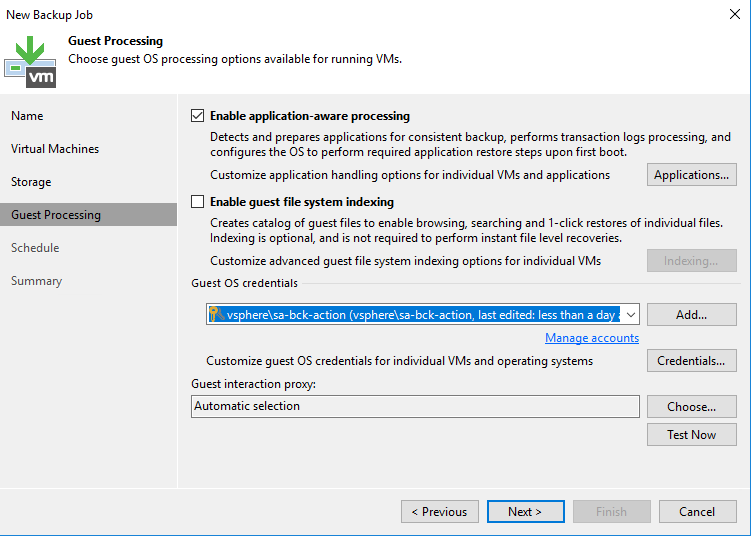
Because I backup a domain controller, I select Enable application-aware processing. Thanks to this, I will be able to restore at the AD object-level. However, to use this feature a Guest OS credentials with local administrator privilege is required.
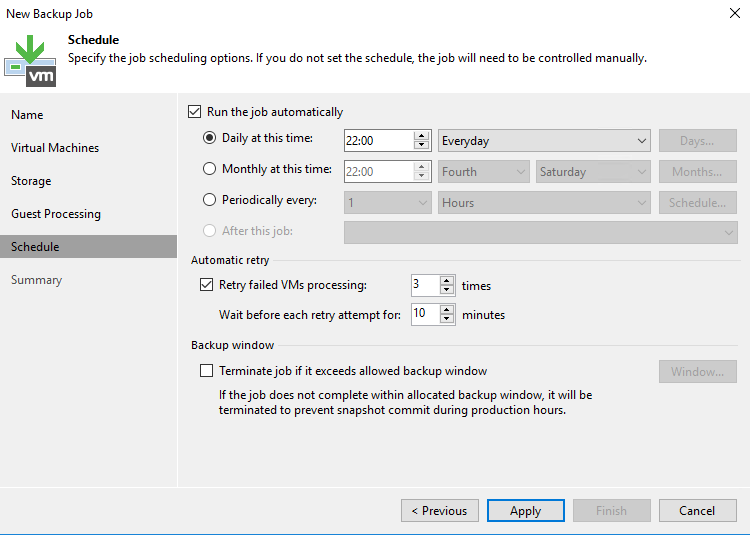
Next, specify the scheduling of your backup job.
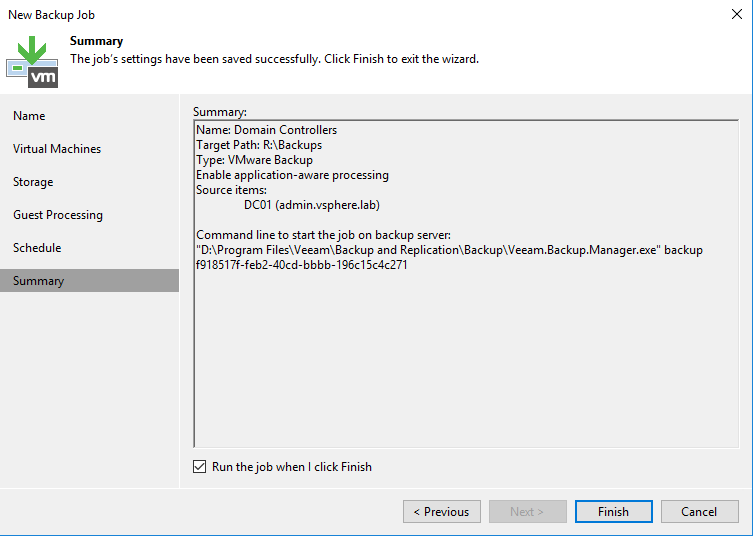
Check the summary and if all is good, click on finish and run the job.
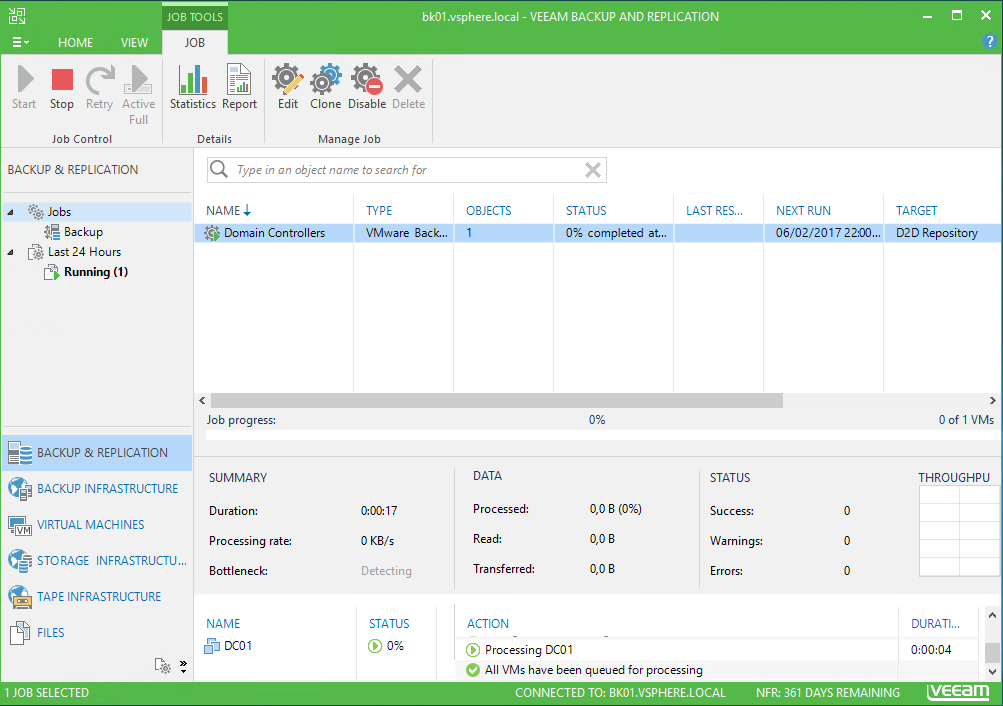
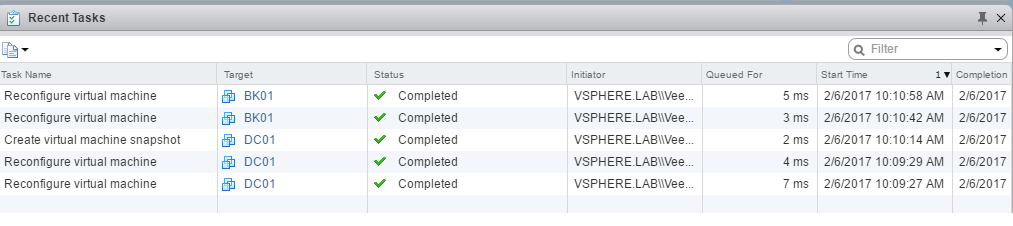
When the backup is running, you should see the job in Backup & Replication tab as below.
When the job is running, some tasks are executed from vCenter perspective. Veeam creates a VM snapshot and when it has finished, Veeam deletes it.
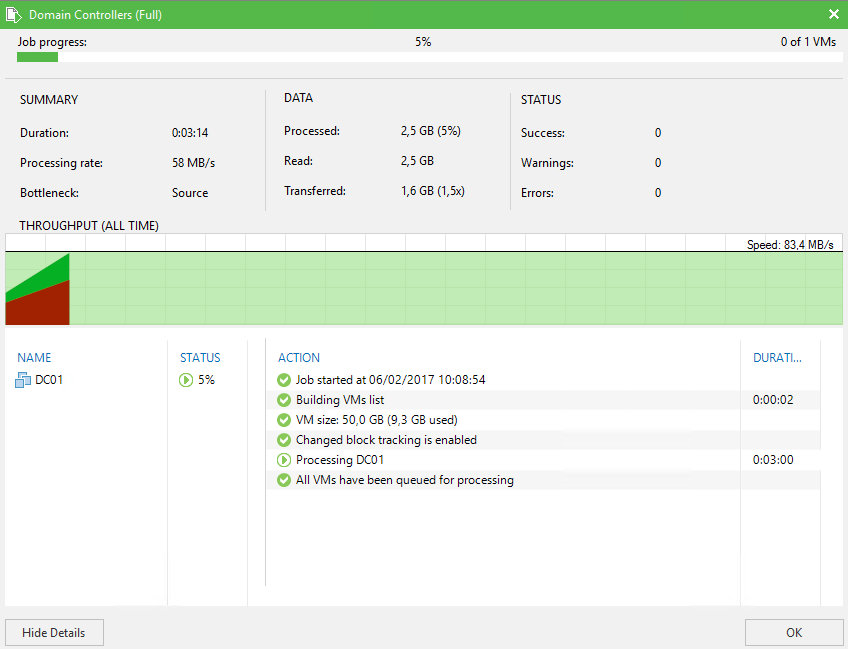
You can review the job statistics such as the following screenshot:
Restore a Active Directory objects
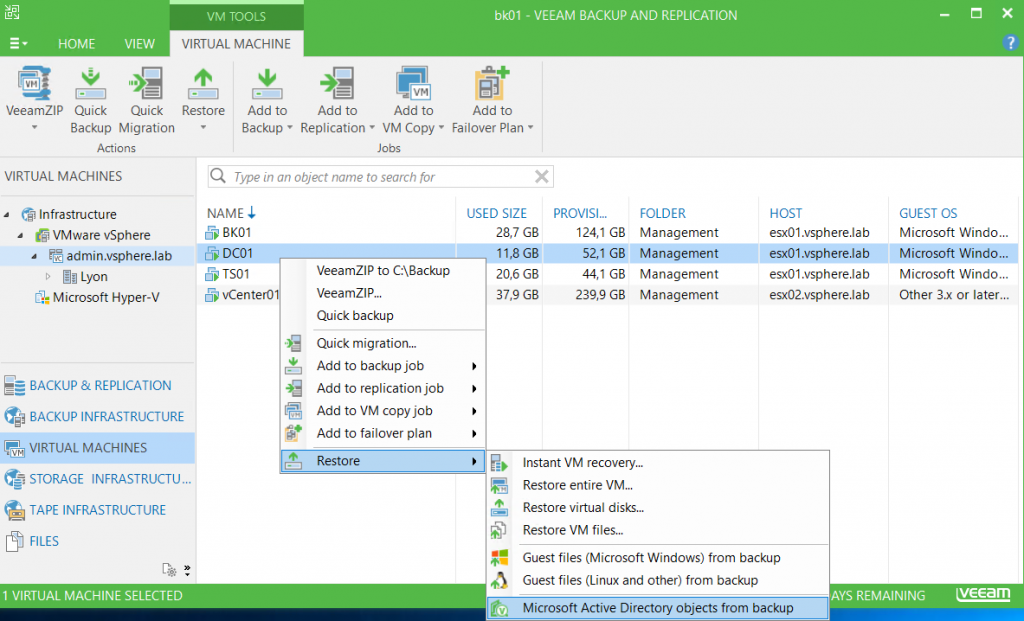
Now the backup is done, you can restore the VM. But because the VM is a domain controller and I have enable the application aware processing, I can also restore Active Directory objects. To restore AD objects, navigate to virtual machines. Then right click on the VM and select restore – Microsoft Active Directory objects from backups.
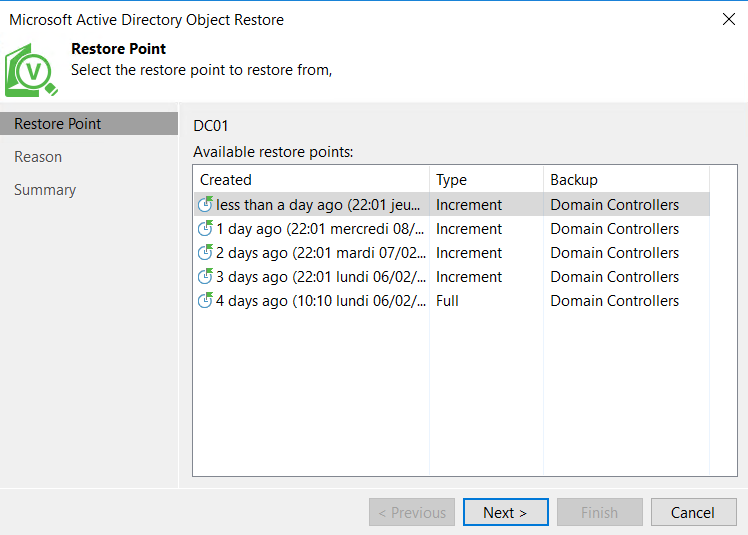
Next, choose a restore point:
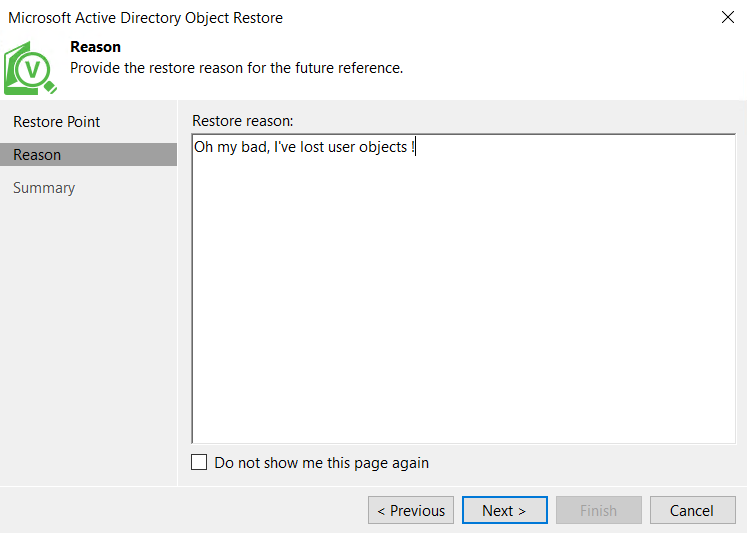
Then you can specify a reason for the restore process:
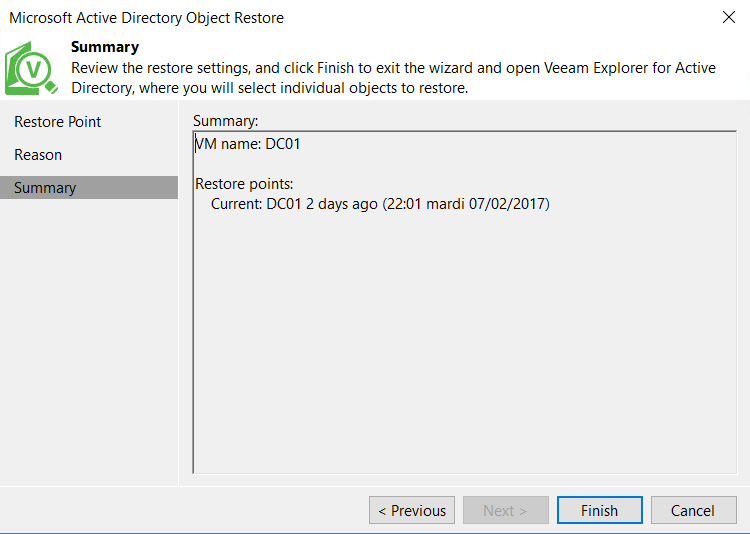
To run the restore process, review the settings and click on finish.
Next, Veeam Explorer for Active Directory is opened and you can browse the Active Directory from the restore point that you have selected:
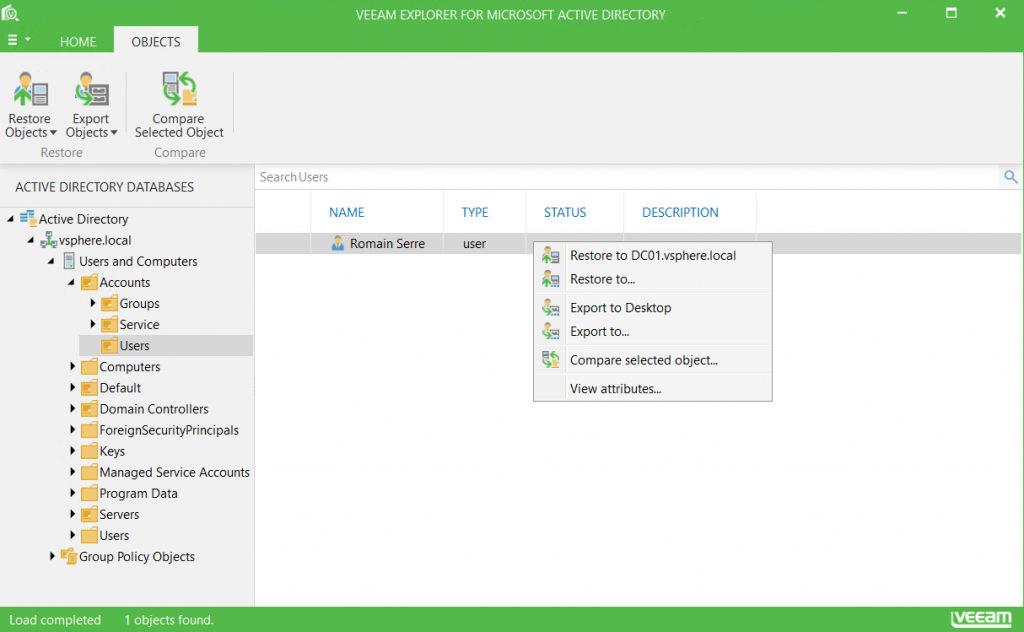
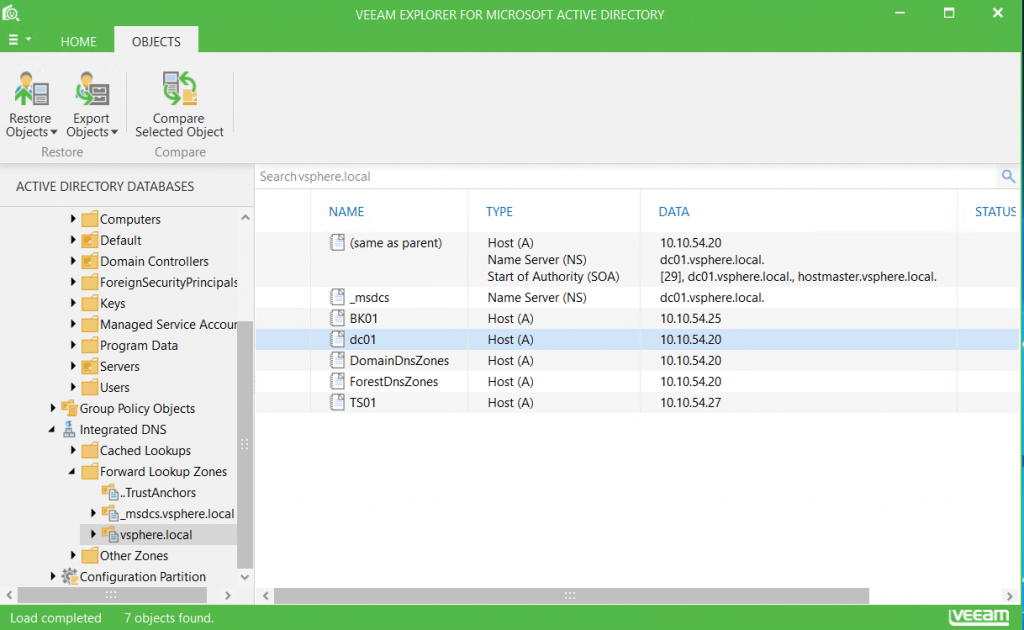
Then you can restore a single object or export it. You can also compare the object with the current object to check change. You can do the same thing with DNS entries:
By closing the Veeam Explorer for Active Directory, the AD tree of the restore point is unmounted.
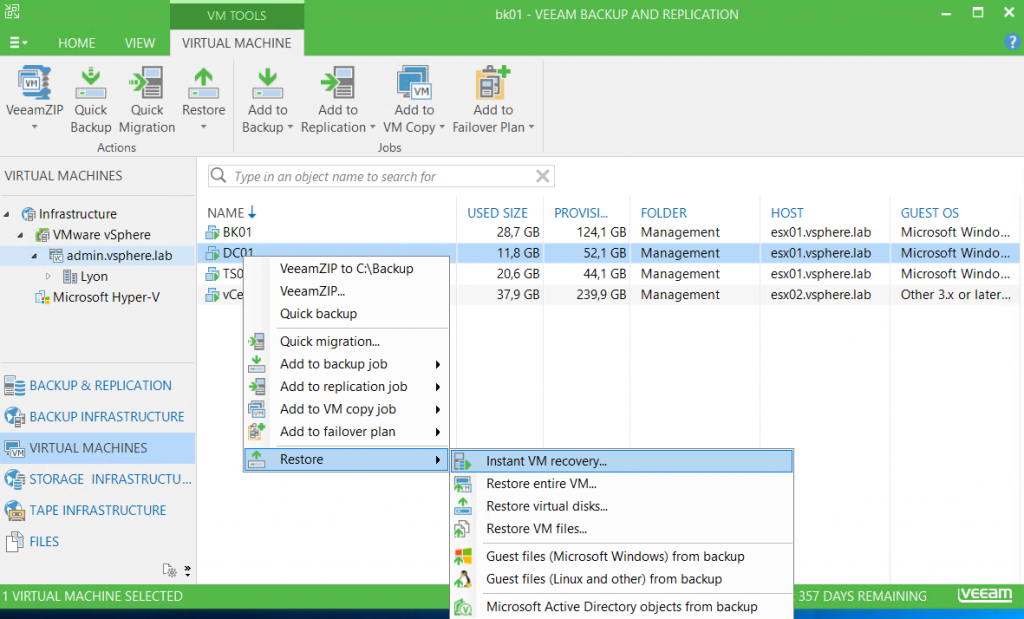
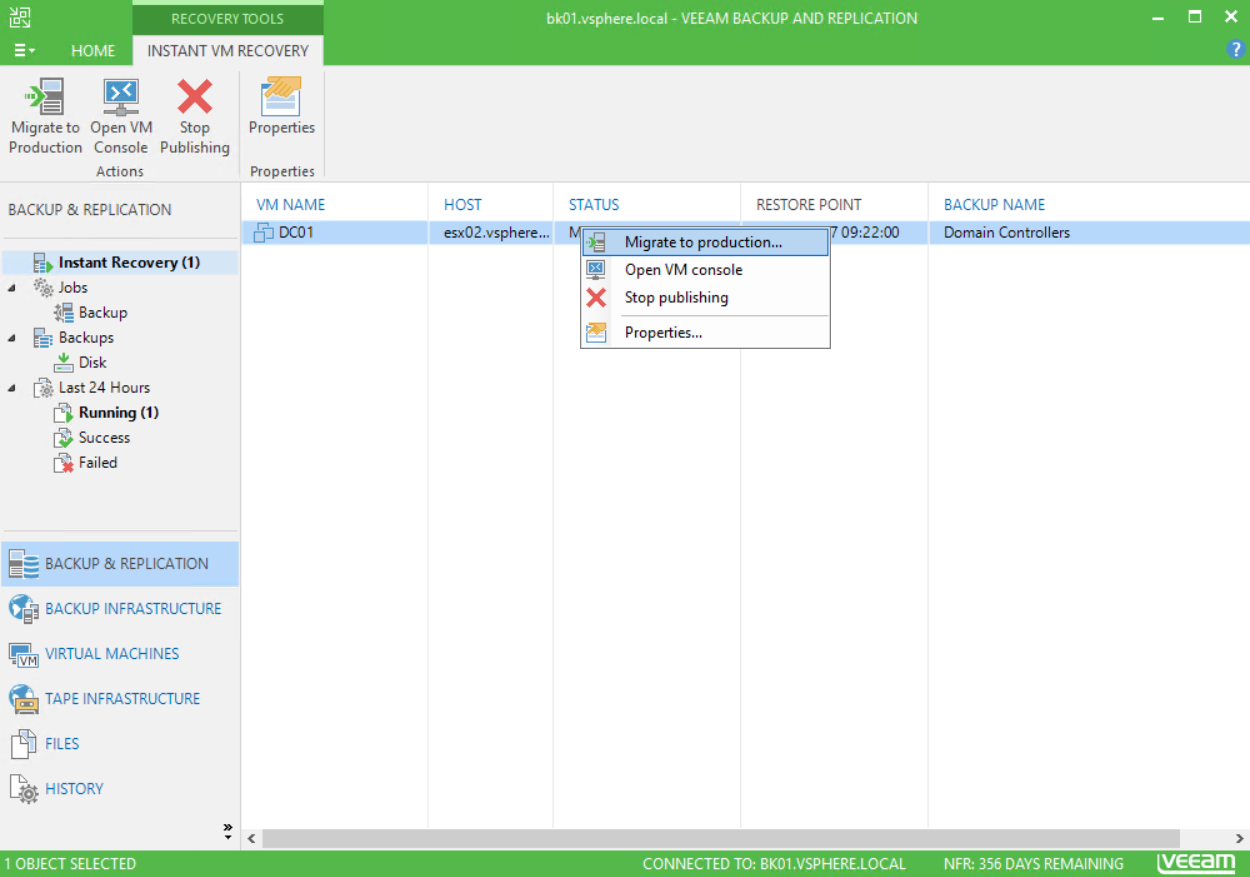
Restore a Virtual Machine
If you want to restore the entire VM, you can leverage Instant VM Recovery. This feature enables to restore and run the VM from the backup repository. Then, when the VM is running, you can restore the data in the production datastore.
To run the instant VM recovery, navigate to virtual machines. Right click on the VM and select restore– Instant VM Recovery.
Next, select a restore point: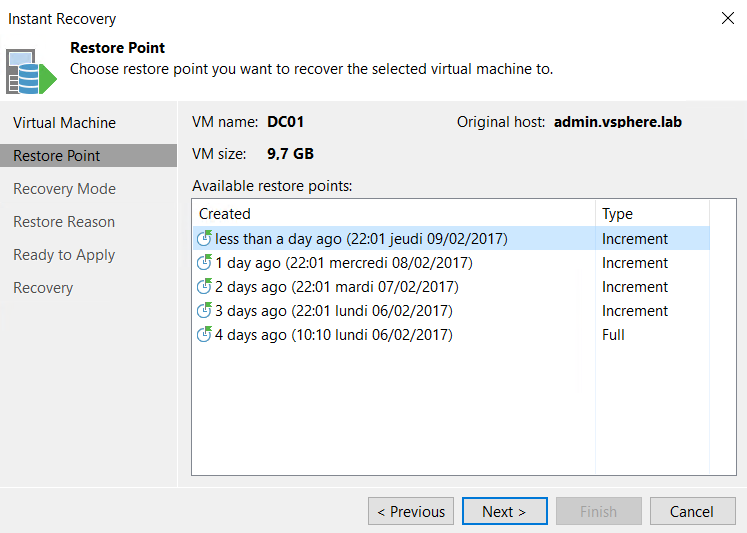
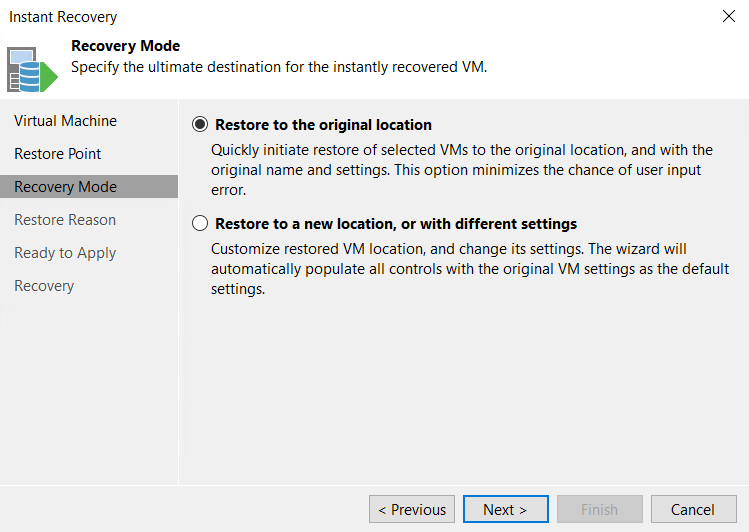
Then choose the recovery mode. I choose to restore to the original location.
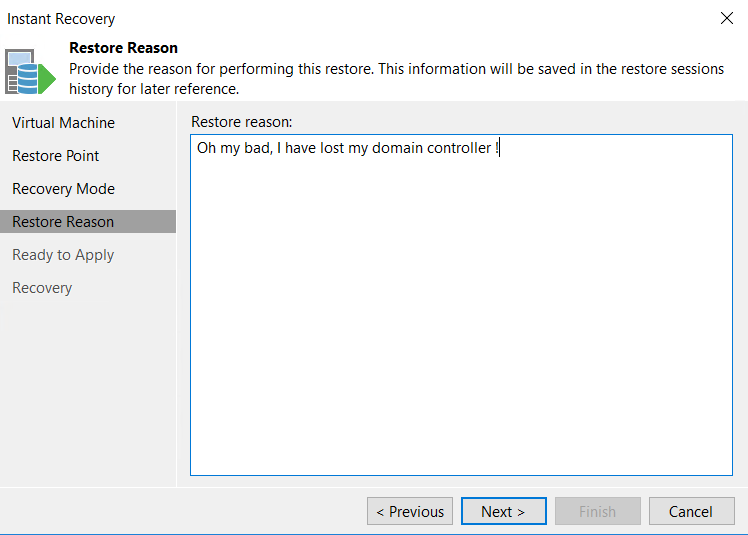
Then you can specify a reason for the recovery process:
Next, I choose to connect the VM to the network and power it on.
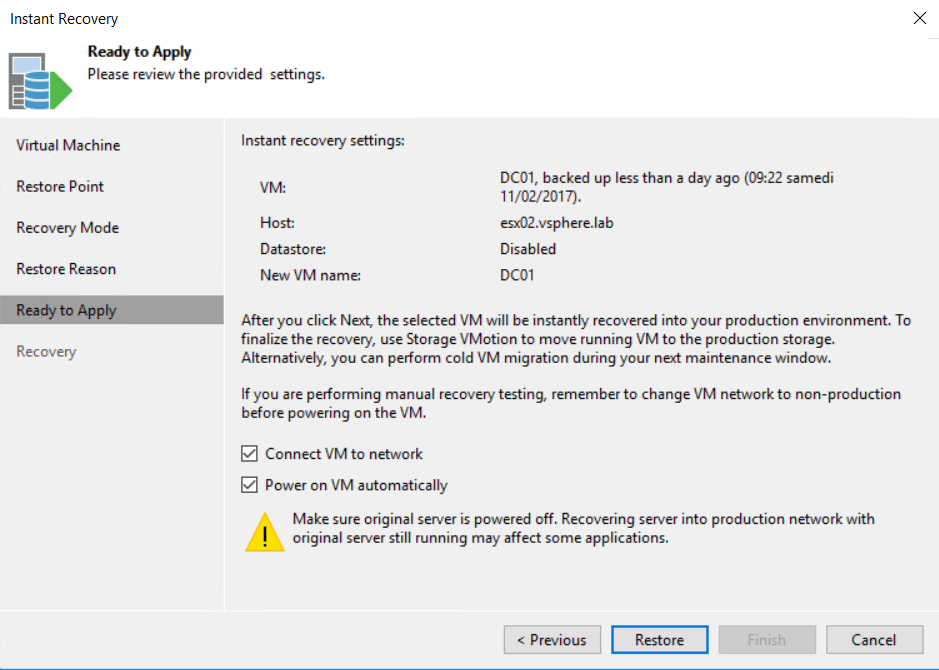
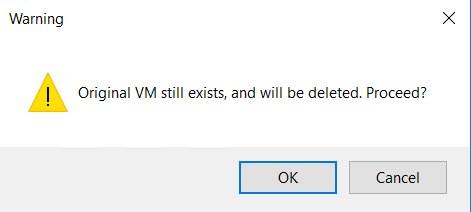
Warning message will pop-up and says VM still exists and it will delete the VM.
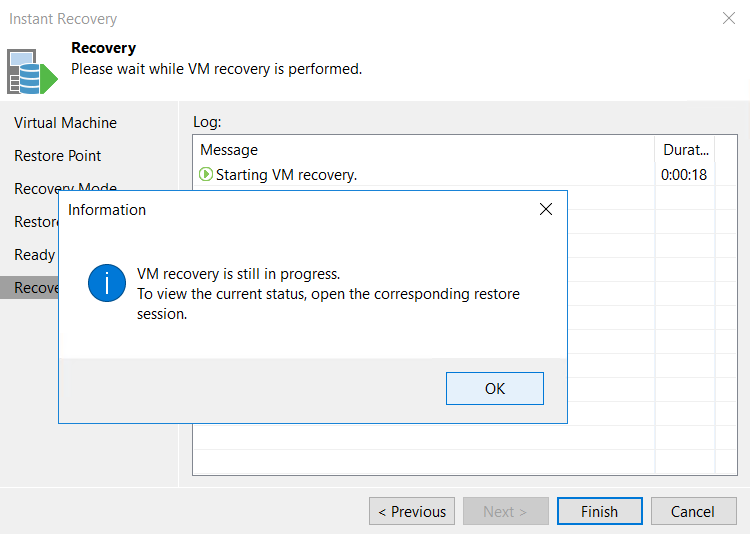
Once you have clicked on OK, the job is running. You can click on finish and review the recovery process statistics.
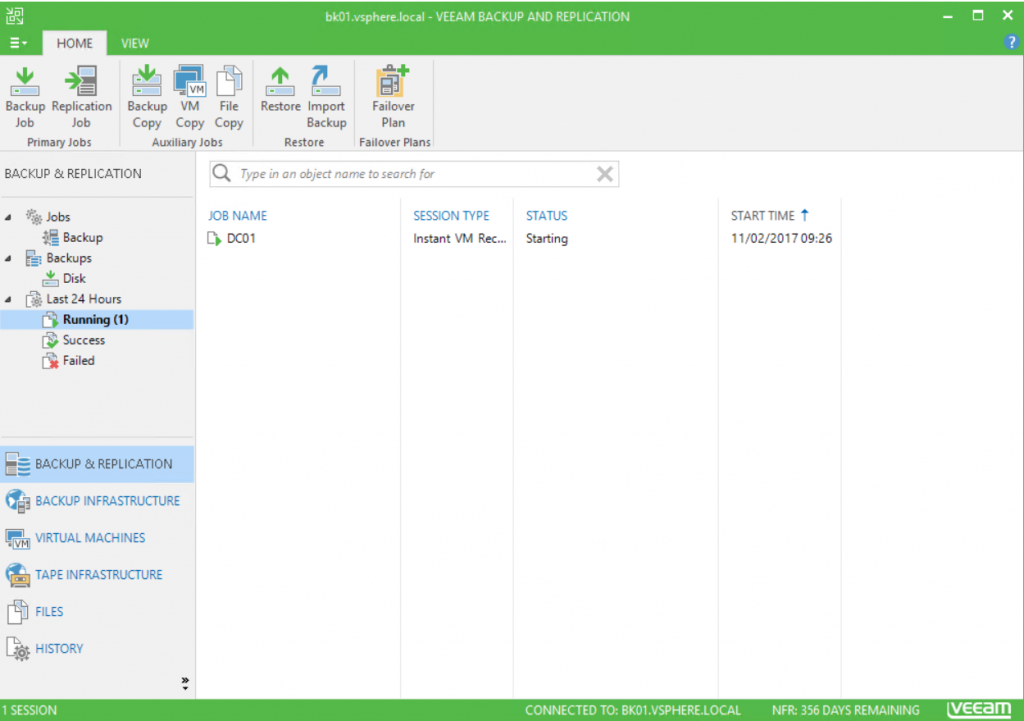
To check statistics, navigate to Backup & Replication, and click on Running.

In vCenter, if you check the VM datastore, you can see that files are located in Veeam datastore by using NFS 3.

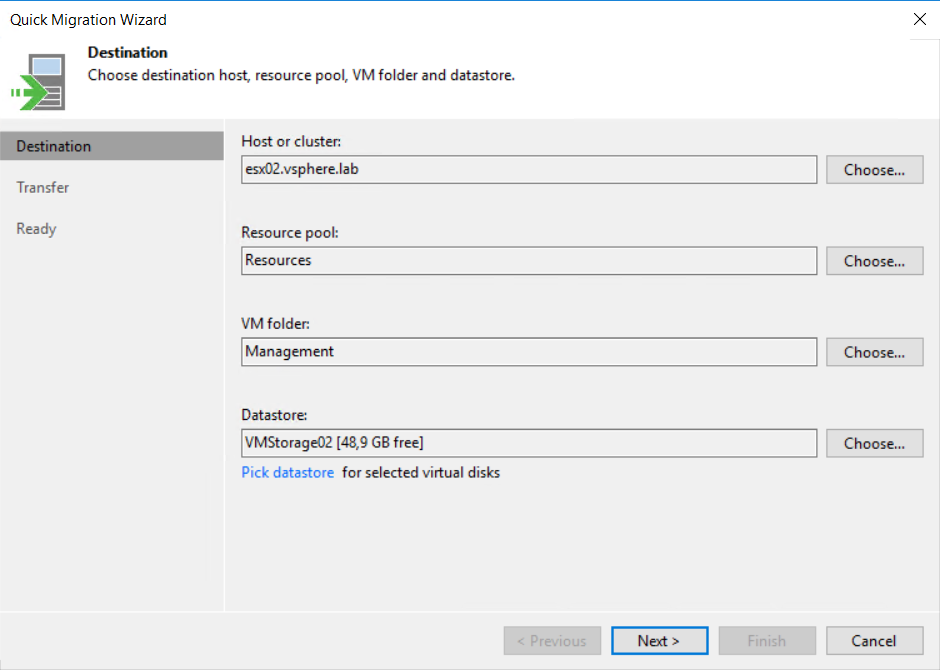
Next, choose the destination of the VM resources. I choose to leave default parameters and click on next.
Next, choose the destination of the VM resources. I choose to leave default parameters and click on next.
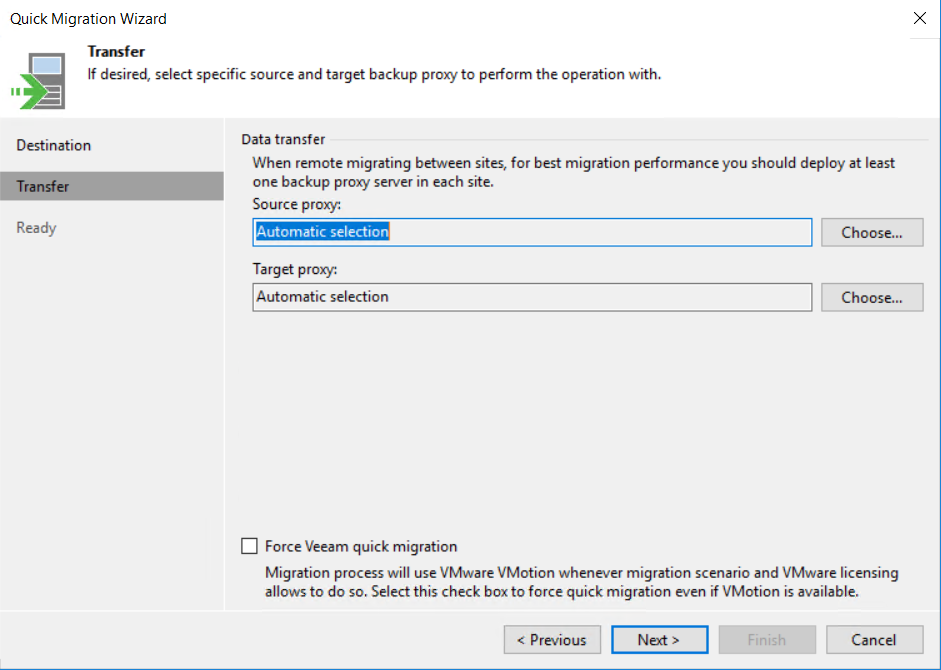
You can specify a source or target backup proxy to offload the backup workloads.
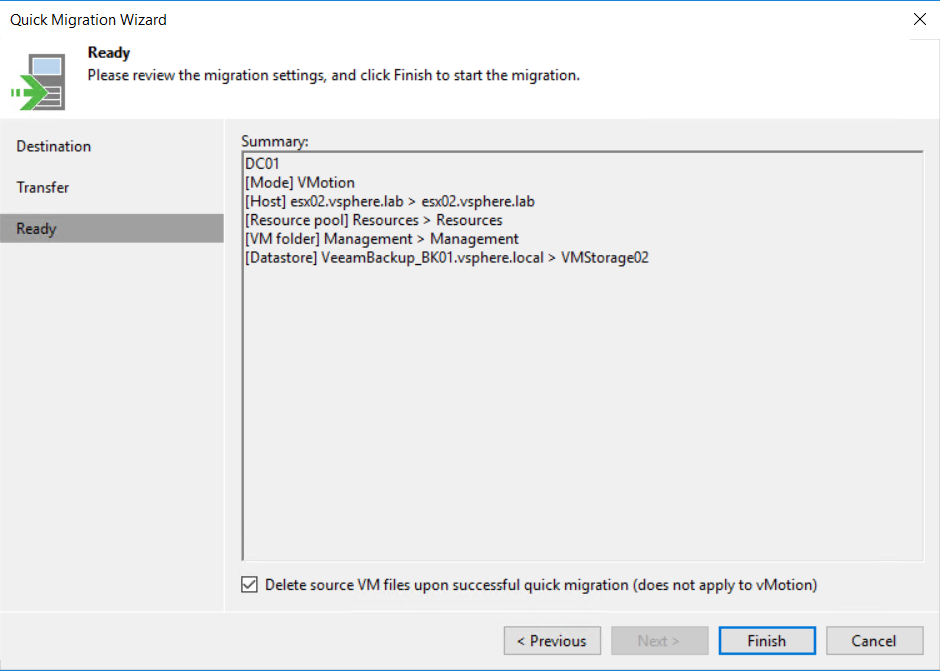
To finish, review the settings of the migration. If all is good, you can click on finish.
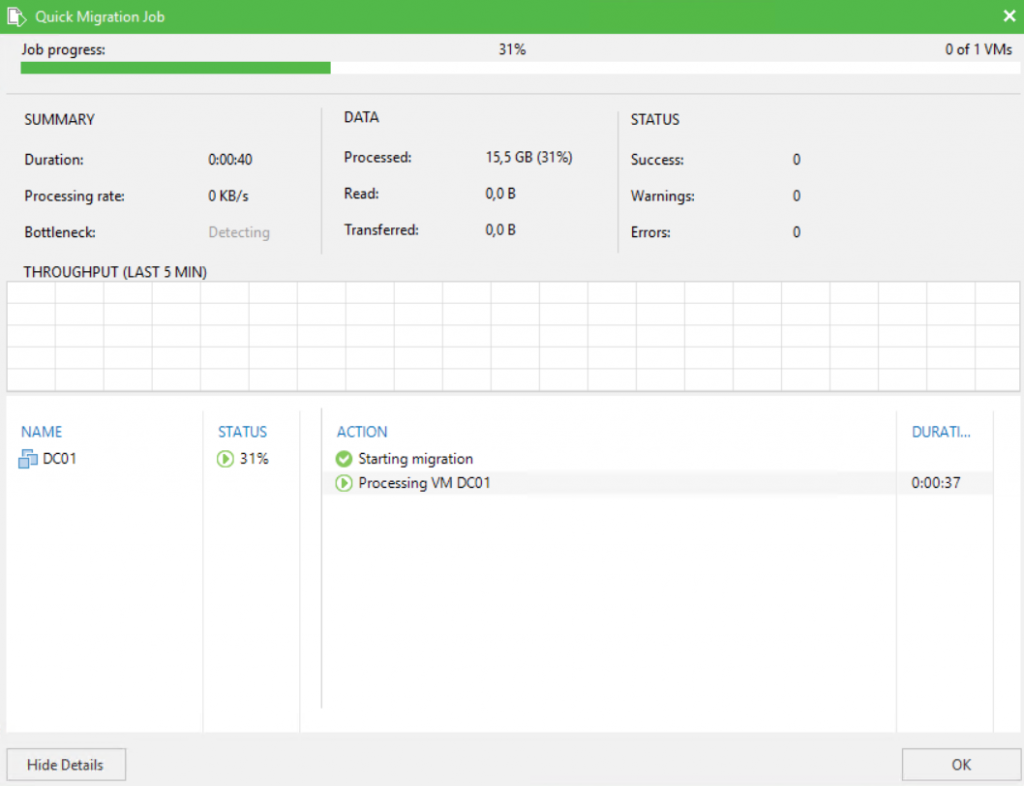
Next, a statistic window should be open to giving you the state of the migration.
If you go back to vCenter, you can see that a Storage vMotion is running to move VM data from Veeam datastore to production Datastore.
